> ## Documentation Index
> Fetch the complete documentation index at: https://help.ip2up.com/llms.txt
> Use this file to discover all available pages before exploring further.
# MuLogin Integration Guide
All proxy products on the platform must be used in an overseas network environment. Users are required to configure the overseas network environment on their own.
This tutorial explains how to configure **[Ip2up](https://www.Ip2up.com/zh-cn/)** proxy IPs in the **MuLogin fingerprint browser** to create a secure and isolated multi-account management environment.
The usage method for dynamic residential IPs is the same as for static residential IPs
### Step 1: Download and Install the MuLogin Client
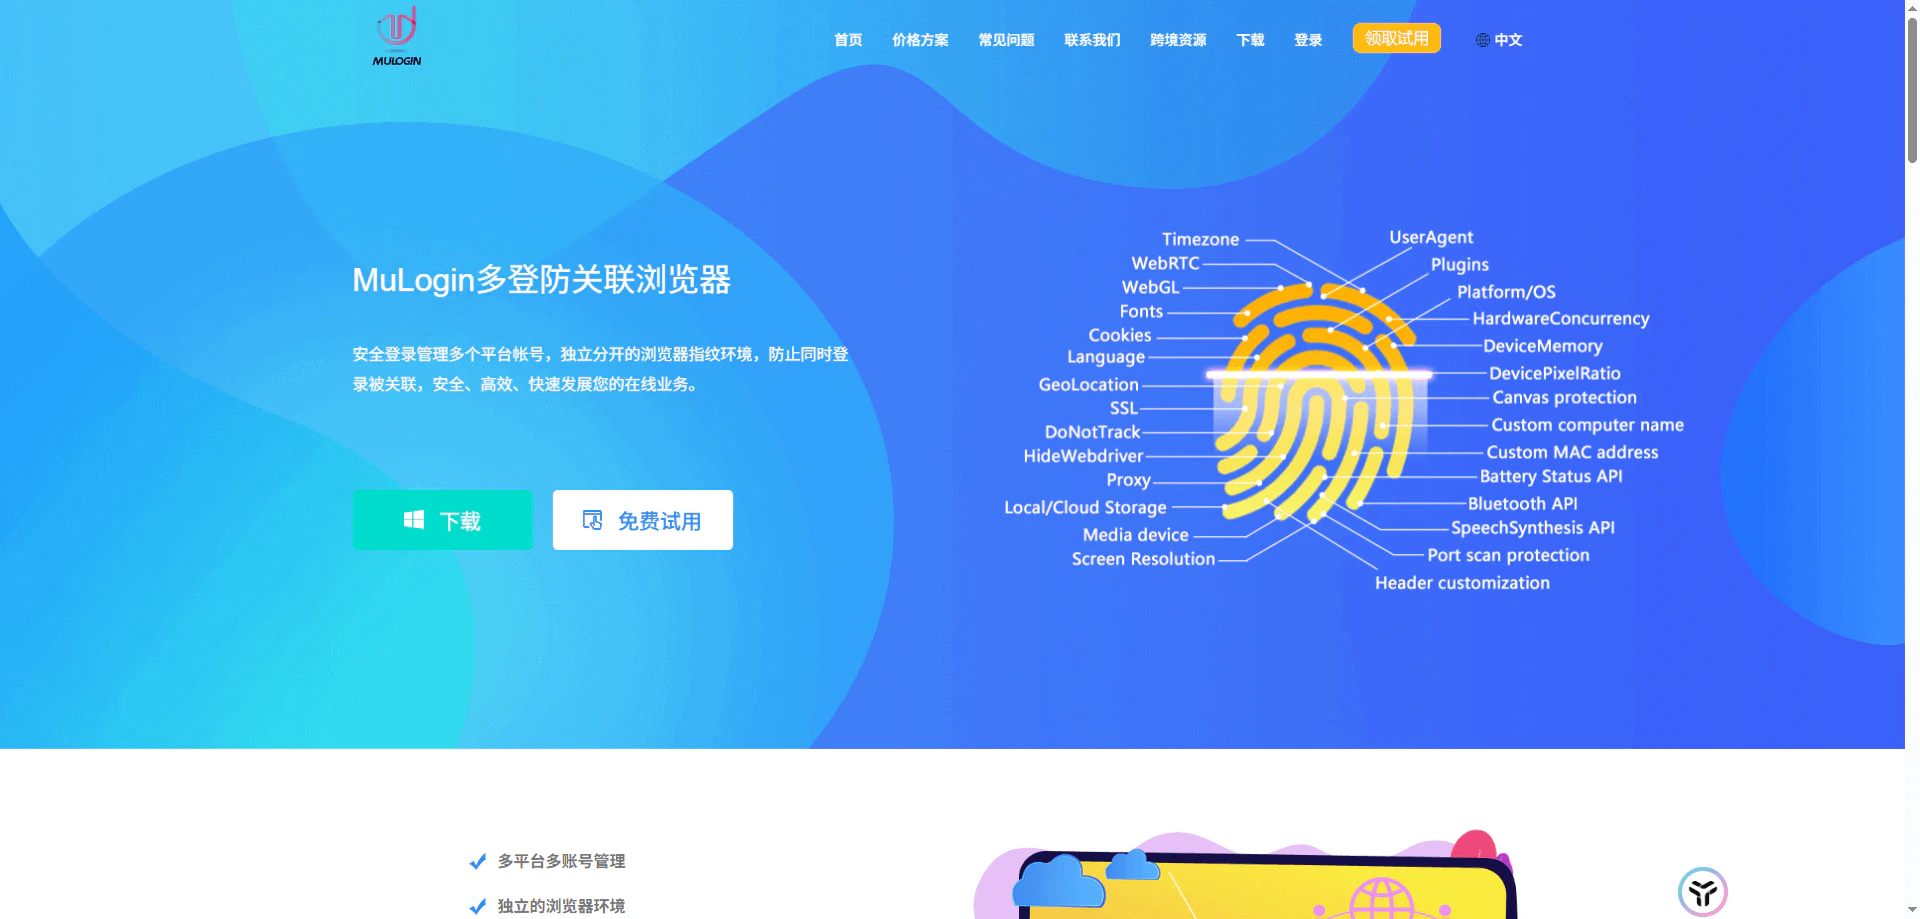
Visit the **MuLogin official website**, register an account, download the client, complete the installation, and then launch the software.
 ### Step 2: Create a New Browser Environment
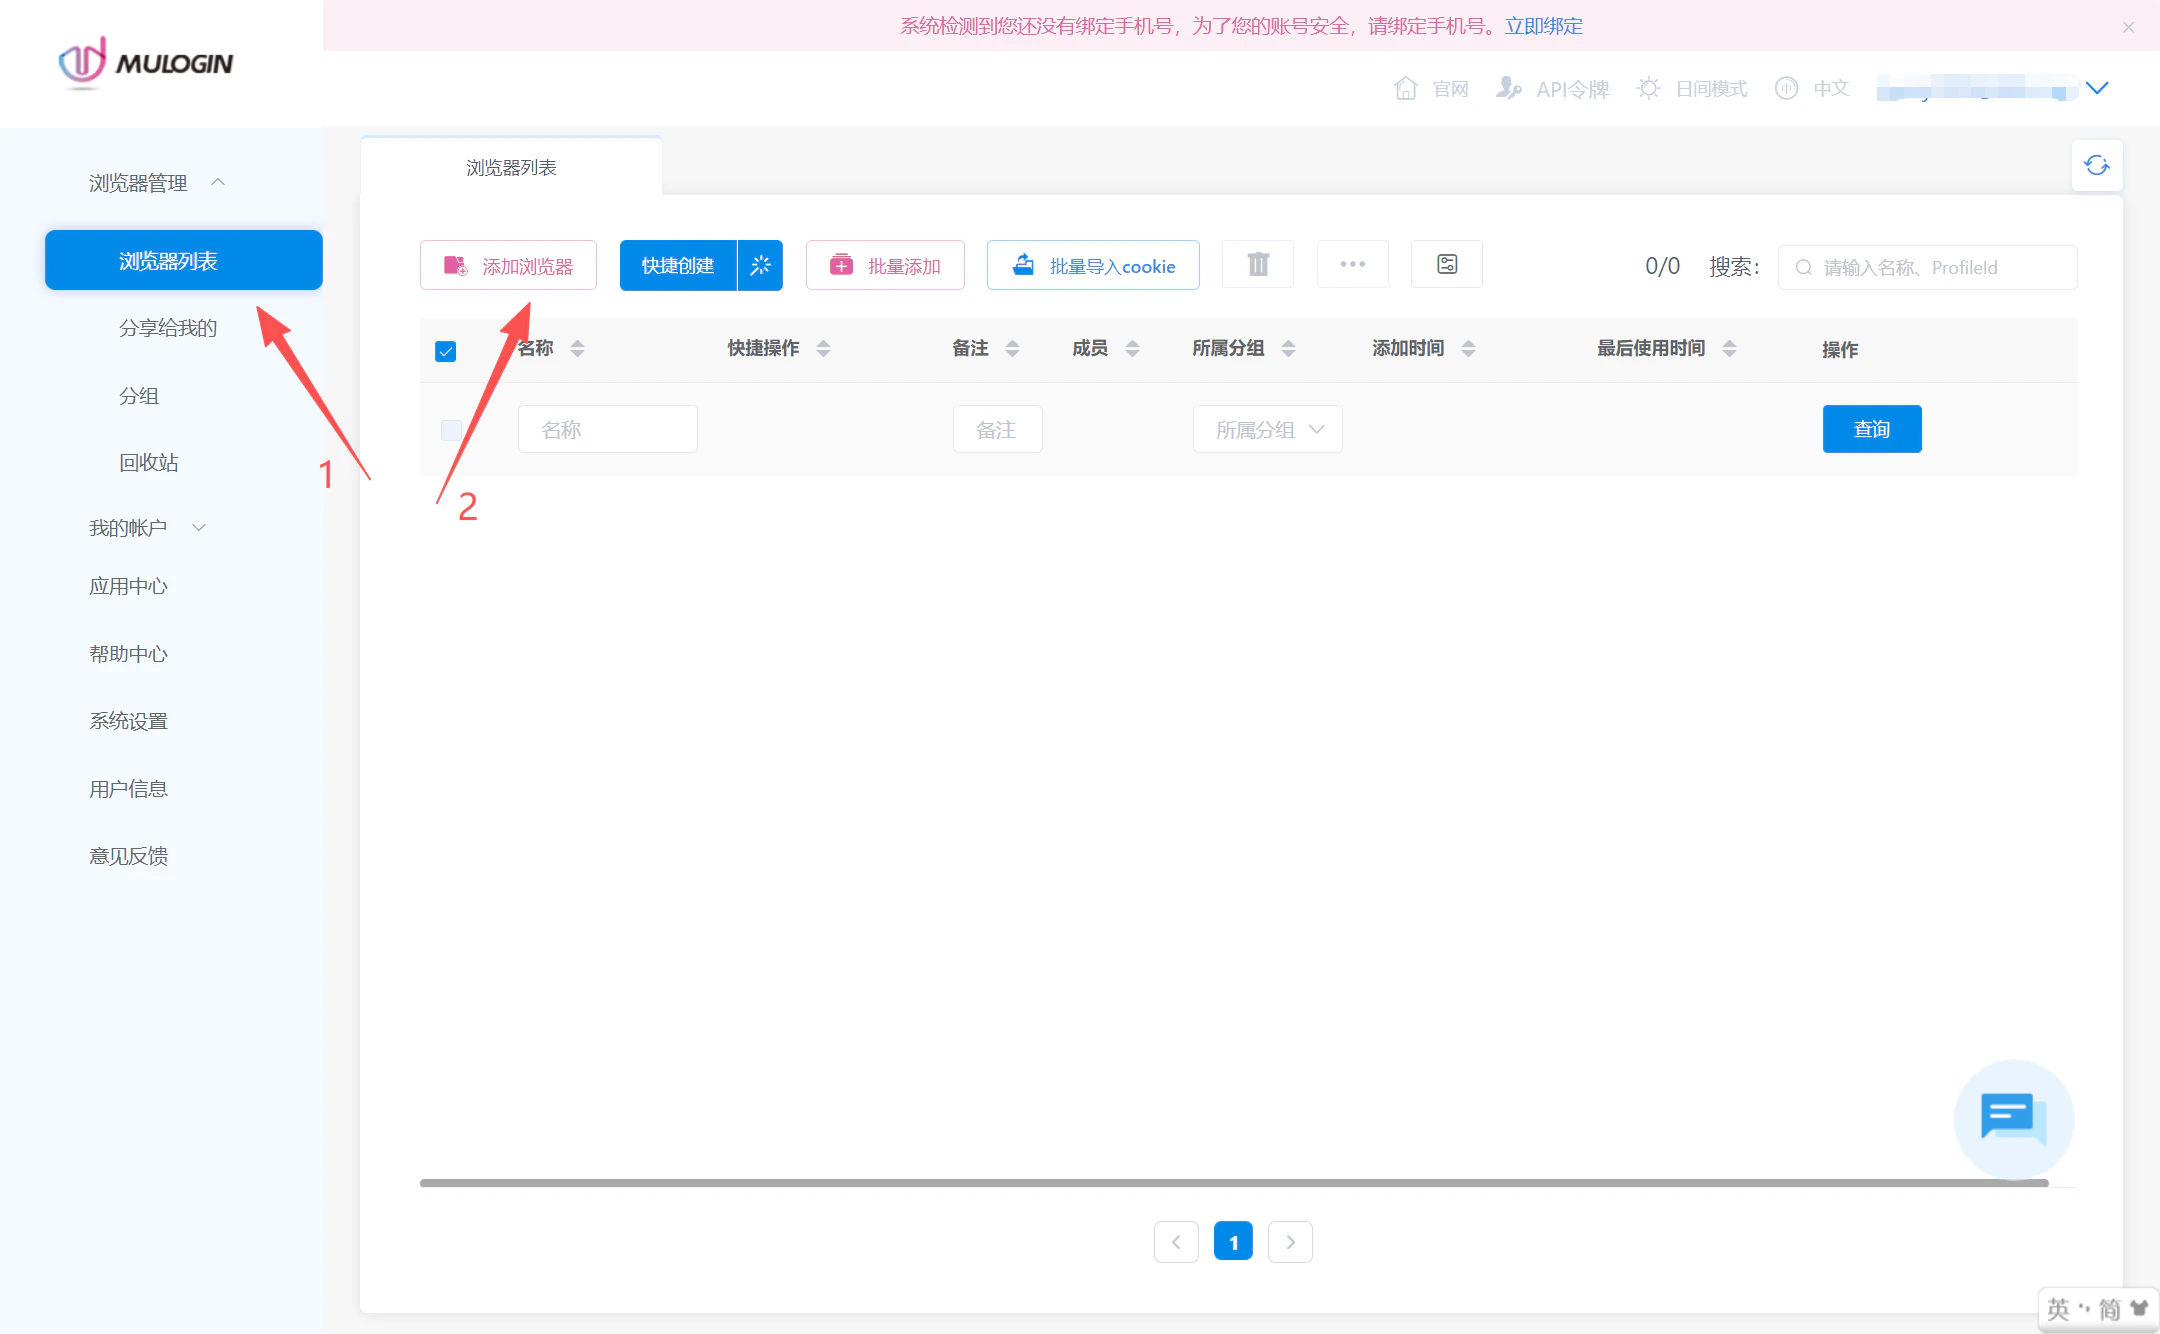
After opening the MuLogin client, click the **Add Browser** button in the browser list on the main interface to enter the environment configuration page.
### Step 2: Create a New Browser Environment
After opening the MuLogin client, click the **Add Browser** button in the browser list on the main interface to enter the environment configuration page.
 ### Step 3: Obtain Ip2up Proxy Information
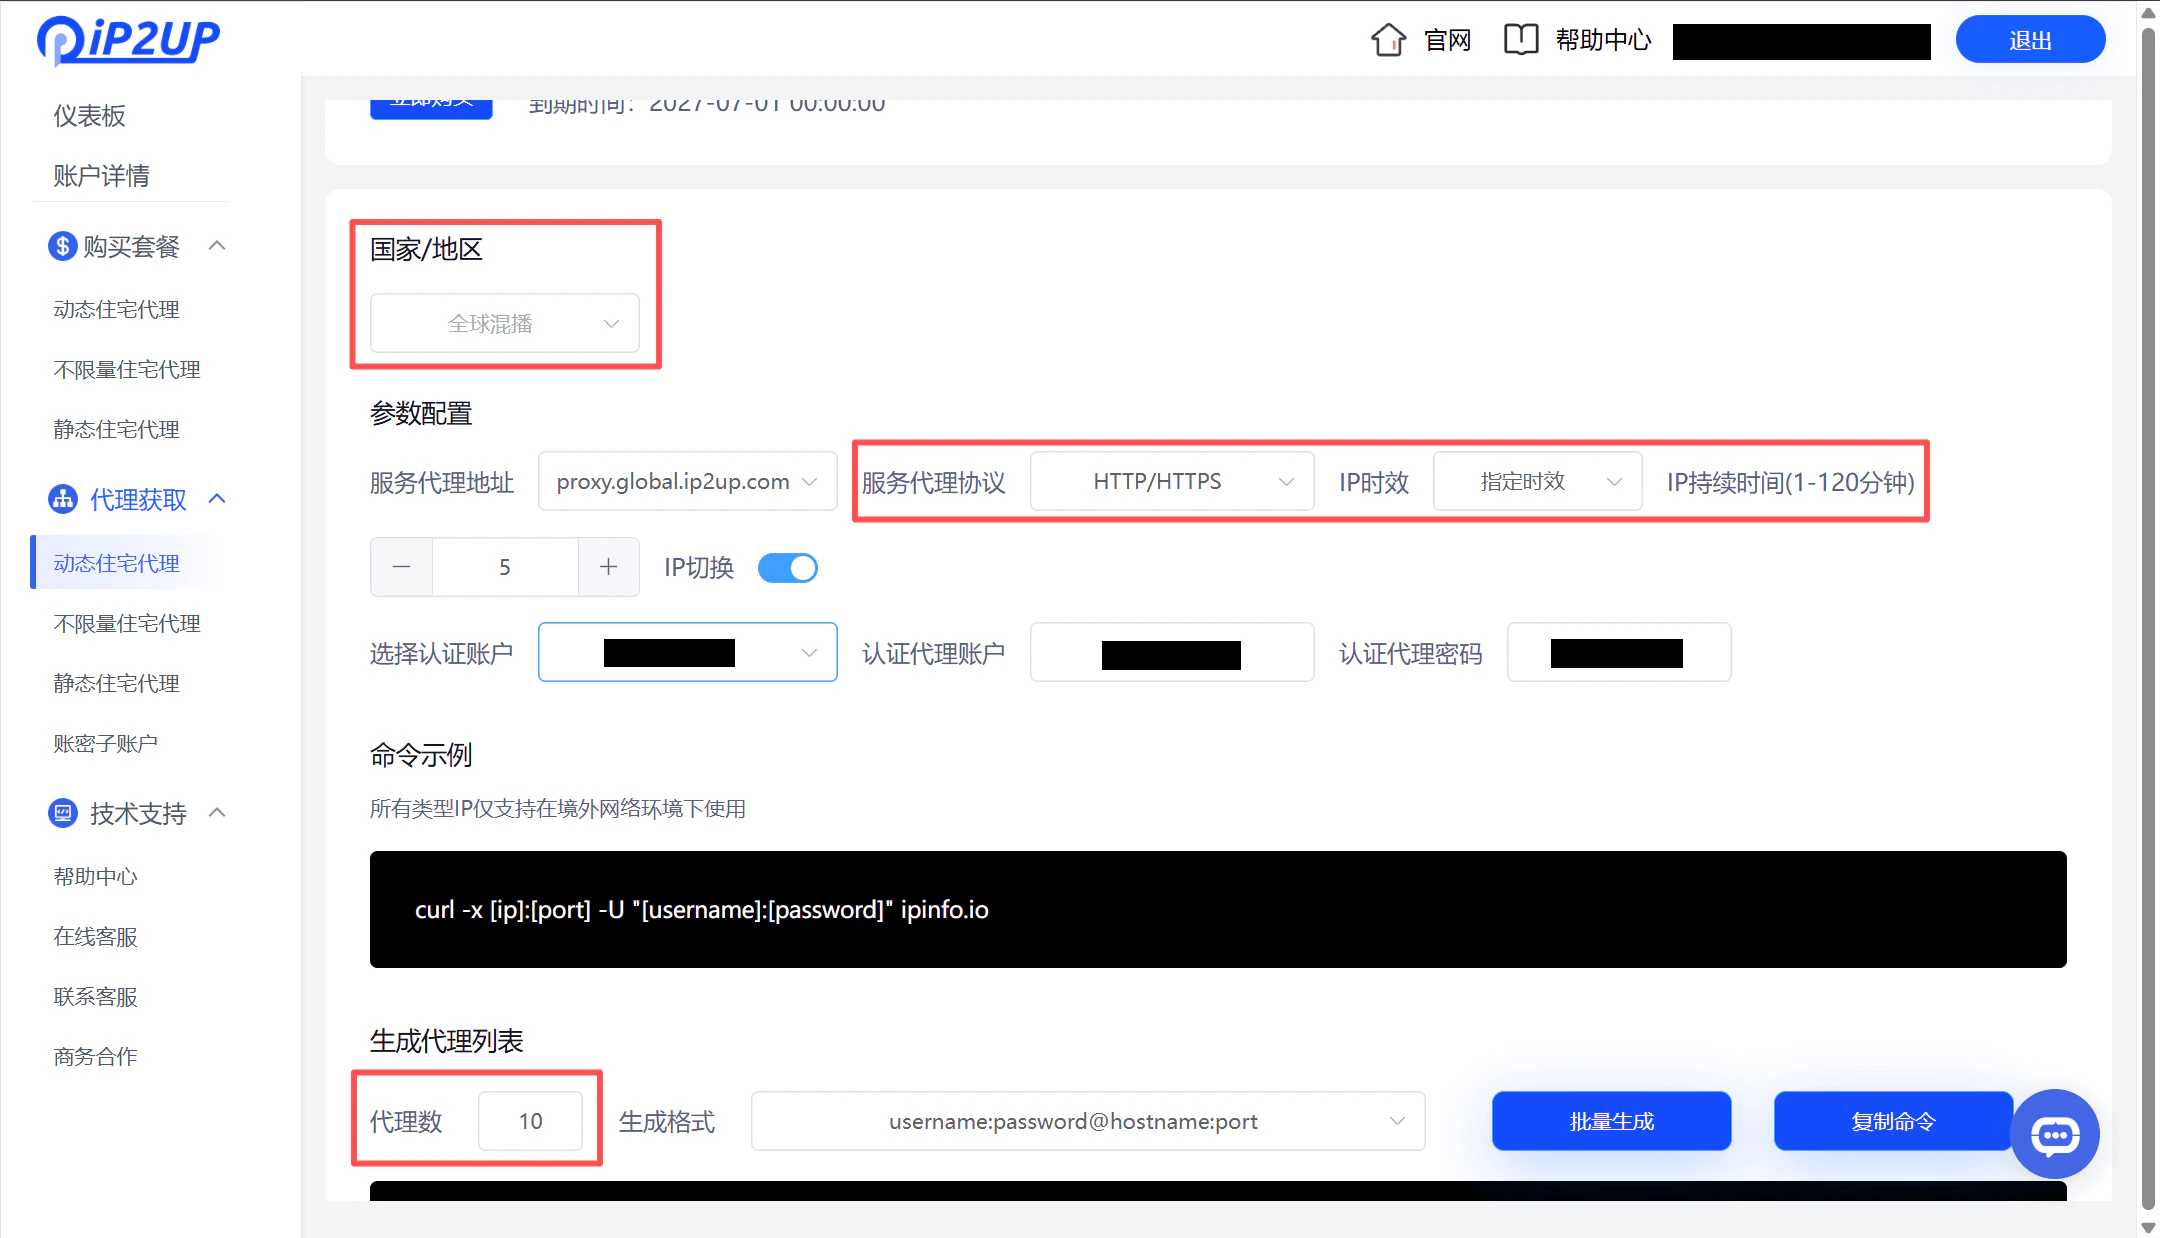
Log in to the [Ip2up Proxy Platform](https://www.Ip2up.com/zh-cn/), navigate to the **Dynamic Residential Proxy** page, and view and copy your proxy information:
* Server address
* Port
* Username
* Password
### Step 3: Obtain Ip2up Proxy Information
Log in to the [Ip2up Proxy Platform](https://www.Ip2up.com/zh-cn/), navigate to the **Dynamic Residential Proxy** page, and view and copy your proxy information:
* Server address
* Port
* Username
* Password
 ### Step 4: Configure Proxy Settings
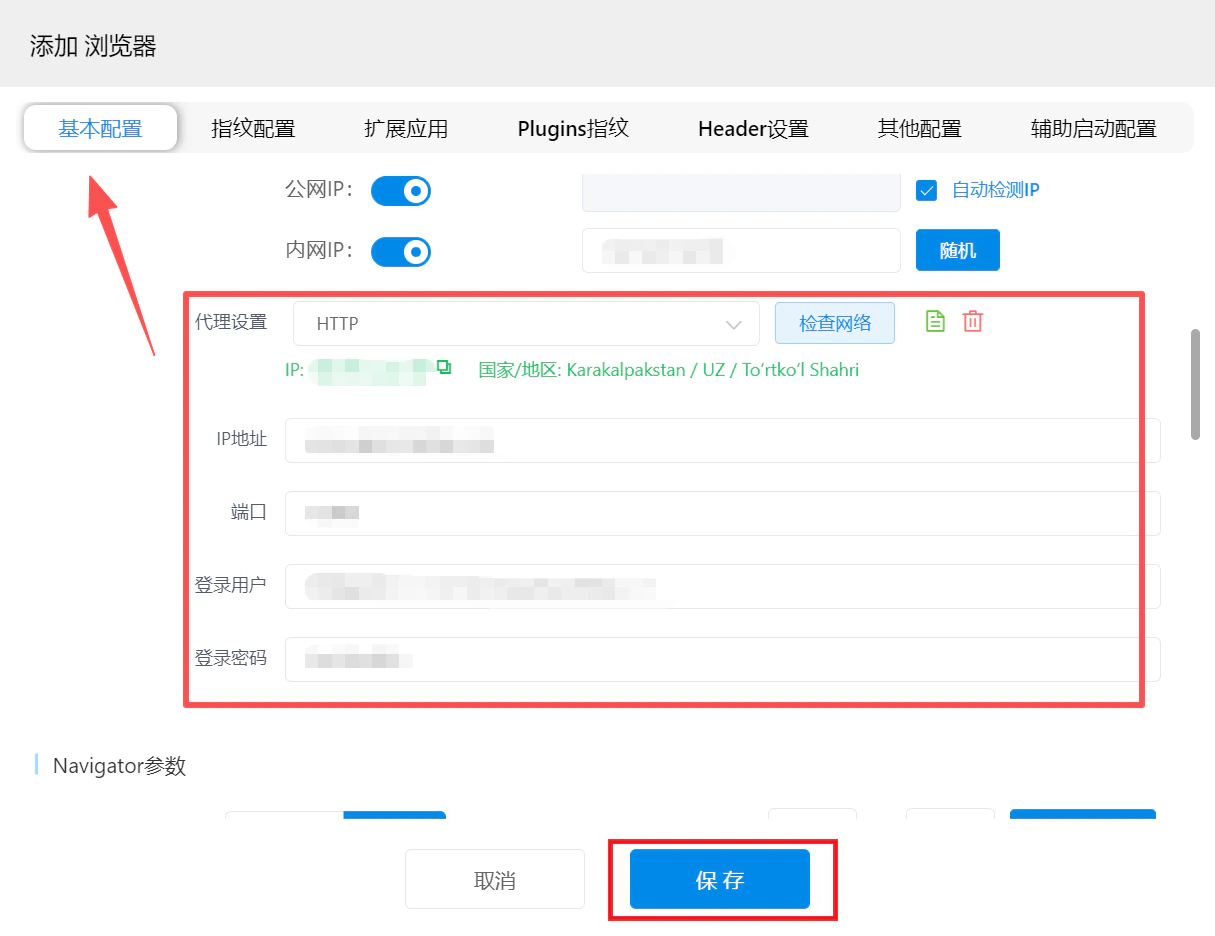
1. On the MuLogin environment configuration page, locate **Basic Configuration**
2. Select the proxy protocol: **HTTP** or **SOCKS5**
3. Enter the proxy information obtained from Ip2up
4. Click the **“Check Network”** button to test proxy connectivity
5. After confirming everything is correct, click **“Save”** to save the configuration
**Note:** Ip2up currently supports **HTTP** and **SOCKS5** proxy protocols. Please choose according to your actual needs.
### Step 4: Configure Proxy Settings
1. On the MuLogin environment configuration page, locate **Basic Configuration**
2. Select the proxy protocol: **HTTP** or **SOCKS5**
3. Enter the proxy information obtained from Ip2up
4. Click the **“Check Network”** button to test proxy connectivity
5. After confirming everything is correct, click **“Save”** to save the configuration
**Note:** Ip2up currently supports **HTTP** and **SOCKS5** proxy protocols. Please choose according to your actual needs.
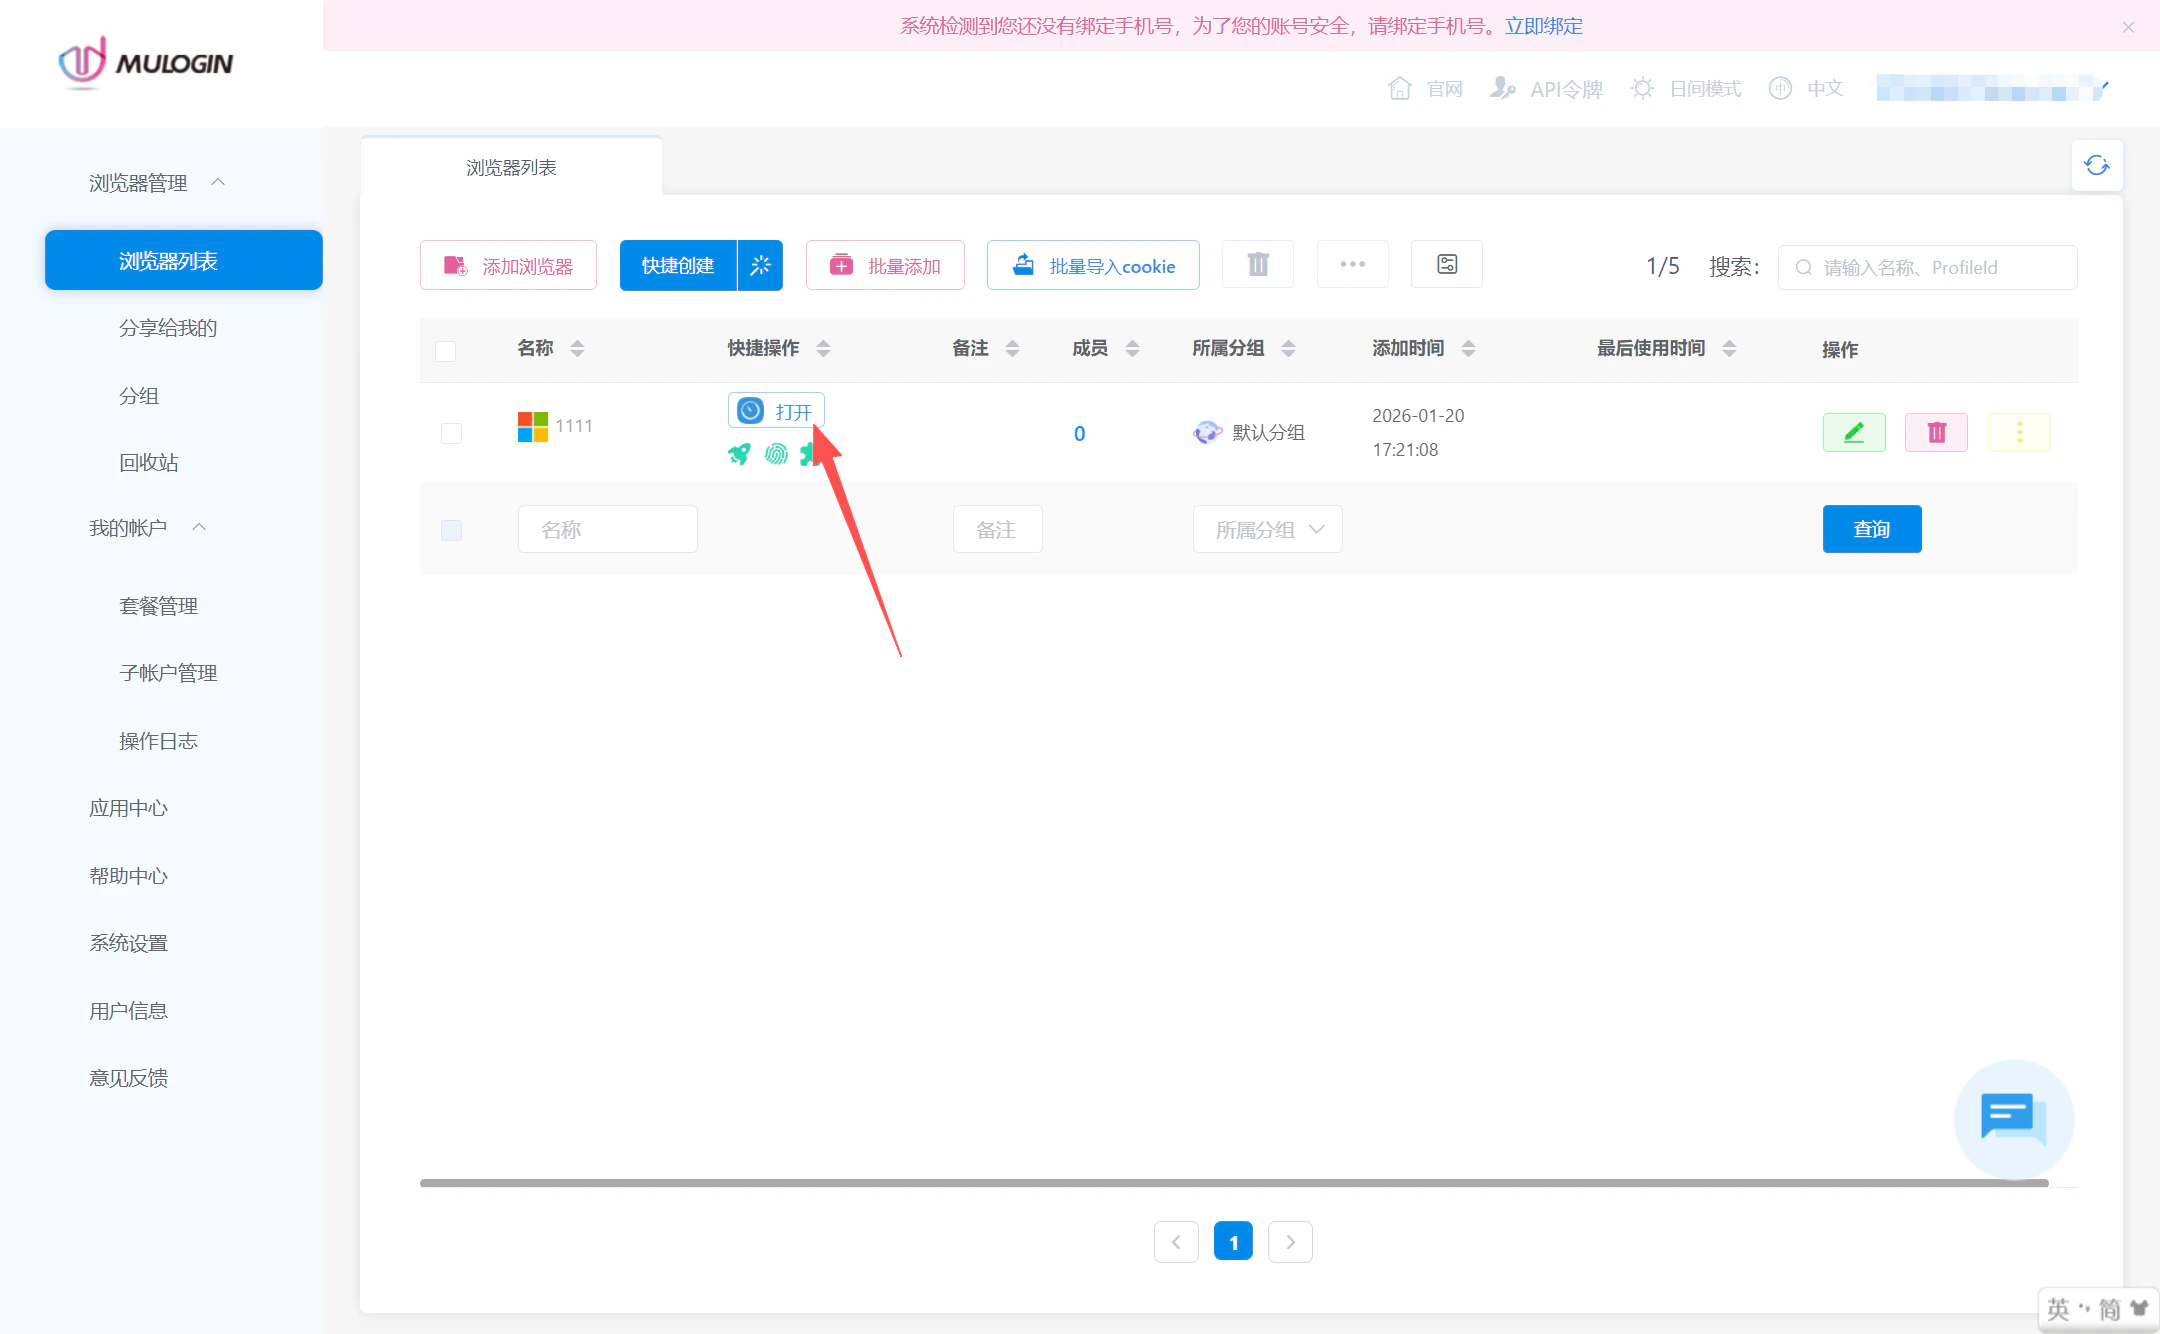
 ### Step 5: Launch the Browser Environment
After saving the configuration, return to the browser list page, locate the environment you just created, and click the **“Open”** button to launch the browser.
### Step 5: Launch the Browser Environment
After saving the configuration, return to the browser list page, locate the environment you just created, and click the **“Open”** button to launch the browser.
 ### Step 6: Verify the Proxy IP
In the opened browser, visit an IP checking website to confirm that the displayed IP address matches the proxy IP provided by Ip2up.
### Step 6: Verify the Proxy IP
In the opened browser, visit an IP checking website to confirm that the displayed IP address matches the proxy IP provided by Ip2up.
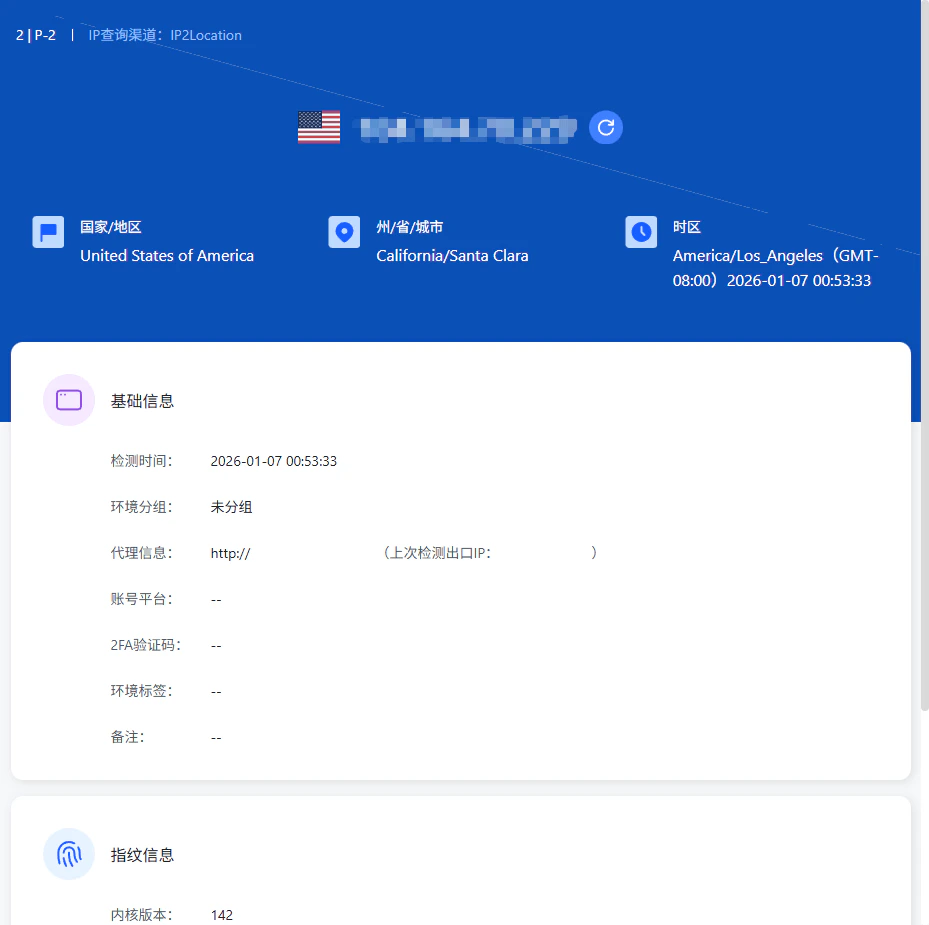 ✅ **At this point, Ip2up dynamic proxy IP has been successfully configured in the MuLogin fingerprint browser, and you can begin secure and isolated multi-account operations.**