> ## Documentation Index
> Fetch the complete documentation index at: https://help.ip2up.com/llms.txt
> Use this file to discover all available pages before exploring further.
# Android
All proxy products on the platform must be used in an overseas network environment. Users are required to configure the overseas network environment on their own.
Before integrating a proxy into an Android device, please ensure that you have obtained valid proxy service information and have confirmed that the proxy service is operating normally.
## Operating Steps
### 1. Open Wi-Fi Settings
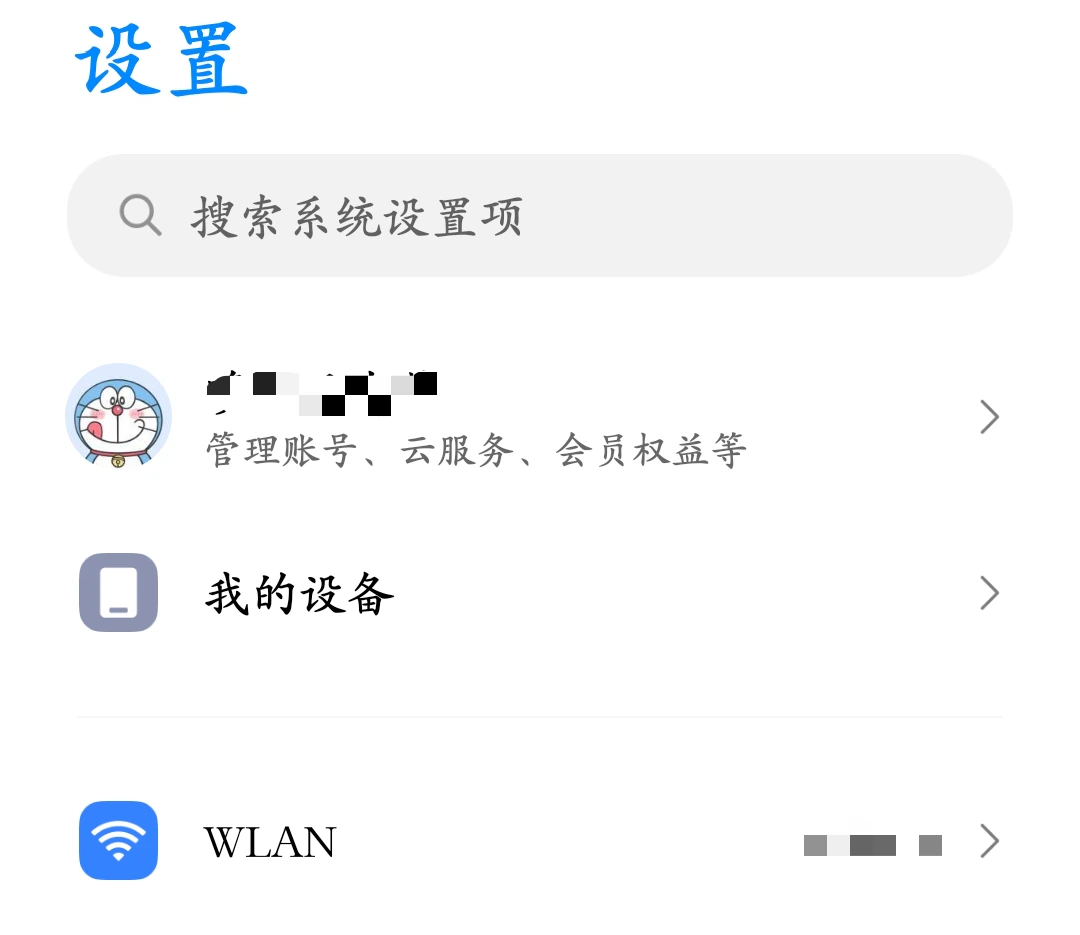
Open **Settings** on your phone → tap **WLAN** or **Wi-Fi** (the name may vary slightly by device brand).
 ### 2. Open Connected Network Configuration
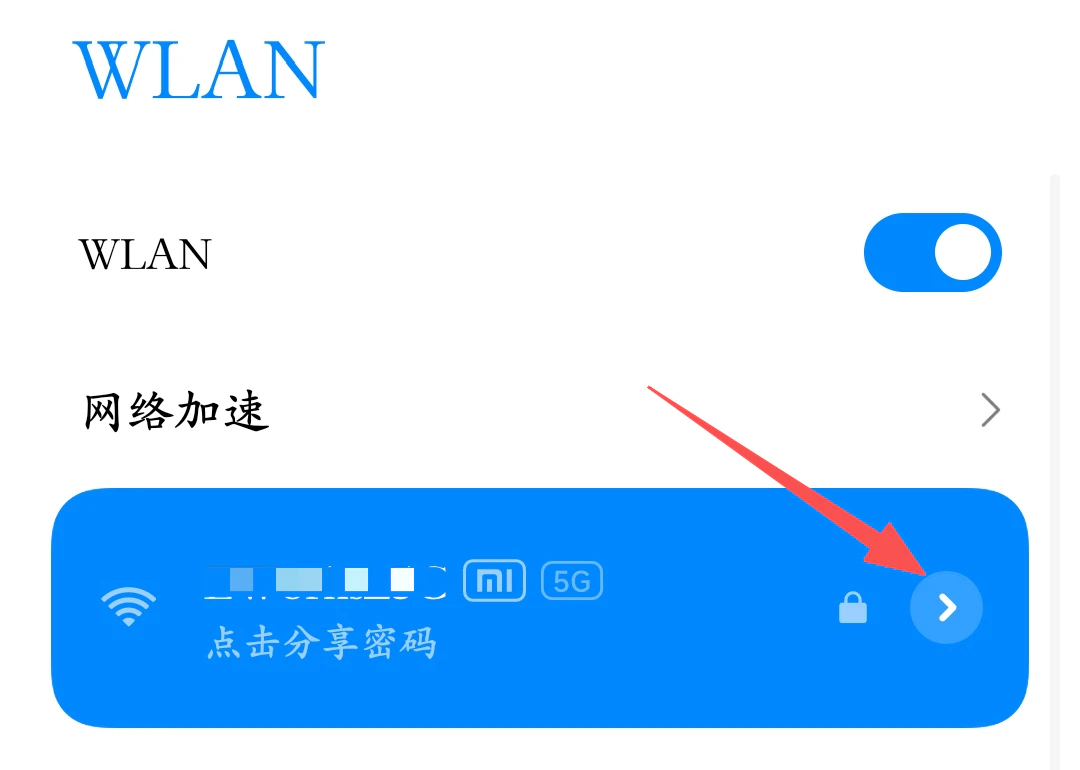
In the Wi-Fi list, find the currently connected network. Tap the **settings icon** on the right, or long-press the network and select **Modify network** or **Advanced options**.
### 2. Open Connected Network Configuration
In the Wi-Fi list, find the currently connected network. Tap the **settings icon** on the right, or long-press the network and select **Modify network** or **Advanced options**.
 ### 3. Configure the Proxy Server
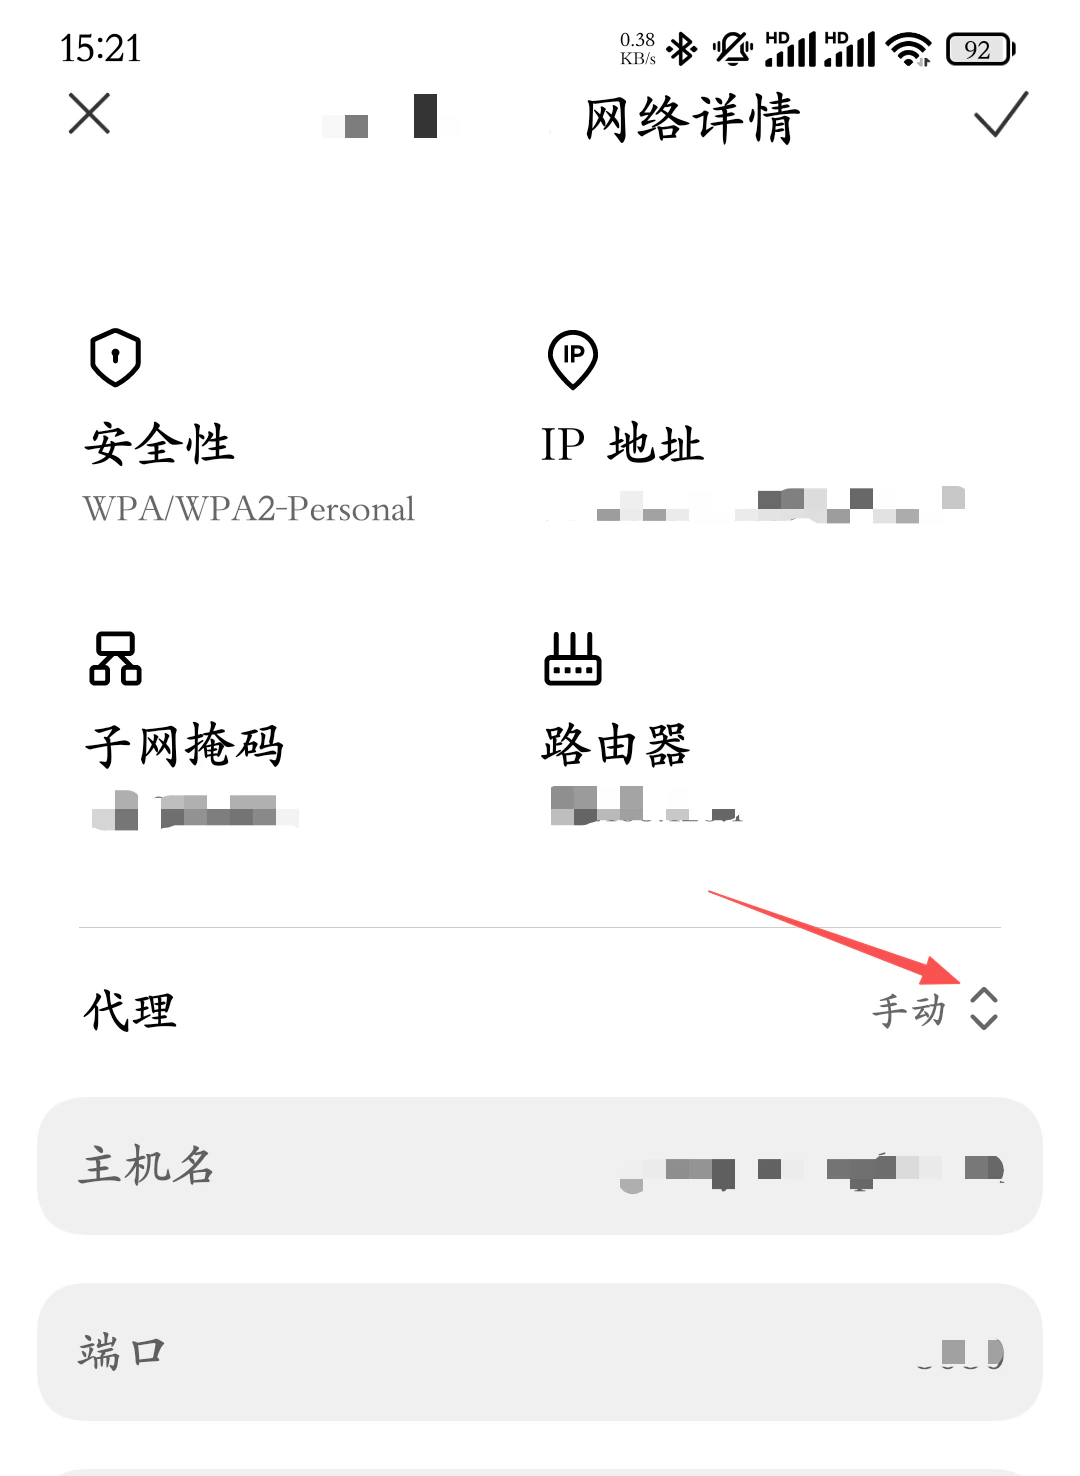
1. In the advanced settings, find the **Proxy** option and set it to **Manual**.
2. Enter the following information:
* **Hostname**: Proxy server IP address or domain name
* **Port**: Proxy service port number
3. Tap **Save** or **OK** in the top-right corner to complete the configuration.
### 3. Configure the Proxy Server
1. In the advanced settings, find the **Proxy** option and set it to **Manual**.
2. Enter the following information:
* **Hostname**: Proxy server IP address or domain name
* **Port**: Proxy service port number
3. Tap **Save** or **OK** in the top-right corner to complete the configuration.
 > **Tip**: On some Android systems, you may need to expand **Advanced options** before the proxy settings are visible.
### 4. Enter Authentication Information (If Required)
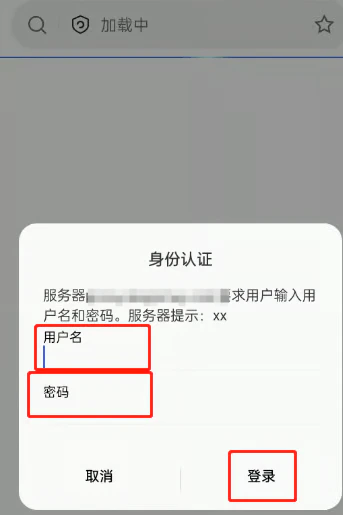
If the proxy service requires username and password authentication, the system will usually prompt for credentials when you first access the network. You may also open any webpage in a browser and enter the username and password when prompted.
> **Tip**: On some Android systems, you may need to expand **Advanced options** before the proxy settings are visible.
### 4. Enter Authentication Information (If Required)
If the proxy service requires username and password authentication, the system will usually prompt for credentials when you first access the network. You may also open any webpage in a browser and enter the username and password when prompted.
 ### 5. Verify the Proxy Connection
Open any browser (such as Chrome) and visit an IP detection website to check whether the displayed IP address matches the proxy IP you configured. If they match, the proxy setup is successful.
## Notes
* This configuration applies at the Wi-Fi level and only takes effect for the current Wi-Fi network.
* You must reconfigure the proxy after switching to a different Wi-Fi network.
* Ensure that the proxy server supports your intended use case and that all information is entered correctly.
✅ **At this point, the Wi-Fi proxy configuration on the Android device is complete, and you can access the network through the proxy server.**
### 5. Verify the Proxy Connection
Open any browser (such as Chrome) and visit an IP detection website to check whether the displayed IP address matches the proxy IP you configured. If they match, the proxy setup is successful.
## Notes
* This configuration applies at the Wi-Fi level and only takes effect for the current Wi-Fi network.
* You must reconfigure the proxy after switching to a different Wi-Fi network.
* Ensure that the proxy server supports your intended use case and that all information is entered correctly.
✅ **At this point, the Wi-Fi proxy configuration on the Android device is complete, and you can access the network through the proxy server.**