> ## Documentation Index
> Fetch the complete documentation index at: https://help.ip2up.com/llms.txt
> Use this file to discover all available pages before exploring further.
# Shadowrocket
All proxy products on the platform must be used in an overseas network environment. Users are required to configure the overseas network environment on their own.
This article provides a detailed guide on how to use the **Shadowrocket** client to configure and deploy **Static Residential IPs**, enabling a more stable and secure network access environment.
The usage method for Dynamic Residential IPs is the same as that for Static Residential IPs.
### Step 1. Add a Proxy Configuration
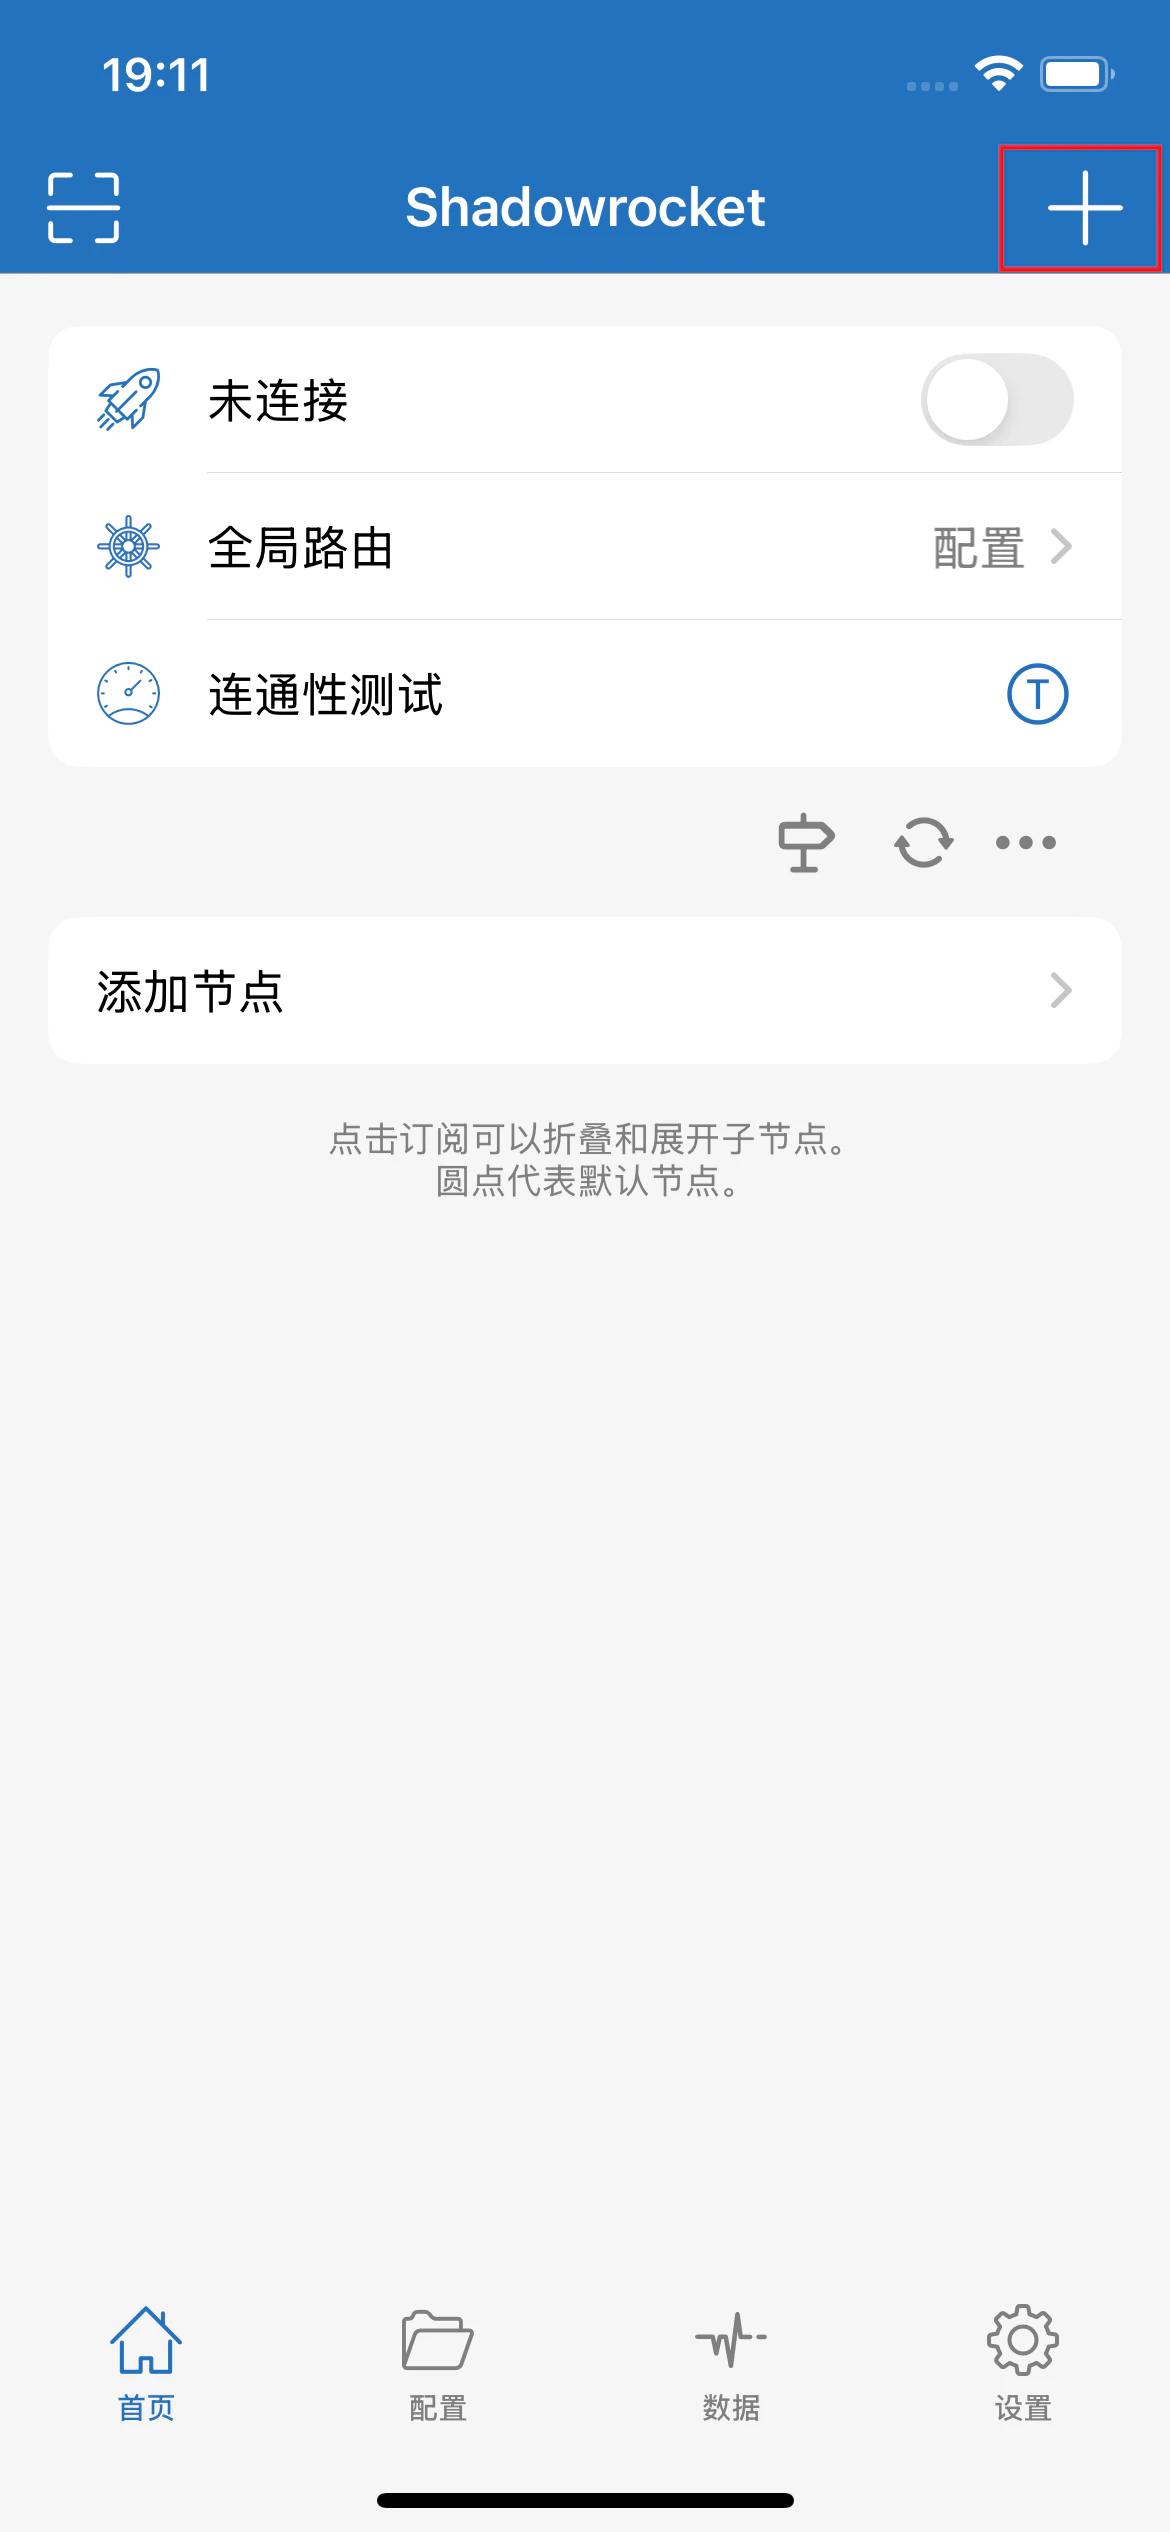
Open the Shadowrocket app and tap the **+** button in the upper-right corner to add a new configuration.
 ### Step 2. Configure Proxy Information
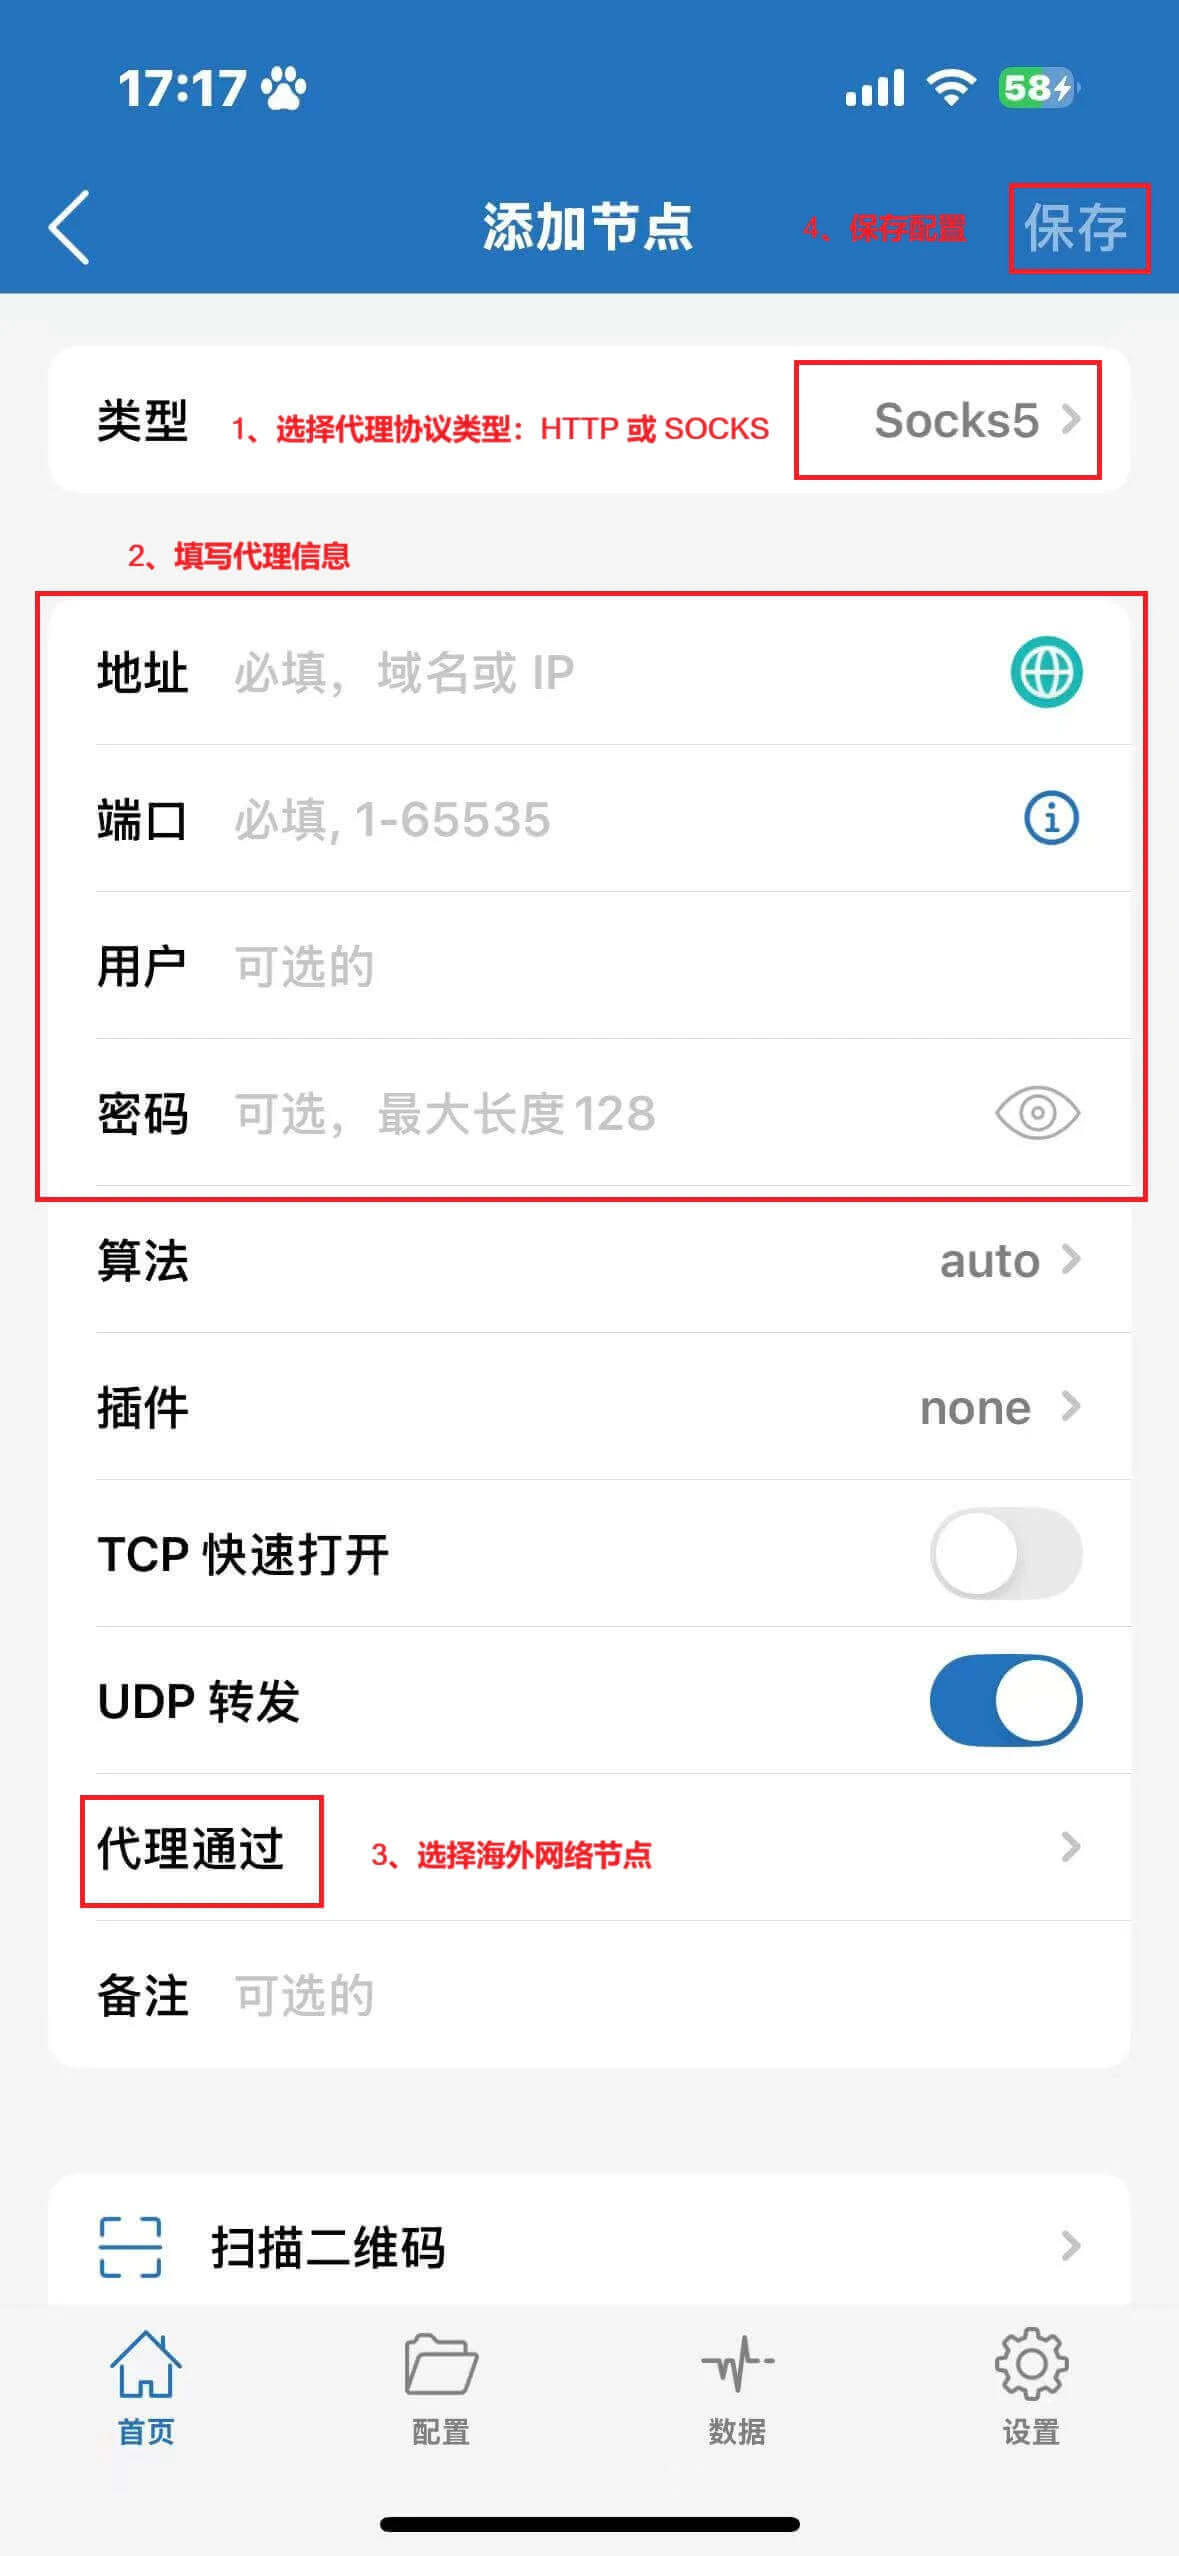
1. Select the proxy protocol type: **HTTP** or **SOCKS**
2. Enter the proxy information obtained from [Ip2up](https://www.ip2up.com/):
* **Address (Server)**: Proxy server address
* **Port**: Proxy service port number
* **Username**: Proxy account
* **Password**: Proxy password
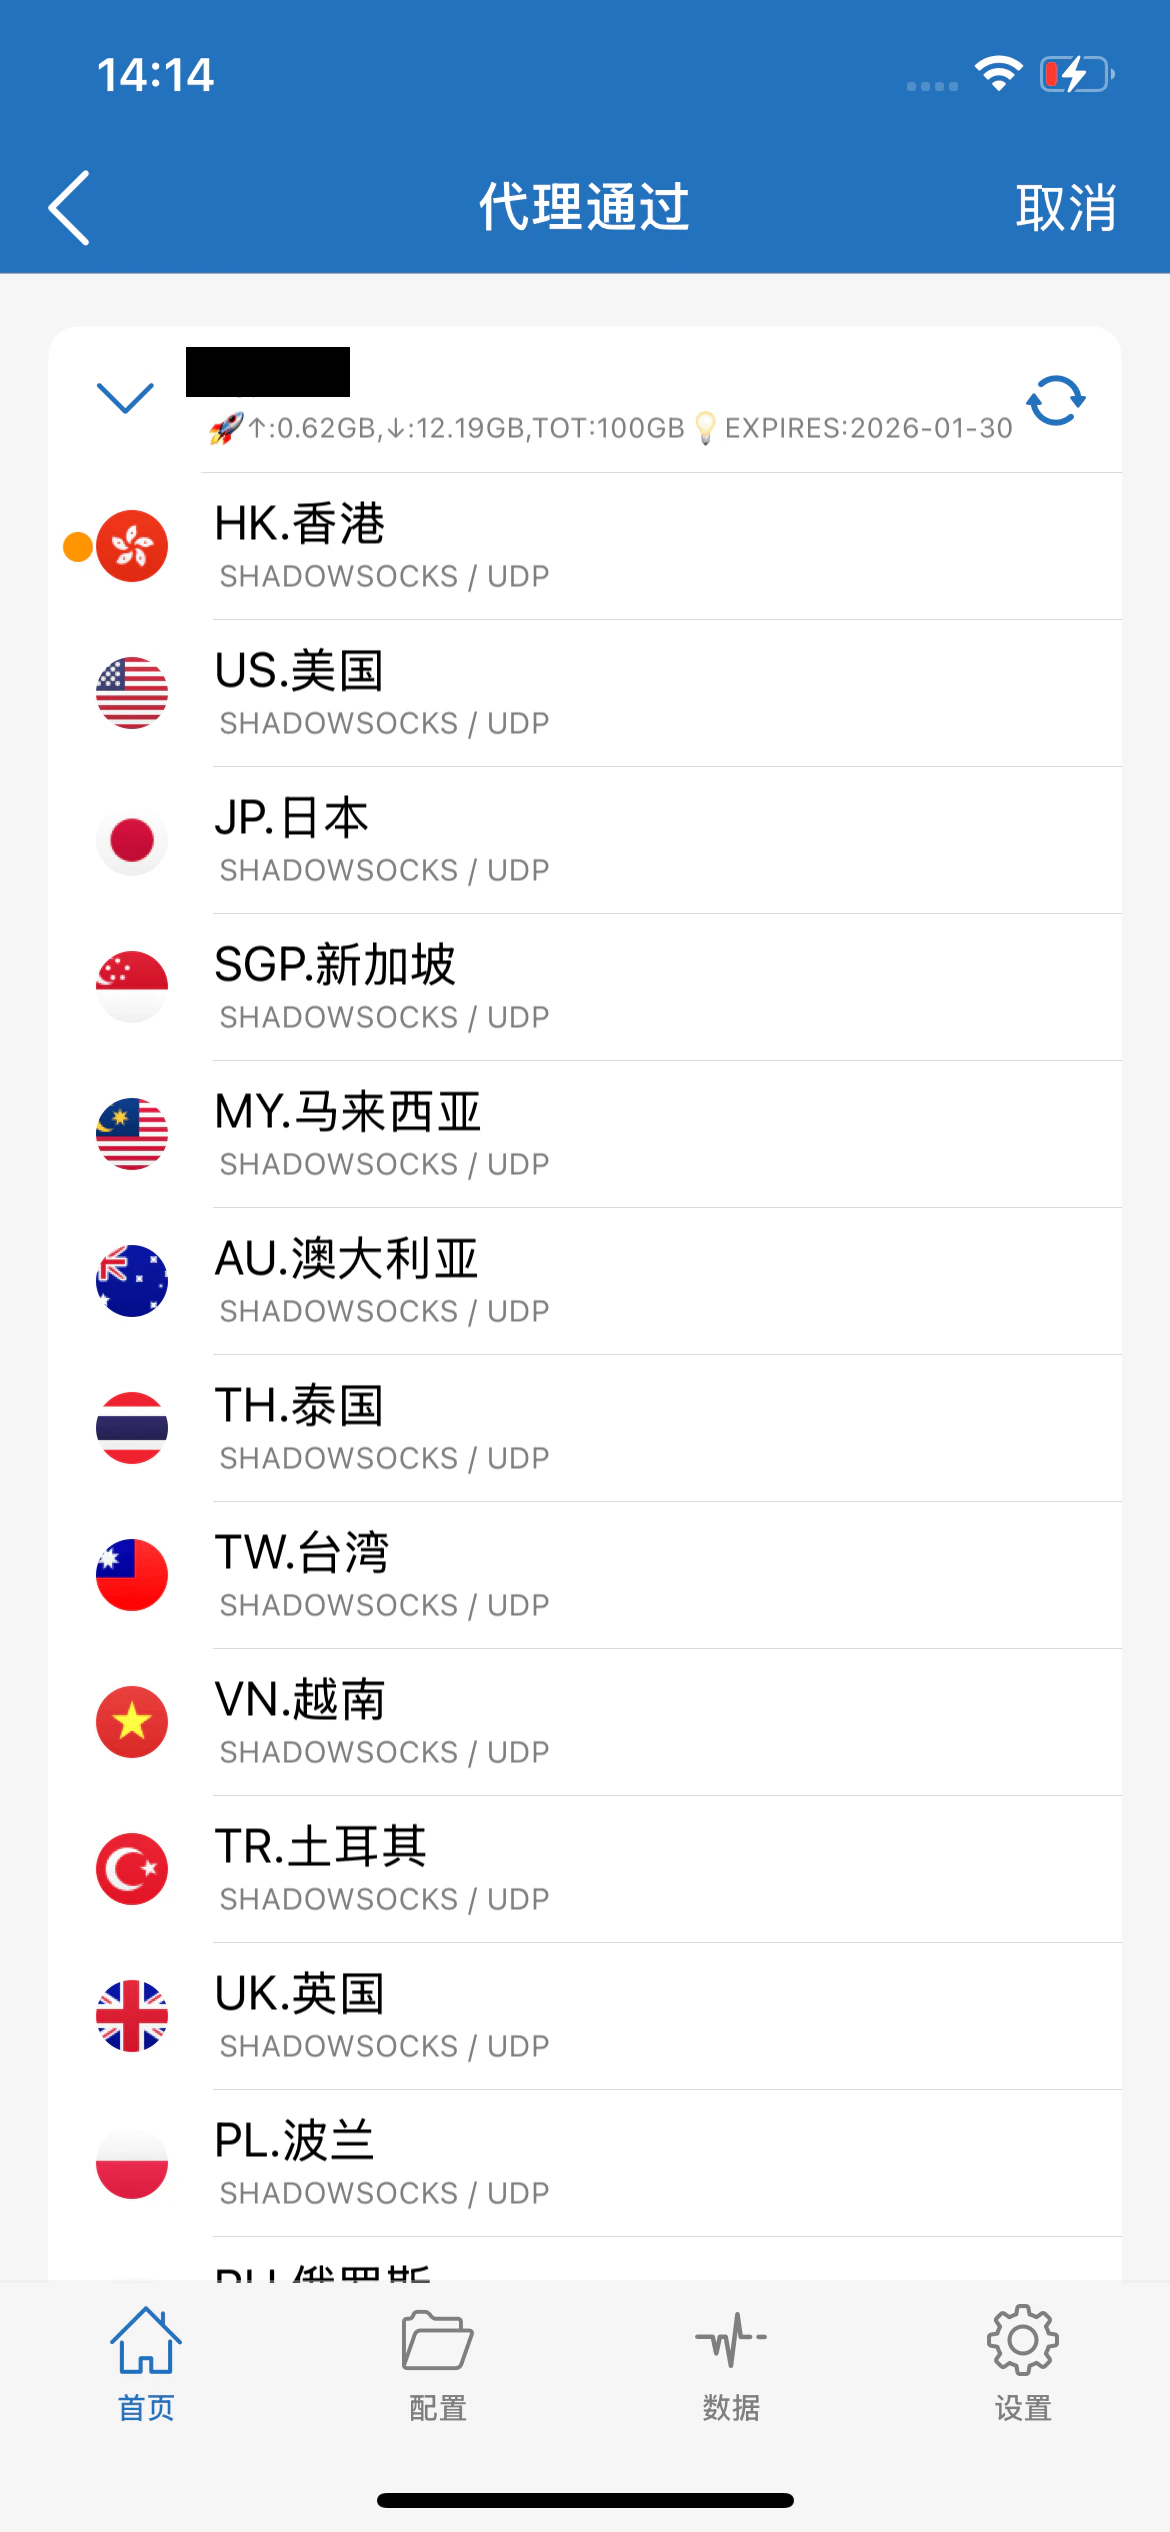
3. Tap **Proxy via** and select an overseas network node
4. Tap **Done** or **Save** in the upper-right corner to save the configuration
### Step 2. Configure Proxy Information
1. Select the proxy protocol type: **HTTP** or **SOCKS**
2. Enter the proxy information obtained from [Ip2up](https://www.ip2up.com/):
* **Address (Server)**: Proxy server address
* **Port**: Proxy service port number
* **Username**: Proxy account
* **Password**: Proxy password
3. Tap **Proxy via** and select an overseas network node
4. Tap **Done** or **Save** in the upper-right corner to save the configuration
 ### Step 3. Enable and Connect the Proxy
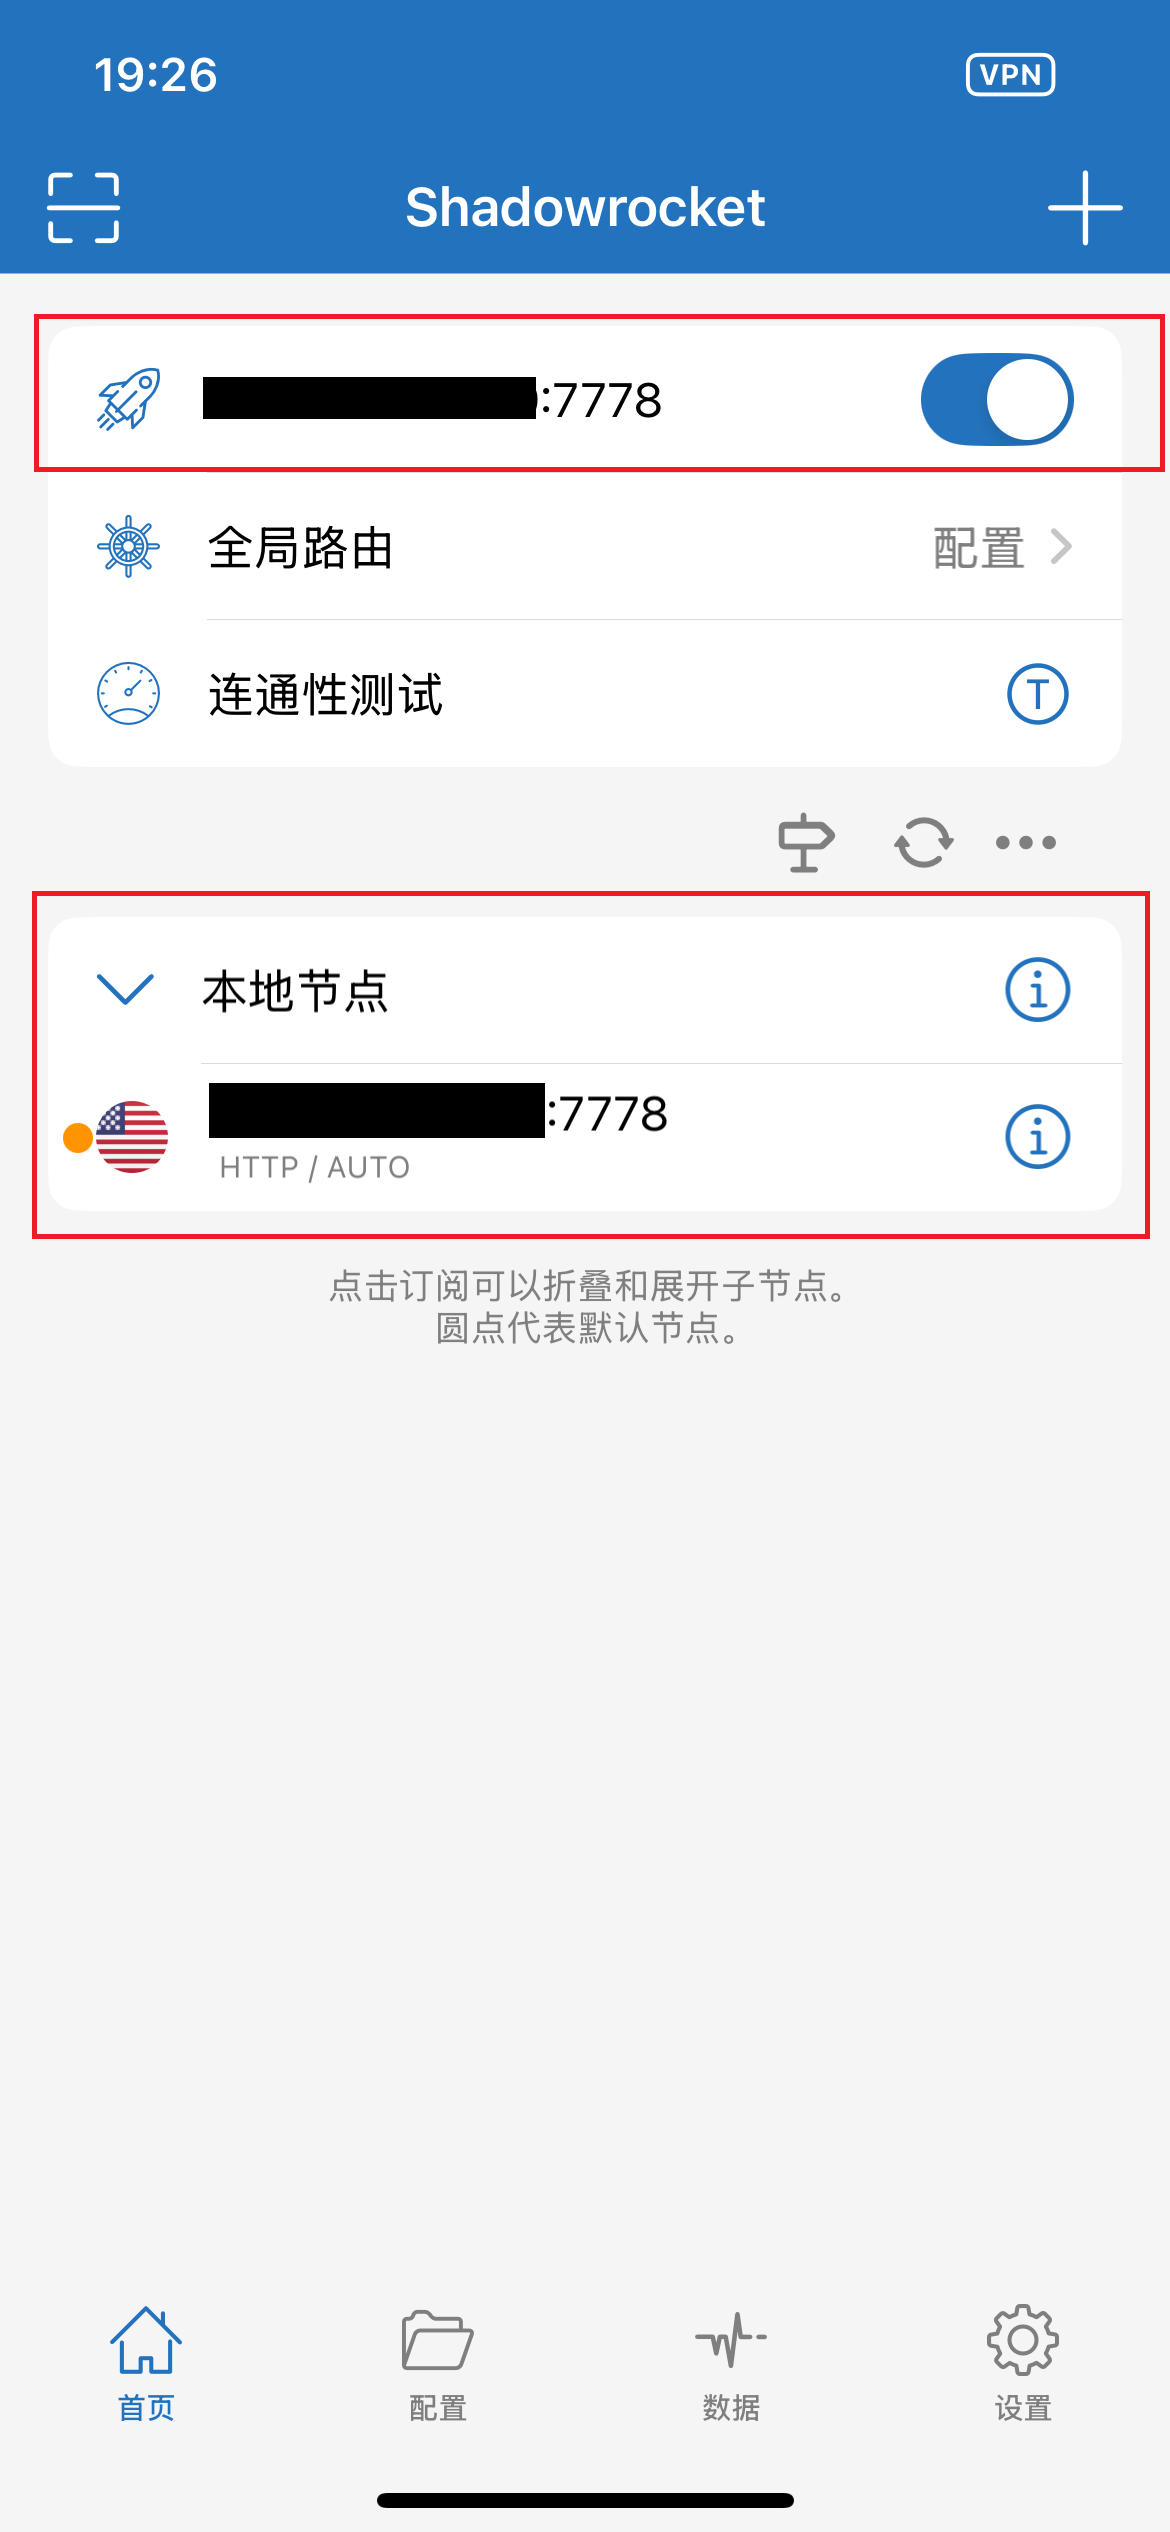
1. Return to the Shadowrocket main interface (home page). The node list will display the proxy node you just added
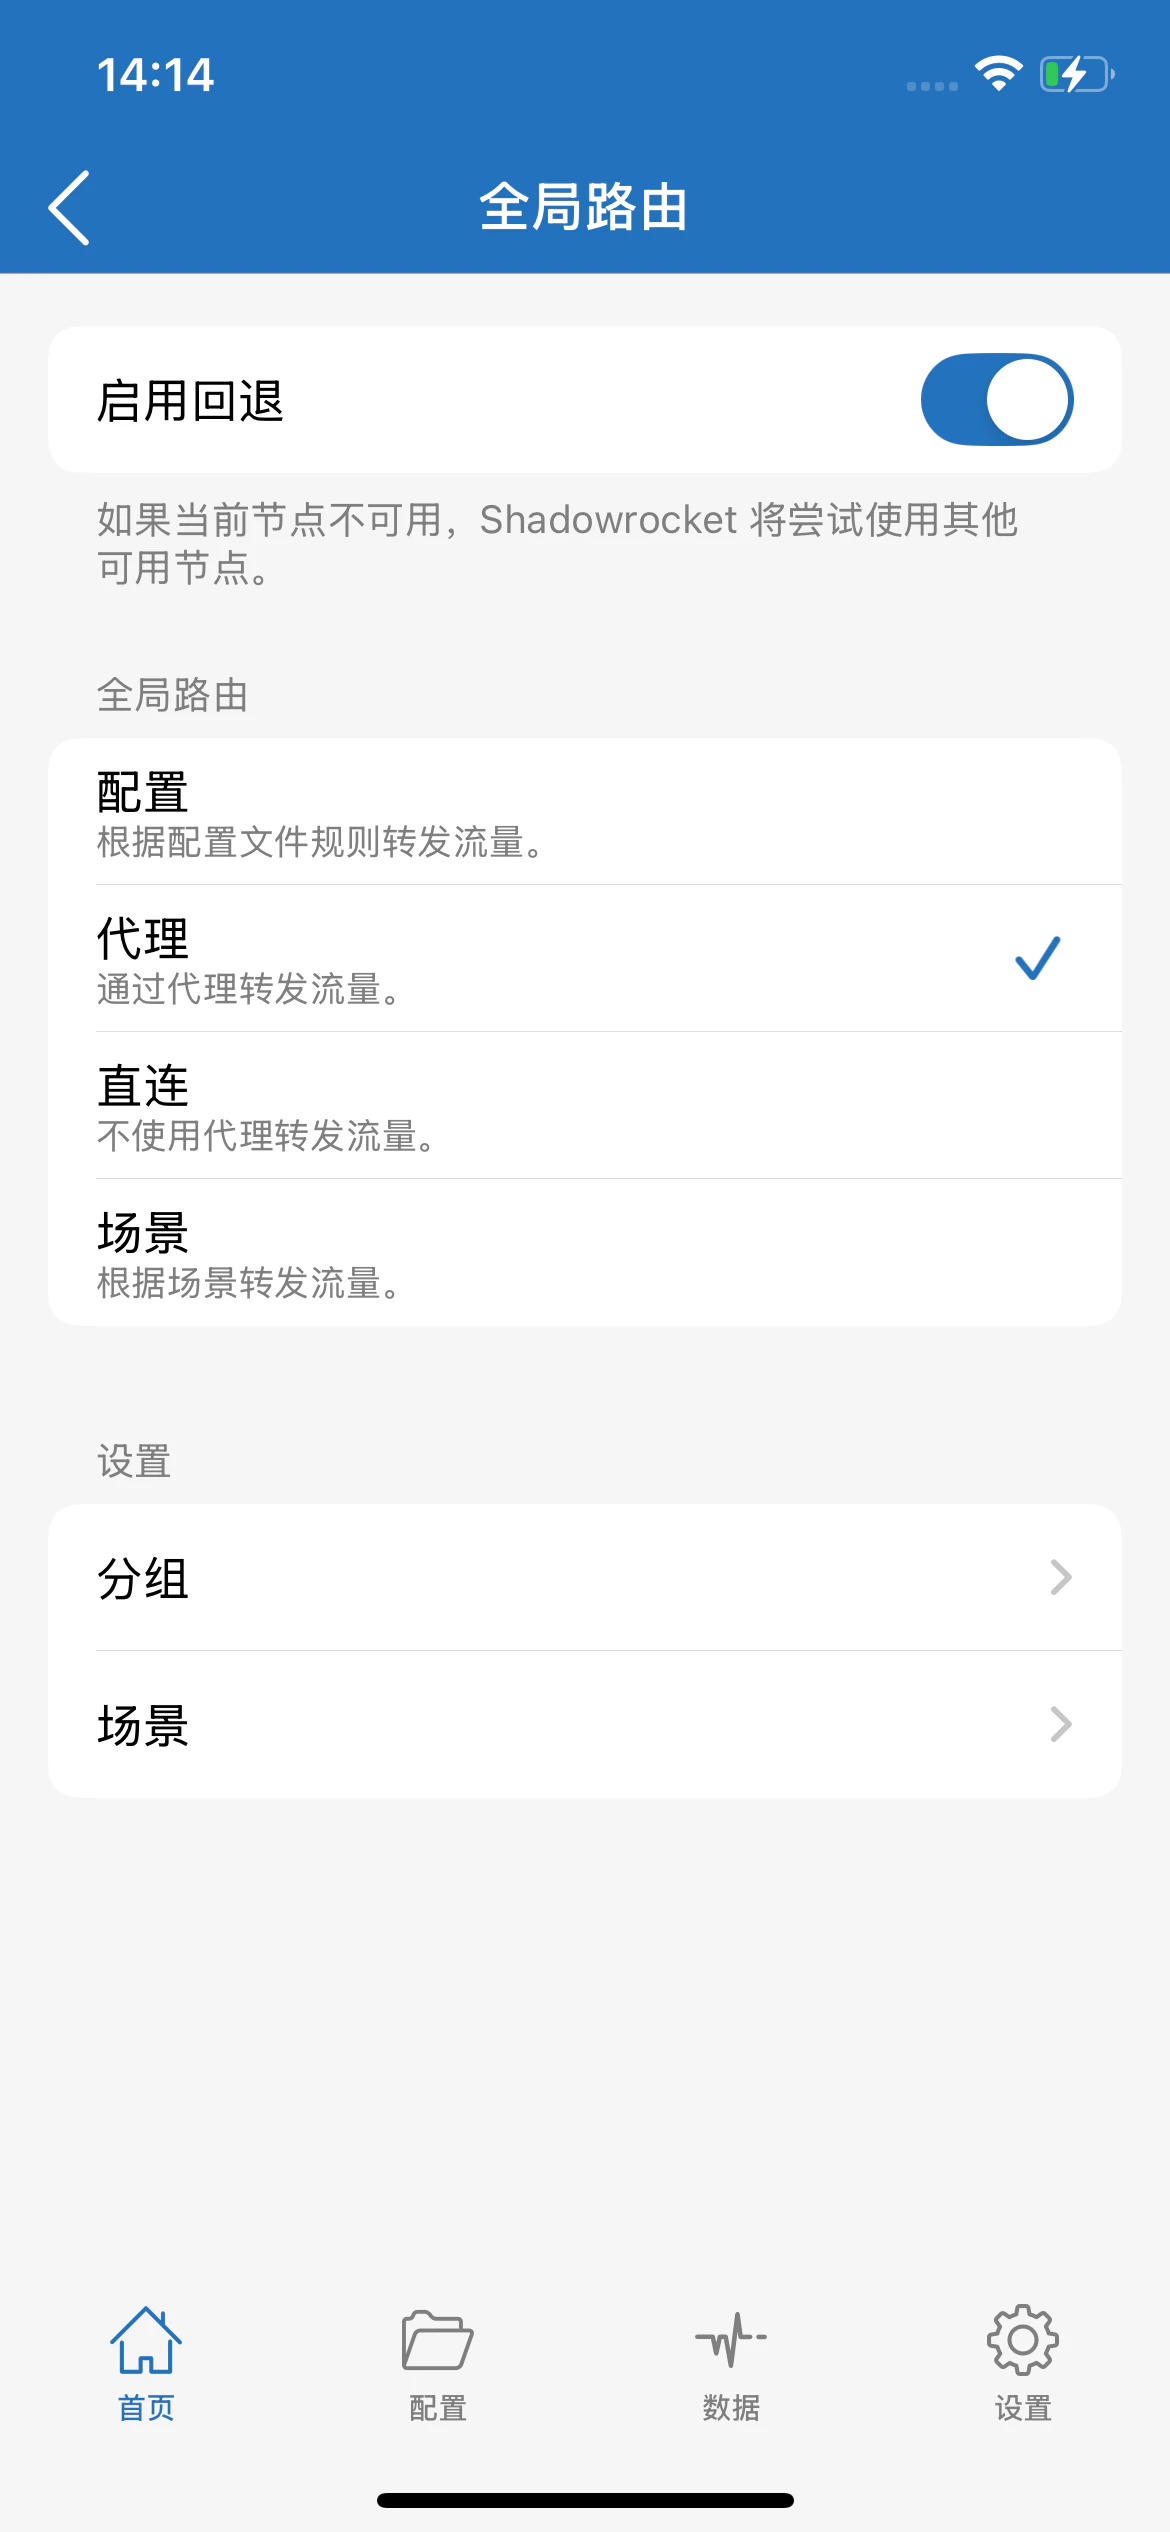
2. Set the global routing mode:
* Select **Proxy** mode
* Turn on the top switch to enable the proxy
3. Permission prompt handling:
* When connecting for the first time, the system will display a VPN configuration dialog
* Tap **Allow** to grant permission; otherwise, the proxy function cannot be used
4. Node management:
* If there are multiple nodes, tap a node to set it as the default
* Each connection will automatically use the default node
* To switch nodes, simply set another node as the default
### Step 3. Enable and Connect the Proxy
1. Return to the Shadowrocket main interface (home page). The node list will display the proxy node you just added
2. Set the global routing mode:
* Select **Proxy** mode
* Turn on the top switch to enable the proxy
3. Permission prompt handling:
* When connecting for the first time, the system will display a VPN configuration dialog
* Tap **Allow** to grant permission; otherwise, the proxy function cannot be used
4. Node management:
* If there are multiple nodes, tap a node to set it as the default
* Each connection will automatically use the default node
* To switch nodes, simply set another node as the default
 ### Step 4. Verify the Proxy Connection
1. Ensure that the top switch in Shadowrocket is turned on (displayed in green)
2. Open Safari or another browser and visit [ipinfo.io](https://ipinfo.io)
3. Confirm that the displayed IP address matches the residential proxy IP you configured
### Important Notes
**Connectivity Test Explanation**:
* Some IP addresses may display **"Timeout"** during connectivity tests
* This is a normal phenomenon of the Shadowrocket detection mechanism and does not affect actual usage
* The timeout prompt can be ignored; the proxy function remains fully operational
**Node Switching Operation**:
* Before switching nodes, first disconnect the current connection
* Then initiate the new node connection
* Avoid Shadowrocket cache data affecting connection stability
✅ **At this point, the residential proxy has been successfully configured and enabled in Shadowrocket, allowing secure access to network resources.**
### Step 4. Verify the Proxy Connection
1. Ensure that the top switch in Shadowrocket is turned on (displayed in green)
2. Open Safari or another browser and visit [ipinfo.io](https://ipinfo.io)
3. Confirm that the displayed IP address matches the residential proxy IP you configured
### Important Notes
**Connectivity Test Explanation**:
* Some IP addresses may display **"Timeout"** during connectivity tests
* This is a normal phenomenon of the Shadowrocket detection mechanism and does not affect actual usage
* The timeout prompt can be ignored; the proxy function remains fully operational
**Node Switching Operation**:
* Before switching nodes, first disconnect the current connection
* Then initiate the new node connection
* Avoid Shadowrocket cache data affecting connection stability
✅ **At this point, the residential proxy has been successfully configured and enabled in Shadowrocket, allowing secure access to network resources.**