> ## Documentation Index
> Fetch the complete documentation index at: https://help.ip2up.com/llms.txt
> Use this file to discover all available pages before exploring further.
# v2rayNG
All proxy products on the platform must be used in an overseas network environment. Users are required to configure the overseas network environment on their own.
This guide will show you how to configure **Ip2up** residential proxies on your Android device using **v2rayNG** for secure access to online resources.
The usage method for Dynamic Residential IPs is the same as that for Static Residential IPs.
### Step 1:Set Global Routing Mode
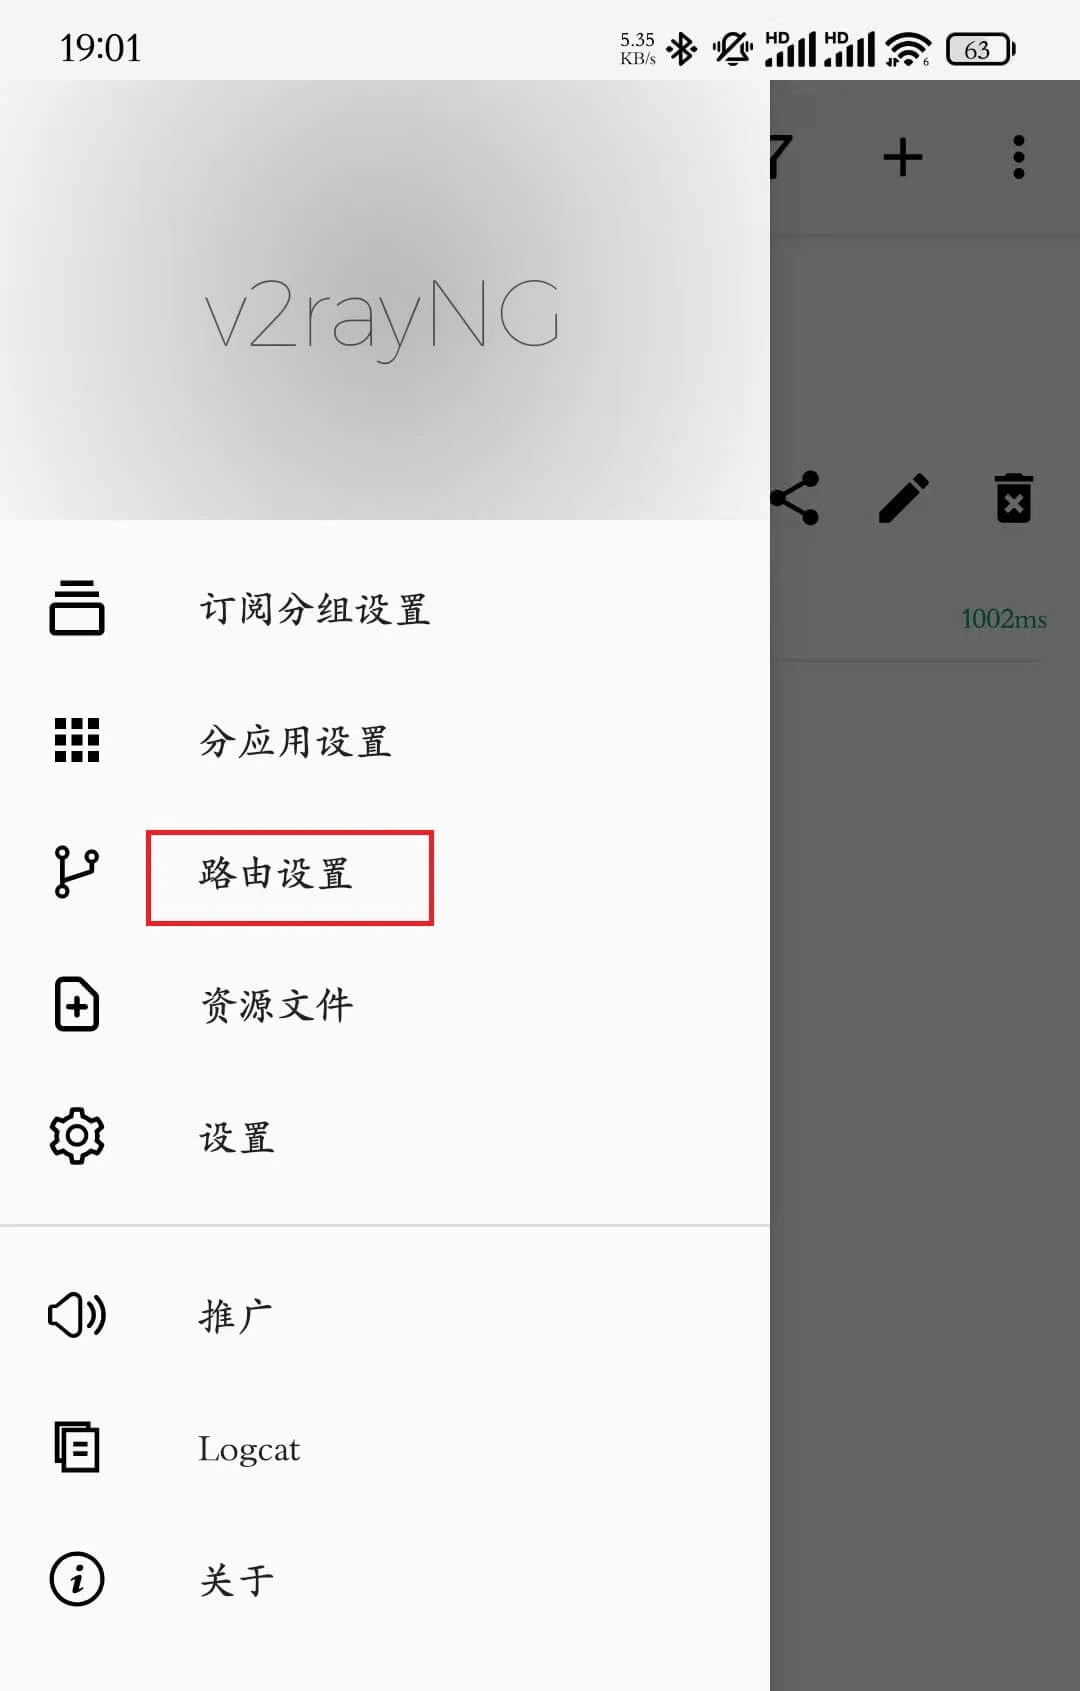
Open the v2rayNG app, tap the menu in the top-left corner, and go to **"Routing Settings"**.
 ### Step 2:Adjust Routing Configuration
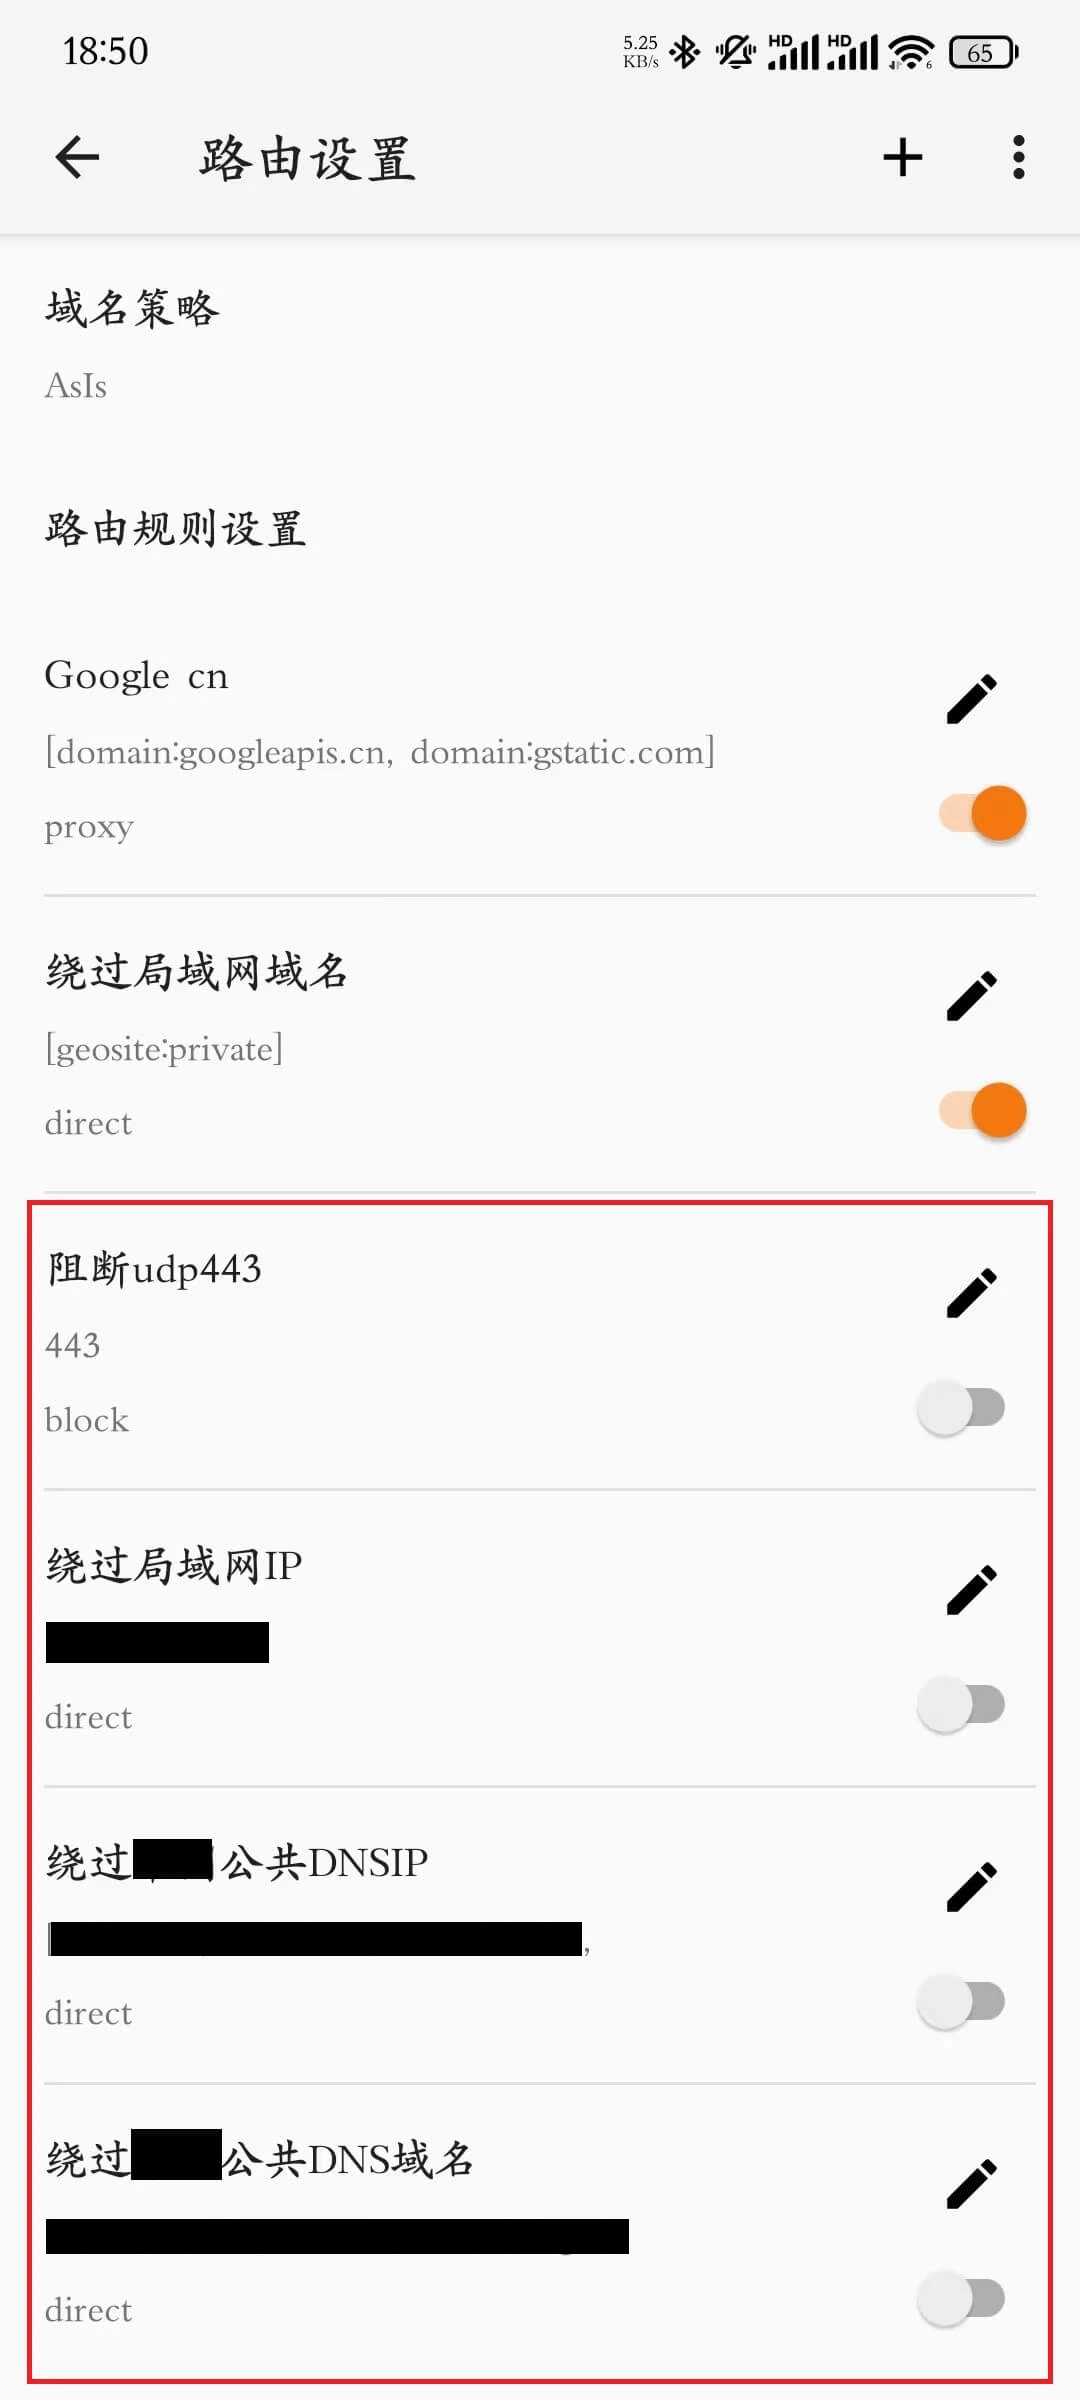
On the "Routing Settings" page, disable the four options highlighted in the image to ensure normal proxy traffic.
### Step 2:Adjust Routing Configuration
On the "Routing Settings" page, disable the four options highlighted in the image to ensure normal proxy traffic.
 ### Step 3:Go to Subscription Group Settings
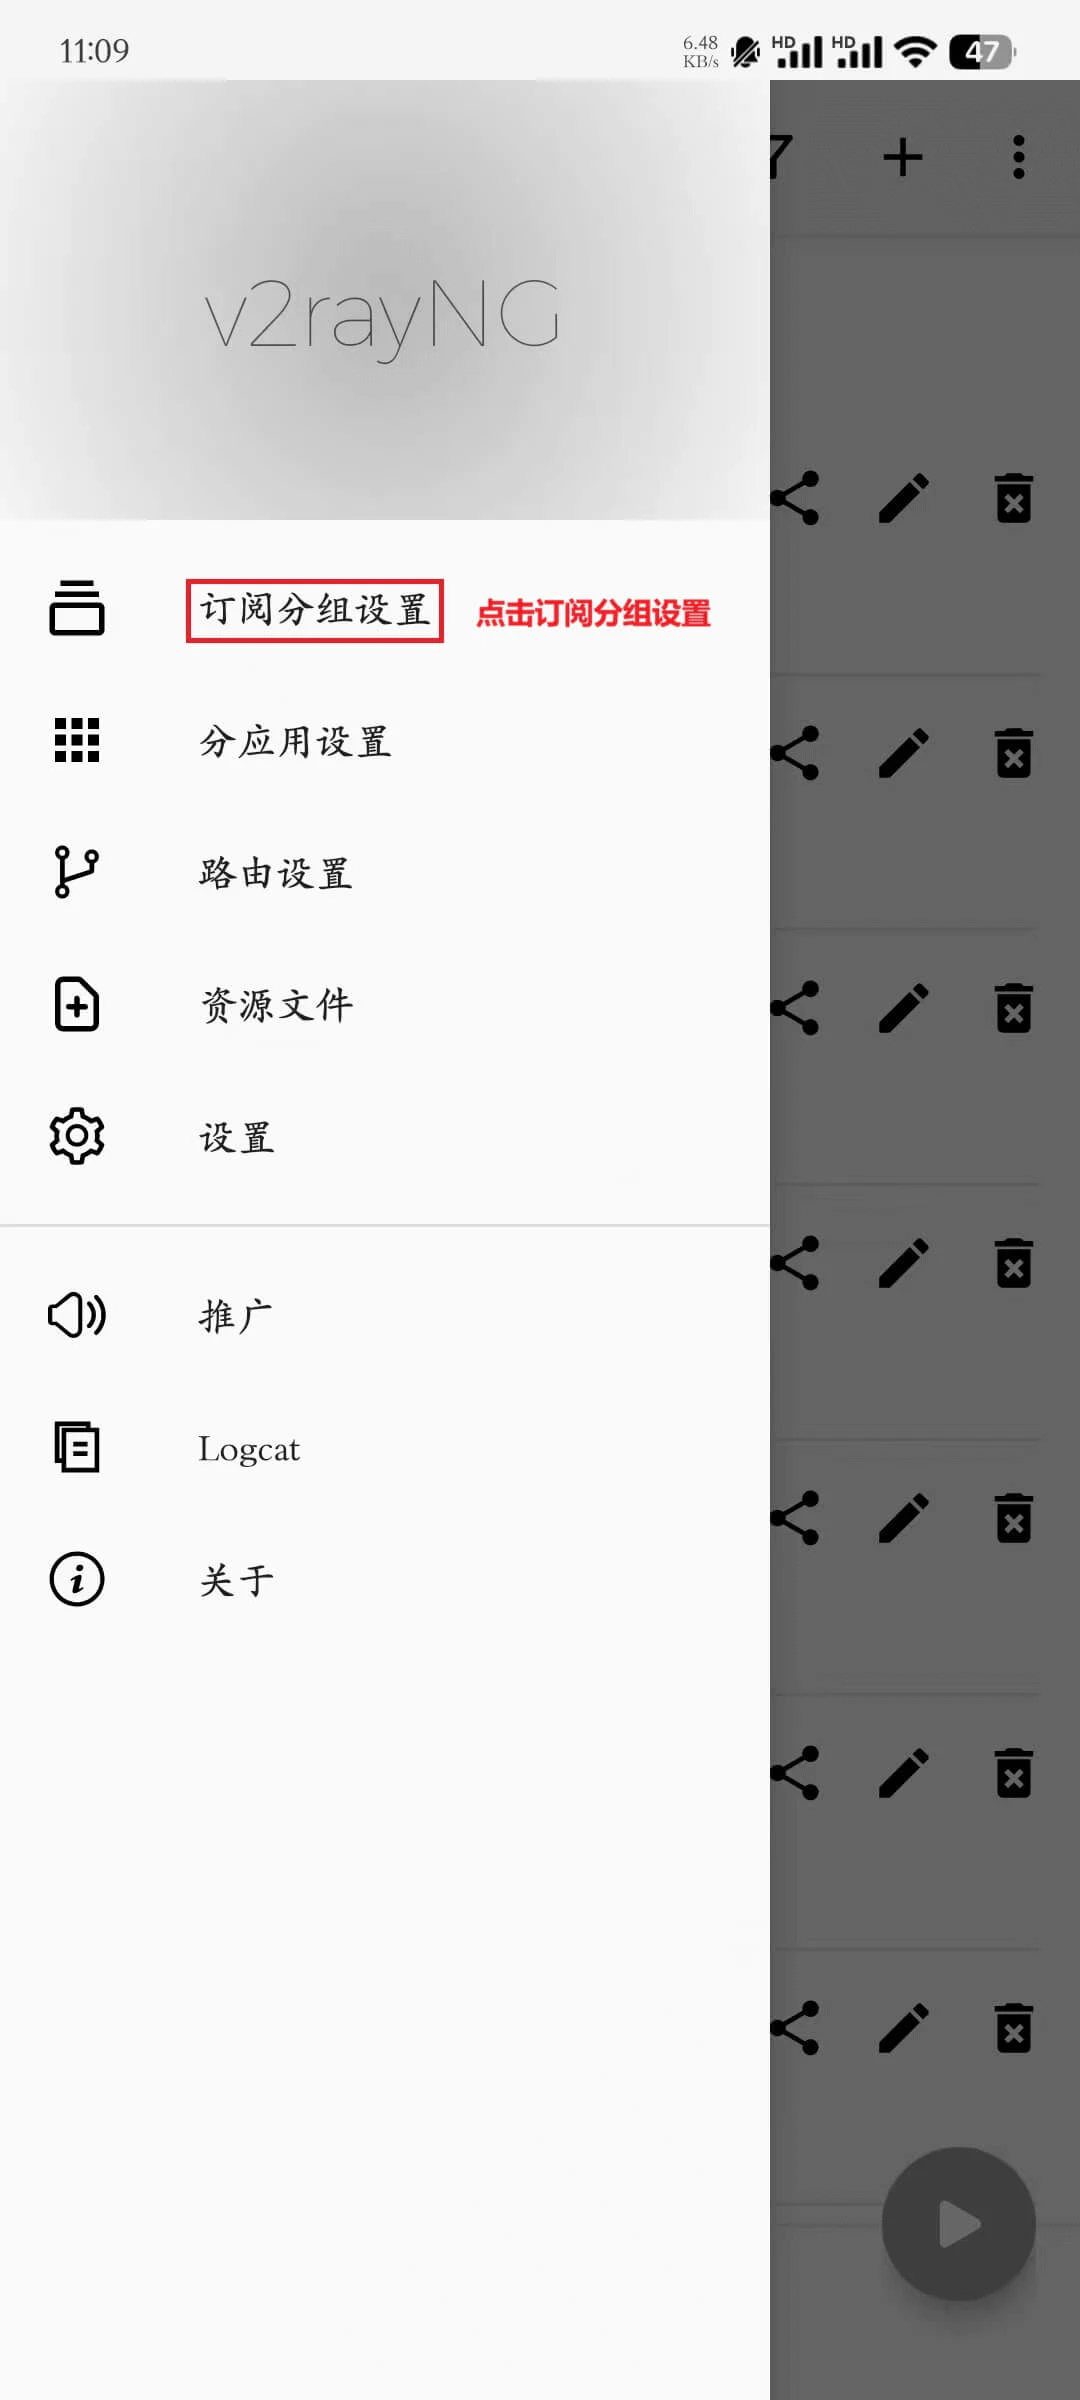
Tap the top-left menu and select **"Subscription Group Settings"**.
### Step 3:Go to Subscription Group Settings
Tap the top-left menu and select **"Subscription Group Settings"**.
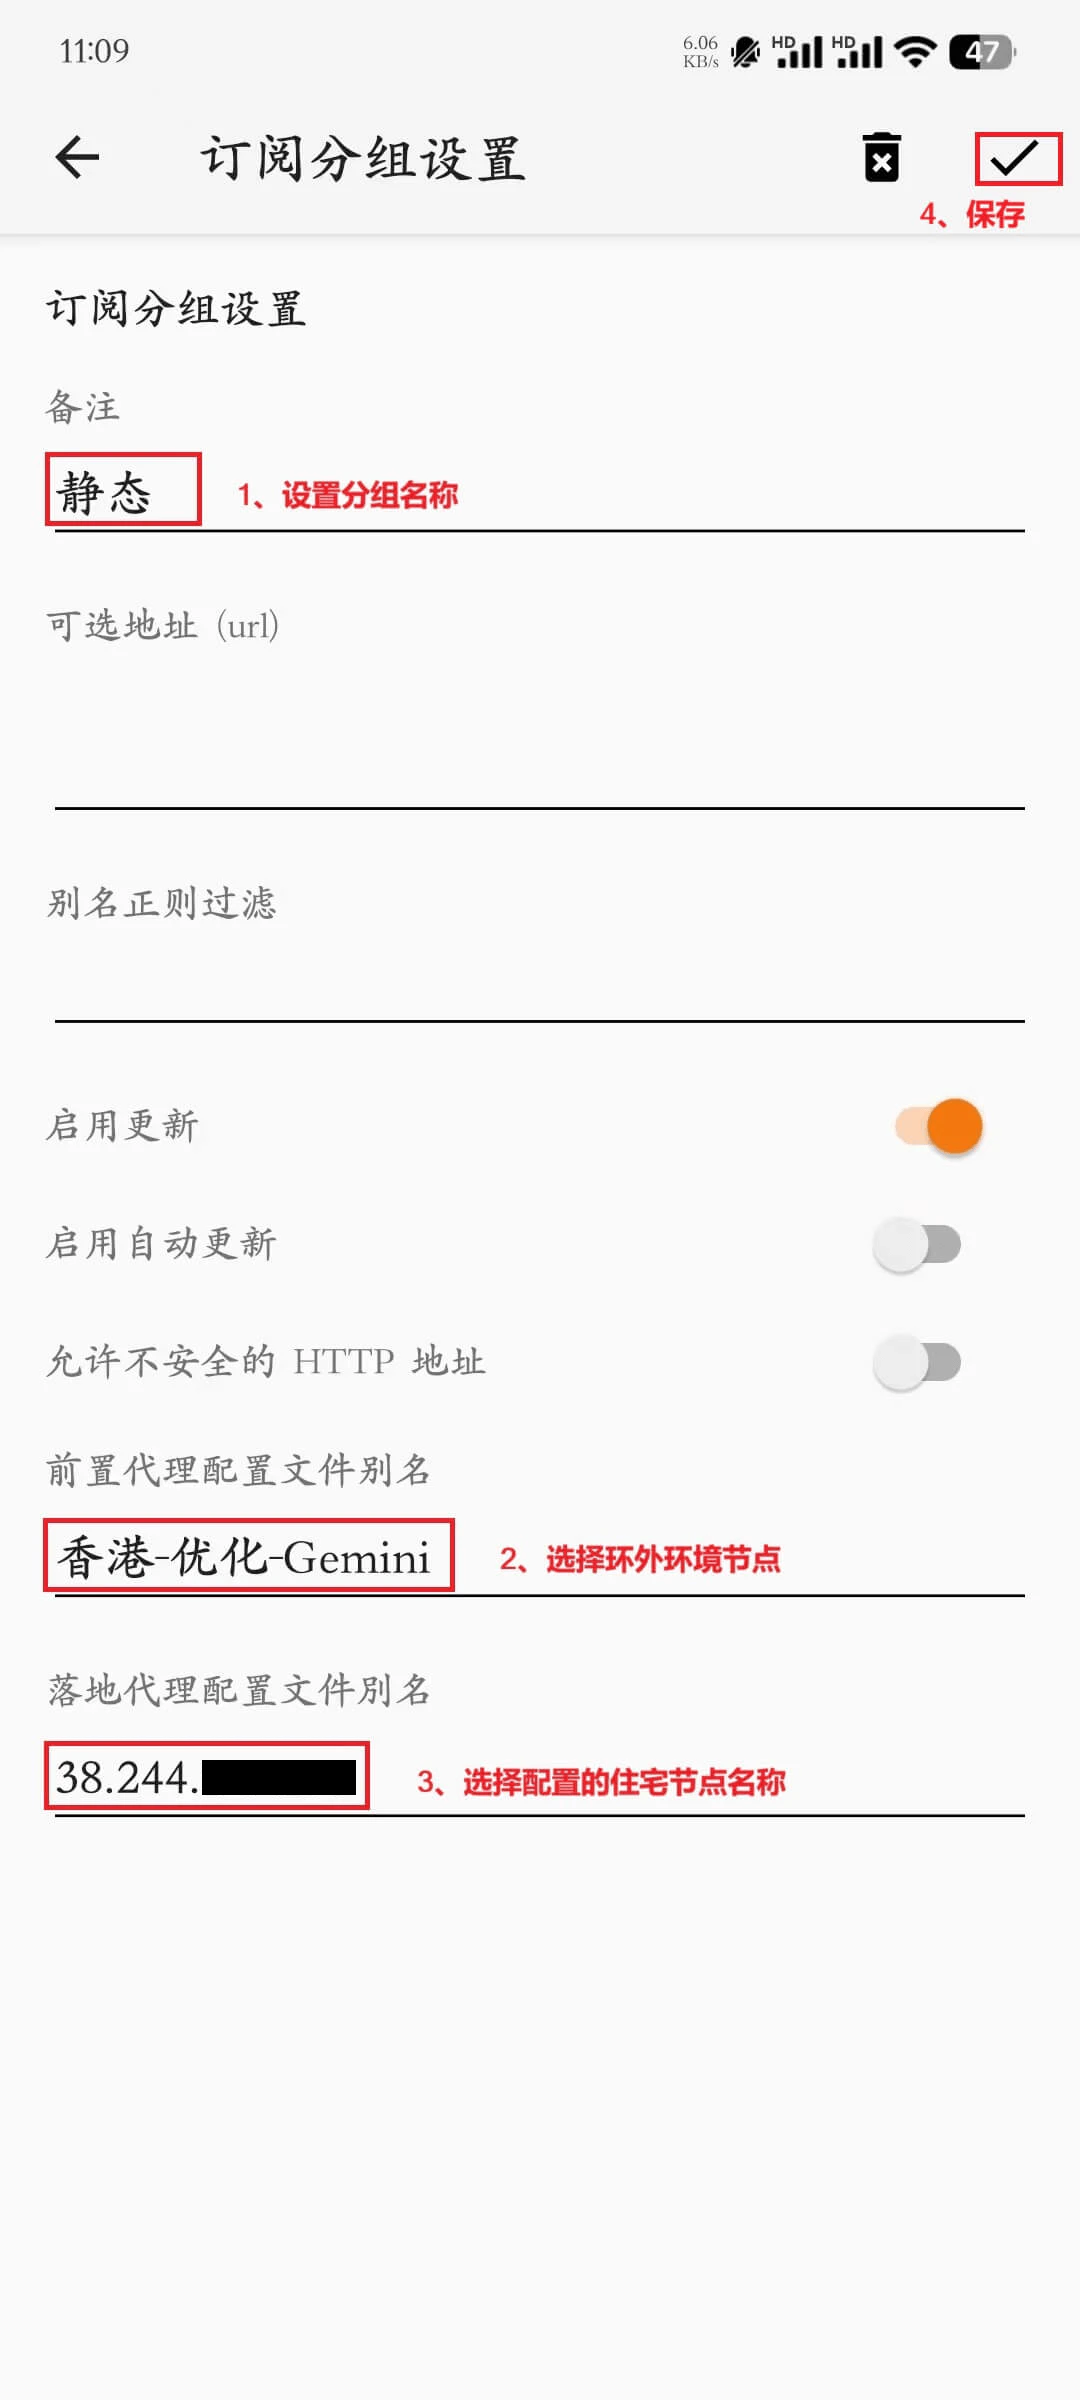
 ### Step 4:Create a New Group
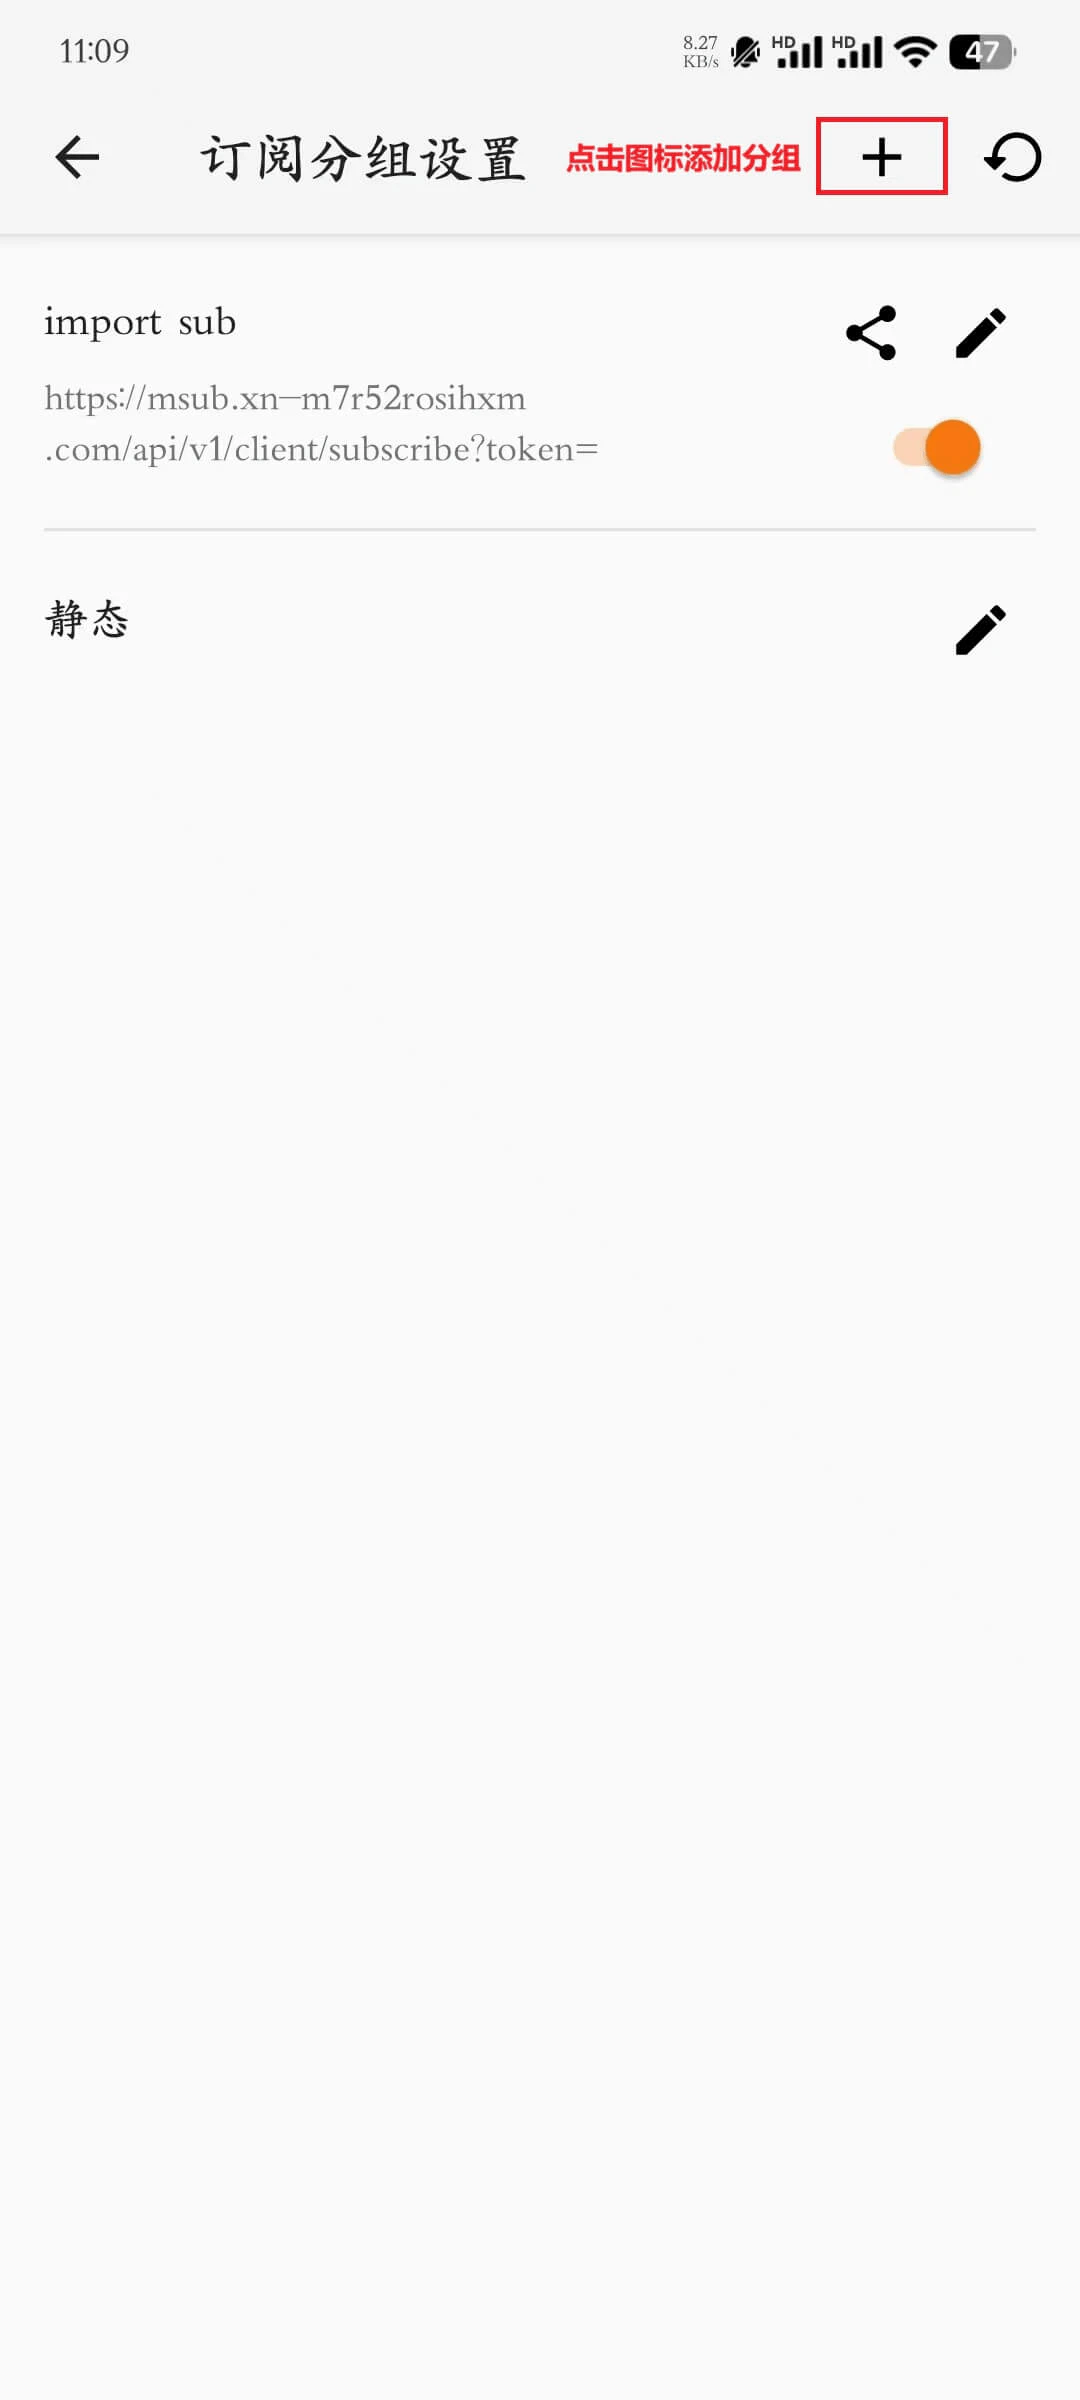
1. Tap the **"+"** icon in the top-right corner to add a new group.
2. Fill in the required group information:
* **Group Name**: Custom group identifier
* **Front Proxy Name**: Select an overseas network node (for connecting to the overseas environment)
* **Exit Proxy Name**: Select an Ip2up residential node (for final access)
3. Tap **"Save"** to finish creating the group.
### Step 4:Create a New Group
1. Tap the **"+"** icon in the top-right corner to add a new group.
2. Fill in the required group information:
* **Group Name**: Custom group identifier
* **Front Proxy Name**: Select an overseas network node (for connecting to the overseas environment)
* **Exit Proxy Name**: Select an Ip2up residential node (for final access)
3. Tap **"Save"** to finish creating the group.
 ### Step 5:Add Residential Nodes to the Group
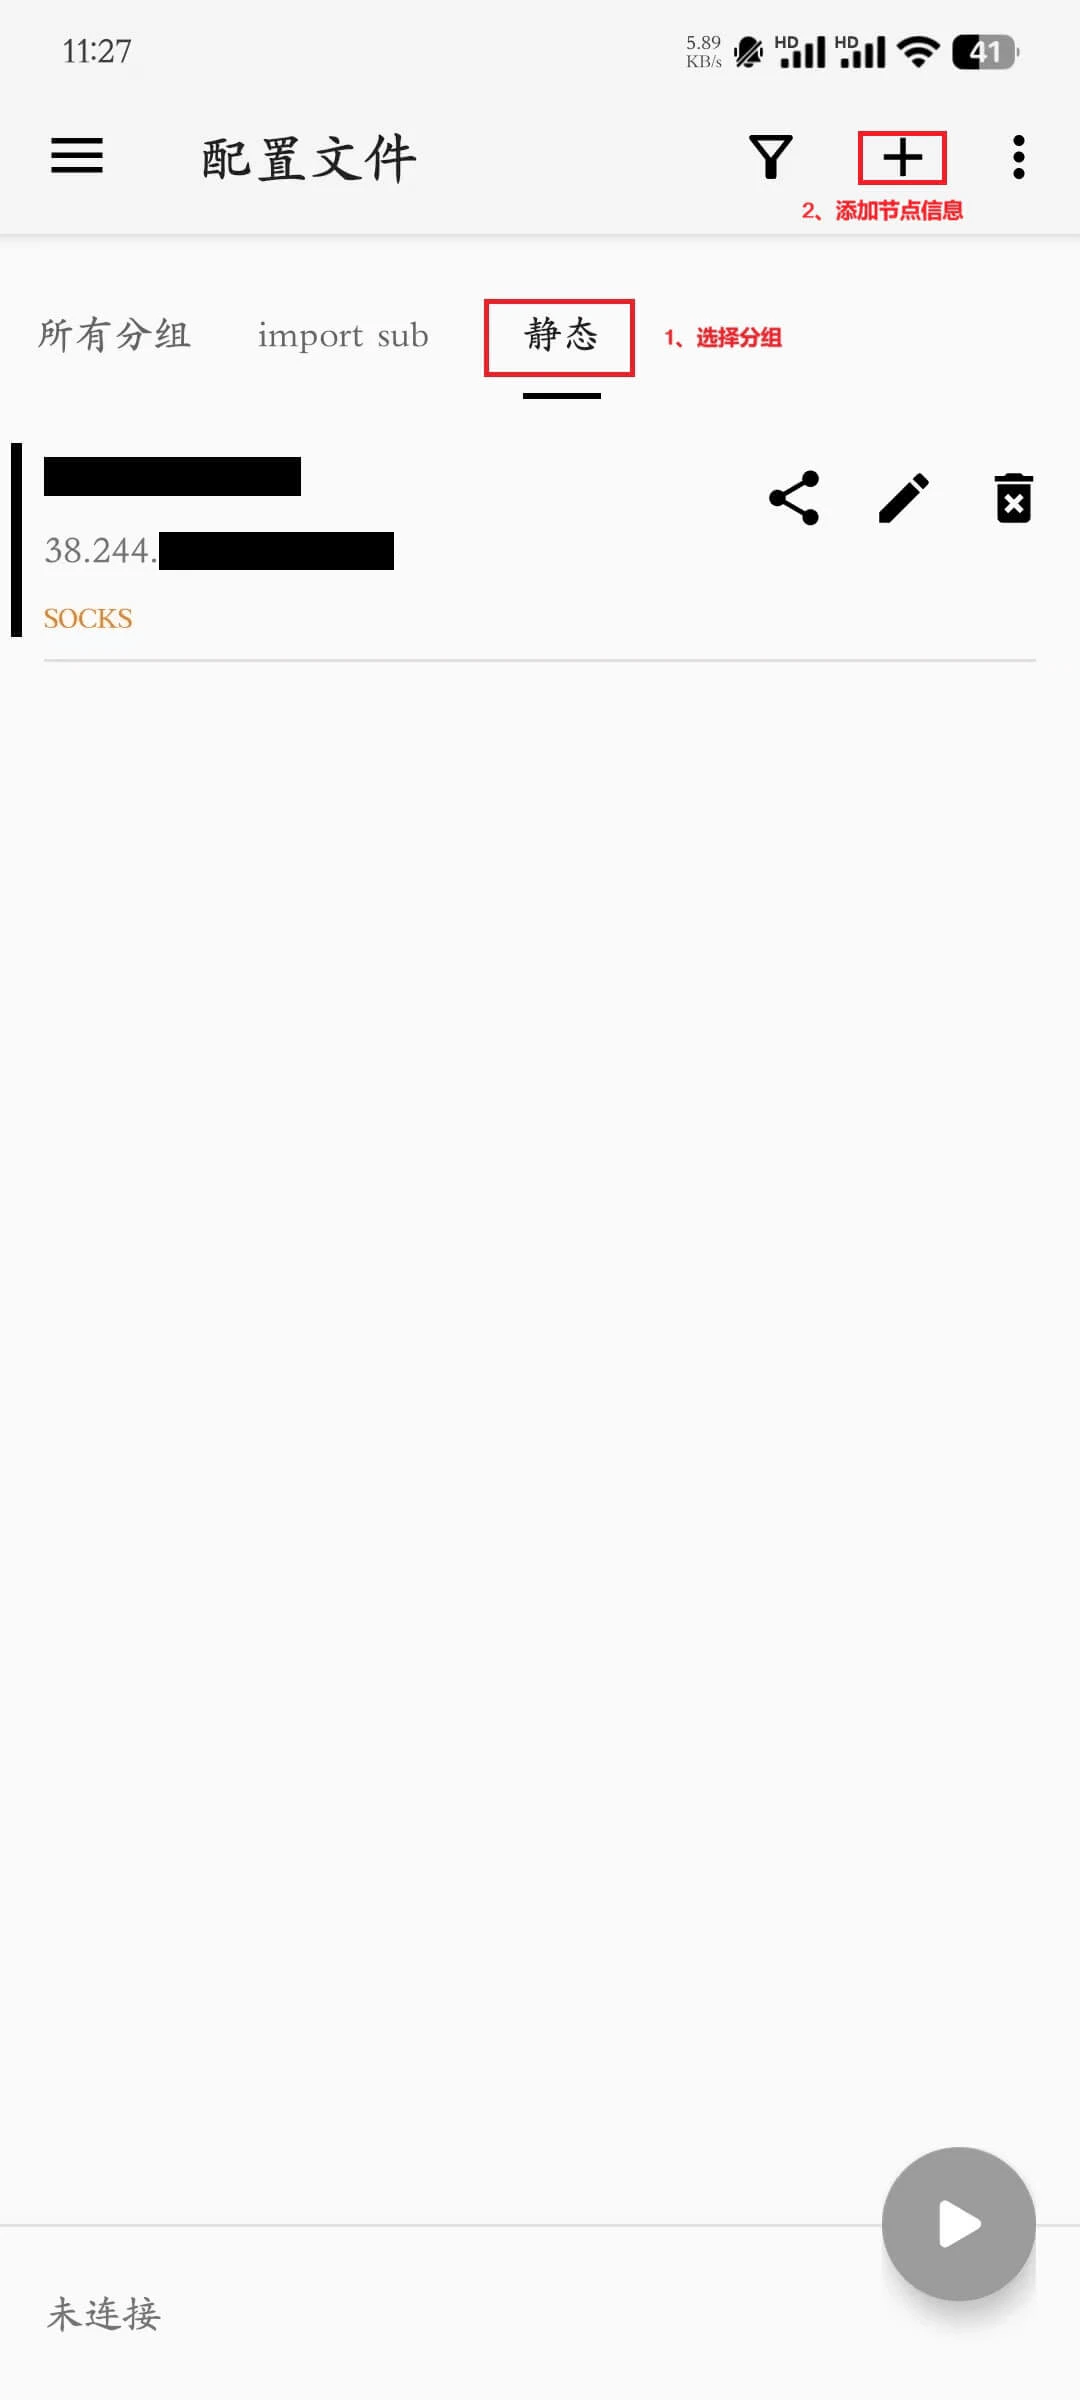
1. Select the group you just created.
2. Tap the **"+"** icon in the top-right corner to add a new configuration.
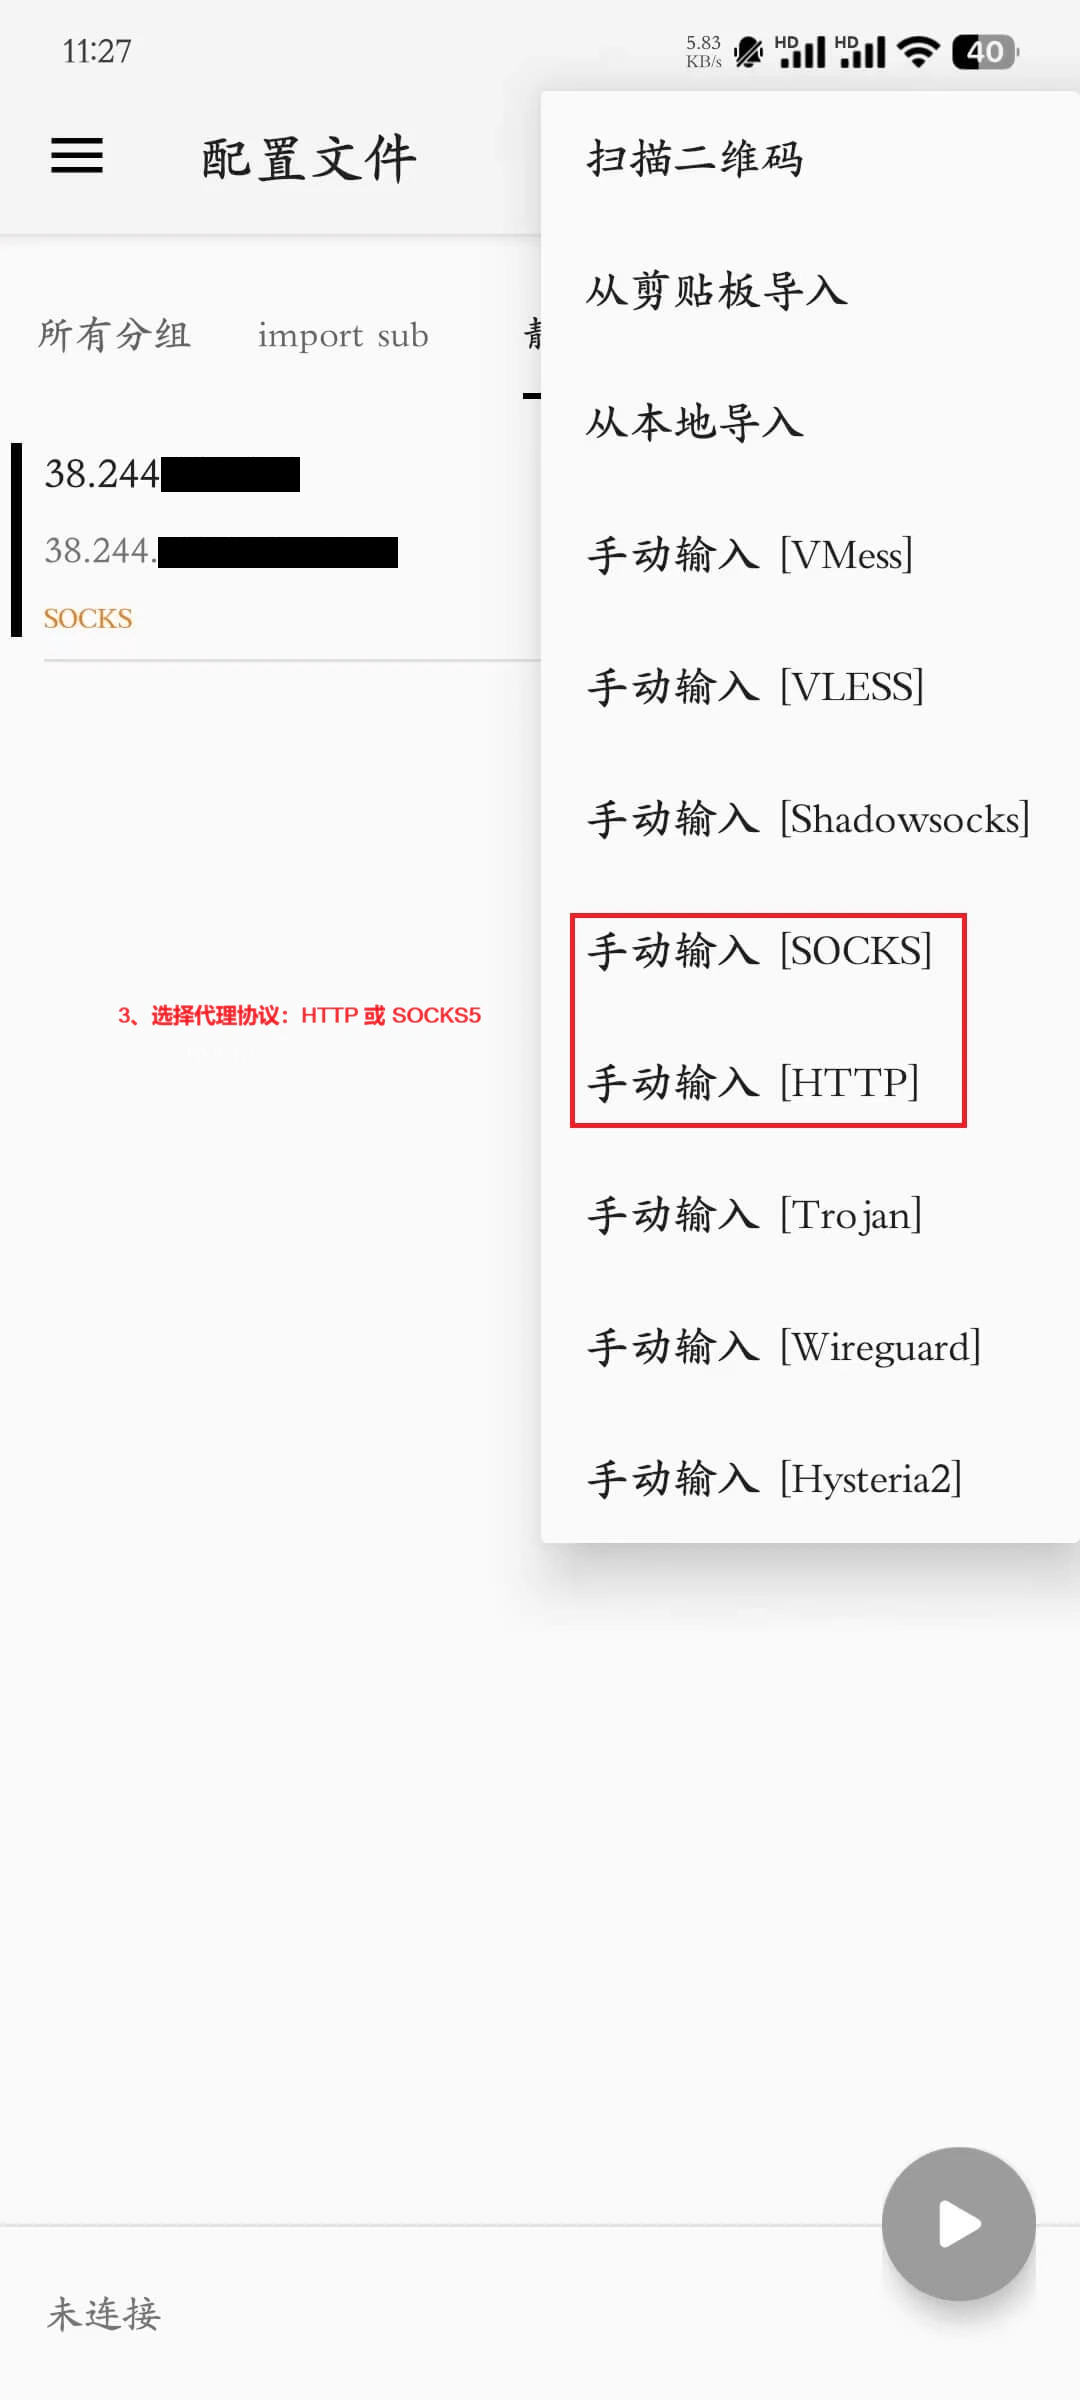
3. Choose the proxy protocol: **HTTP** or **SOCKS5**.
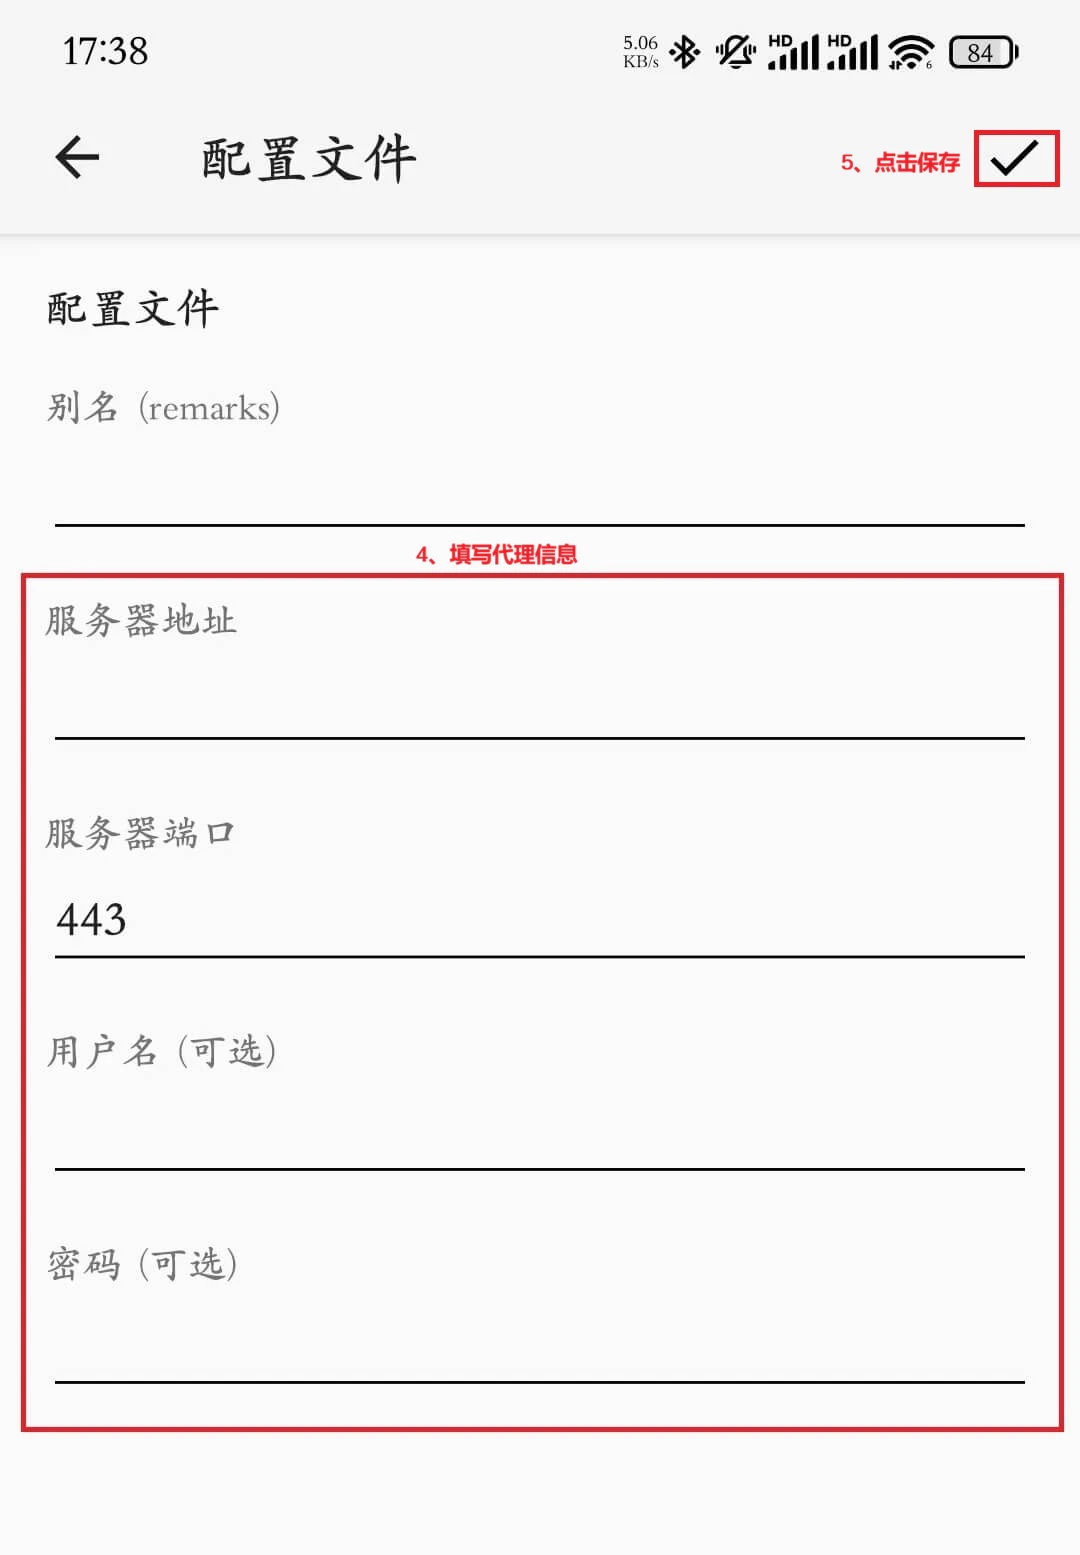
4. Enter the proxy details obtained from [Ip2up](https://www.ip2up.com/):
* **Server Address**
* **Server Port**
* **Username**
* **Password**
5. Tap **"OK"** or **"Save"** in the top-right corner to save the configuration.
### Step 5:Add Residential Nodes to the Group
1. Select the group you just created.
2. Tap the **"+"** icon in the top-right corner to add a new configuration.
3. Choose the proxy protocol: **HTTP** or **SOCKS5**.
4. Enter the proxy details obtained from [Ip2up](https://www.ip2up.com/):
* **Server Address**
* **Server Port**
* **Username**
* **Password**
5. Tap **"OK"** or **"Save"** in the top-right corner to save the configuration.
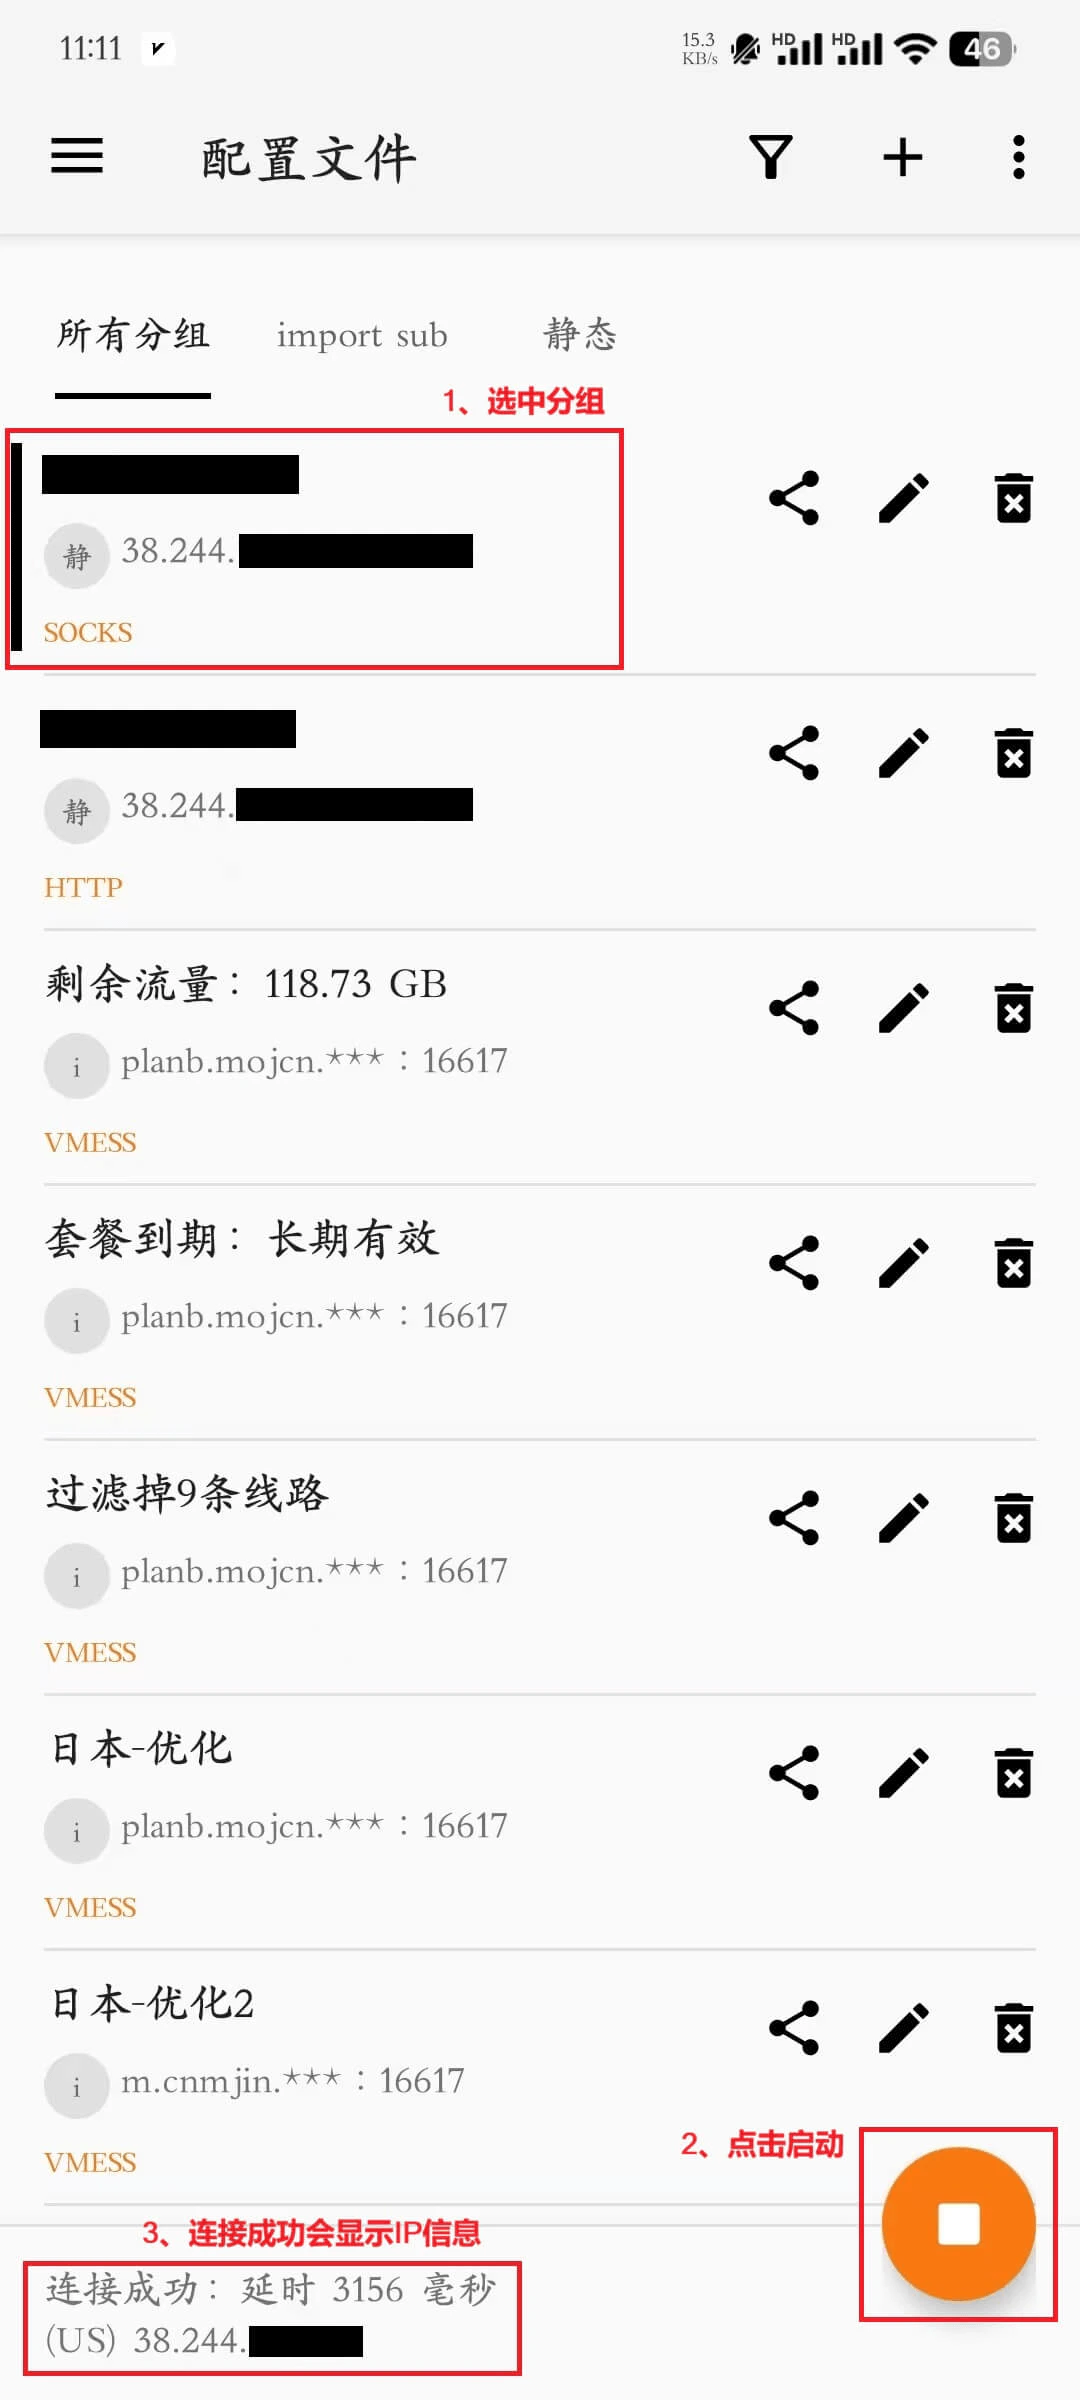
 ### Step 6:Connect and Test the Proxy
1. Return to the v2rayNG main interface.
2. Find the configured group in the group list.
3. **Select the group** (make sure it is selected).
4. Tap the **"Start"** button at the bottom.
5. The interface showing **"Connected"** means the proxy setup is complete.
### Step 6:Connect and Test the Proxy
1. Return to the v2rayNG main interface.
2. Find the configured group in the group list.
3. **Select the group** (make sure it is selected).
4. Tap the **"Start"** button at the bottom.
5. The interface showing **"Connected"** means the proxy setup is complete.
 ### Step 7:Verify the Proxy Connection
1. After a successful connection, open your mobile browser.
2. Visit an IP checking website (e.g., [ipinfo.io](https://ipinfo.io)).
3. Confirm that the displayed IP address matches the proxy IP provided by Ip2up.
4. If the proxy IP is shown, the configuration is successful.
### Notes
* Make sure you have the correct Ip2up proxy credentials.
* The proxy service must be used in an overseas network environment.
* Test node latency before connecting and choose the best-performing node.
* Keep v2rayNG running in the background to maintain the proxy connection.
✅ You have successfully configured v2rayNG with Ip2up proxies on your Android device.
### Step 7:Verify the Proxy Connection
1. After a successful connection, open your mobile browser.
2. Visit an IP checking website (e.g., [ipinfo.io](https://ipinfo.io)).
3. Confirm that the displayed IP address matches the proxy IP provided by Ip2up.
4. If the proxy IP is shown, the configuration is successful.
### Notes
* Make sure you have the correct Ip2up proxy credentials.
* The proxy service must be used in an overseas network environment.
* Test node latency before connecting and choose the best-performing node.
* Keep v2rayNG running in the background to maintain the proxy connection.
✅ You have successfully configured v2rayNG with Ip2up proxies on your Android device.