> ## Documentation Index
> Fetch the complete documentation index at: https://help.ip2up.com/llms.txt
> Use this file to discover all available pages before exploring further.

# VMLogin整合使用教學

<Tip>平台的所有代理產品均需要在海外網路環境下使用，海外網路環境需要客戶自行配置。</Tip>

本教學將介紹如何在 **VMLogin防關聯瀏覽器** 中配置 **[Ip2up](https://www.Ip2up.com/zh-cn/)** 代理IP，實現安全、隔離的多帳號操作環境。

<Info>動態住宅IP的使用方式和靜態住宅IP的使用方式一樣</Info>

### 步驟一：下載並安裝VMLogin客戶端

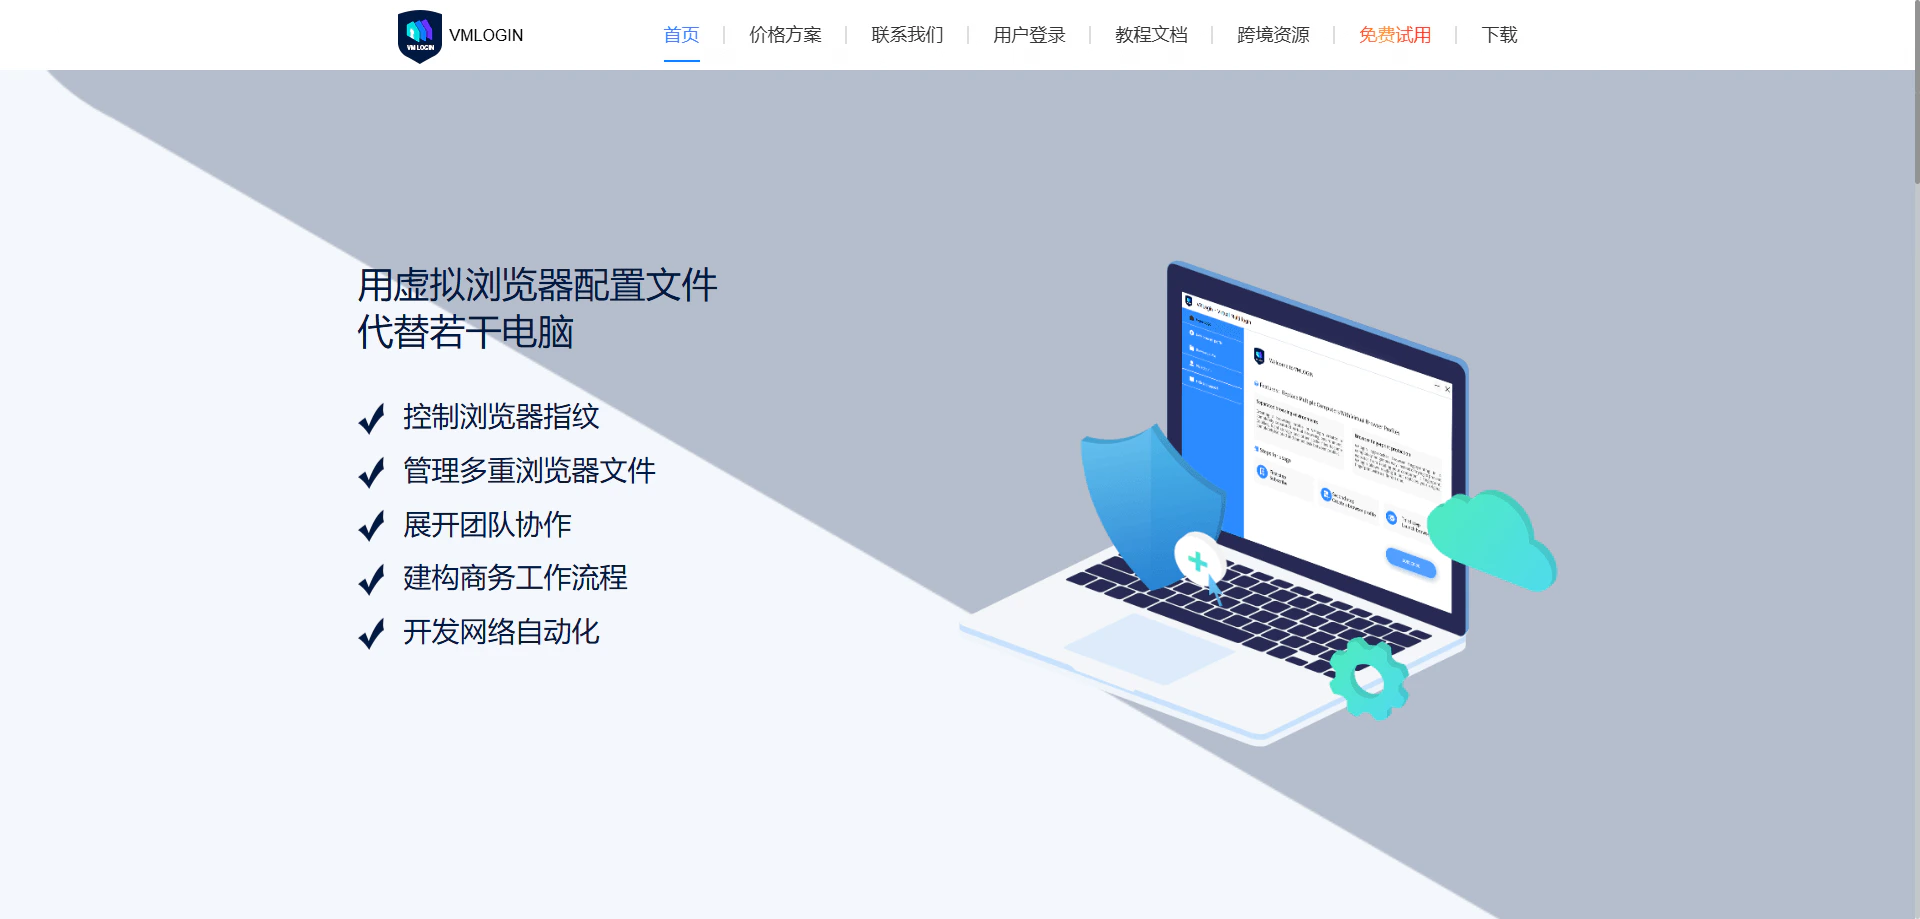
訪問 **VMLogin官網** ，註冊帳號並下載客戶端，完成安裝後啟動軟體。

<img src="https://mintcdn.com/acme-2c62d9fa/-I0epiSaeyhL94EG/res/images/VML10-image.png?fit=max&auto=format&n=-I0epiSaeyhL94EG&q=85&s=fb2c7bc826414e5429c8ae543d403ab8" alt="VMLogin官網下載頁面" width="1920" height="919" data-path="res/images/VML10-image.png" />

### 步驟二：創建新的瀏覽器配置文件

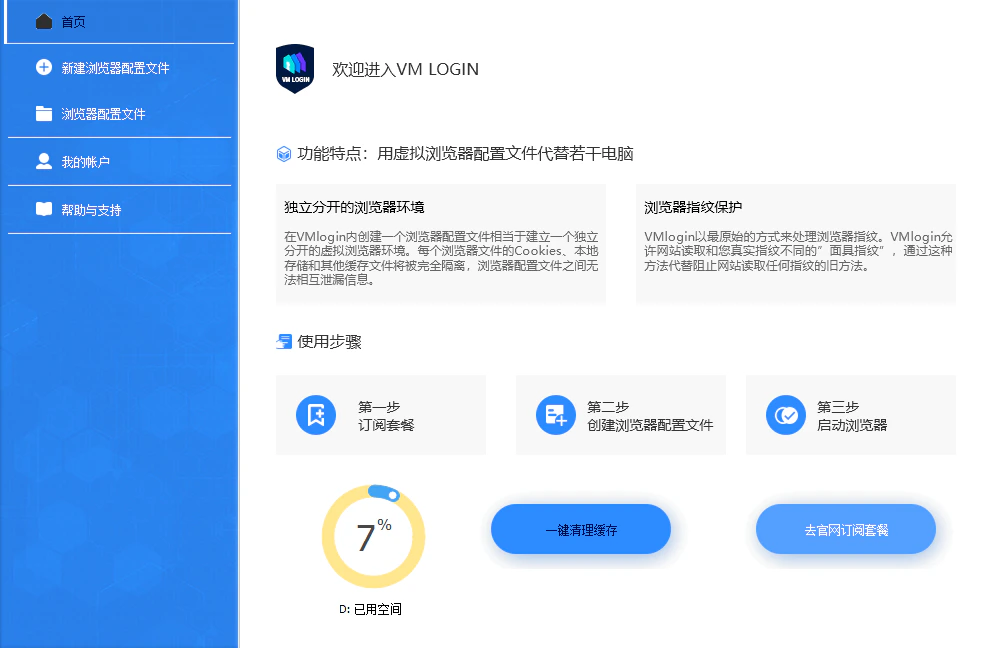
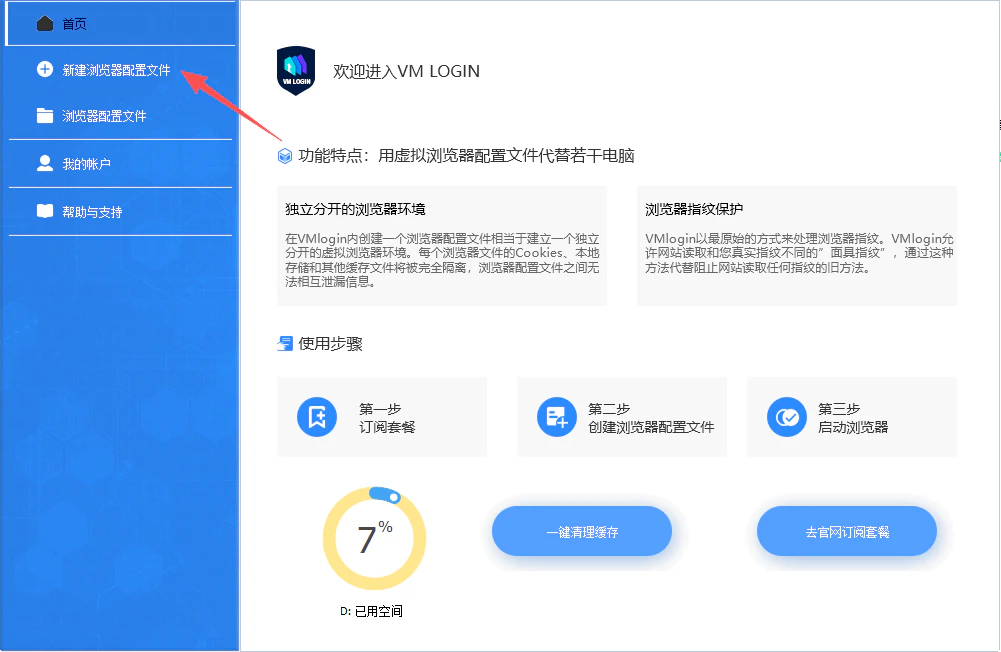
打開VMLogin客戶端後，點擊主介面下方的 **“新建瀏覽器配置文件”** 按鈕，進入配置頁面。

<img src="https://mintcdn.com/acme-2c62d9fa/-I0epiSaeyhL94EG/res/images/VML1-image.png?fit=max&auto=format&n=-I0epiSaeyhL94EG&q=85&s=8e649833c123ecbe1f791e86b79226d7" alt="VMLogin主介面與新建配置文件按鈕" width="997" height="648" data-path="res/images/VML1-image.png" />

<img src="https://mintcdn.com/acme-2c62d9fa/-I0epiSaeyhL94EG/res/images/VML2-image.png?fit=max&auto=format&n=-I0epiSaeyhL94EG&q=85&s=0a8179246eec62ab97dd9c5a73feeb81" alt="新建配置文件介面" width="1001" height="652" data-path="res/images/VML2-image.png" />

### 步驟三：配置瀏覽器基本資訊

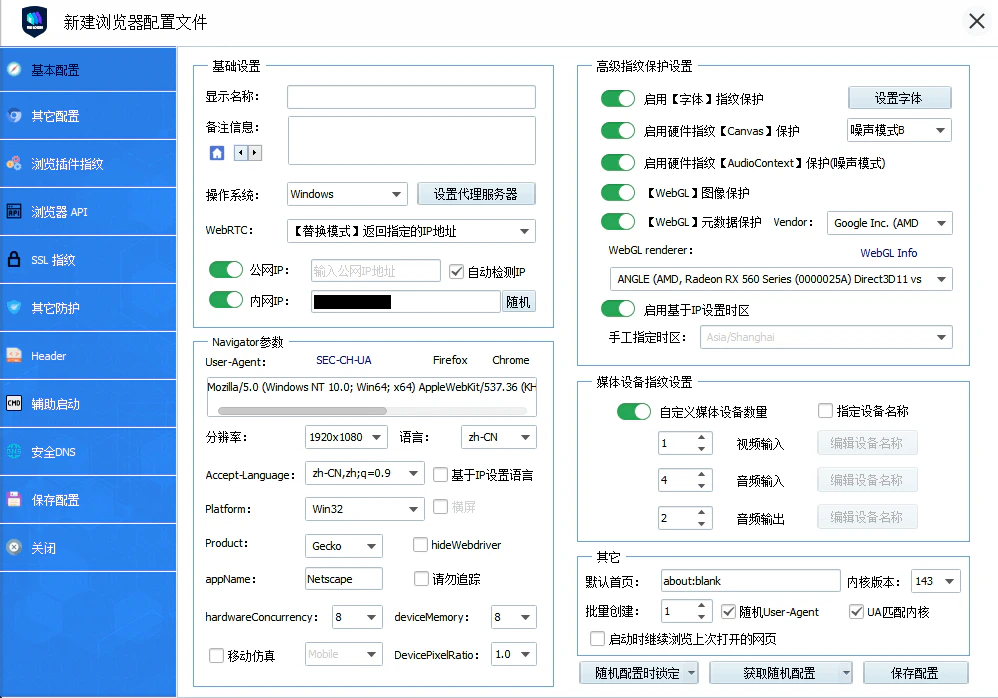
在彈出的配置視窗中，填寫瀏覽器配置文件的基本資訊，如名稱、備註、分組等。

<img src="https://mintcdn.com/acme-2c62d9fa/-I0epiSaeyhL94EG/res/images/VML3-image.png?fit=max&auto=format&n=-I0epiSaeyhL94EG&q=85&s=da3d3f93fe04076c927ff90dccf30d7b" alt="新建瀏覽器配置視窗" width="998" height="698" data-path="res/images/VML3-image.png" />

### 步驟四：啟用代理並選擇代理類型

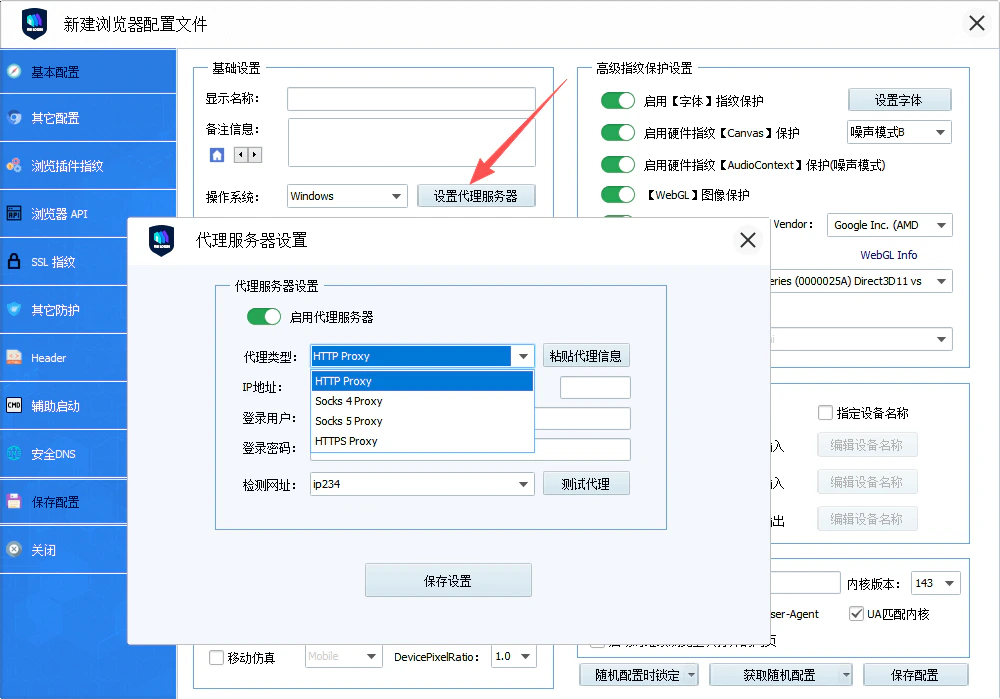
在配置頁面中，找到 **“代理伺服器”** 部分，勾選 **“啟用代理伺服器”**，然後選擇合適的代理協議。

**請注意：** Ip2up 目前支援 **HTTP** 和 **SOCKS5** 兩種代理協議，請根據實際需求選擇。

<img src="https://mintcdn.com/acme-2c62d9fa/-I0epiSaeyhL94EG/res/images/VML4-image.png?fit=max&auto=format&n=-I0epiSaeyhL94EG&q=85&s=2e003a3de0b1d5935955b17ec151f4ce" alt="啟用代理伺服器並選擇協議類型" width="1000" height="699" data-path="res/images/VML4-image.png" />

### 步驟五：取得Ip2up代理資訊

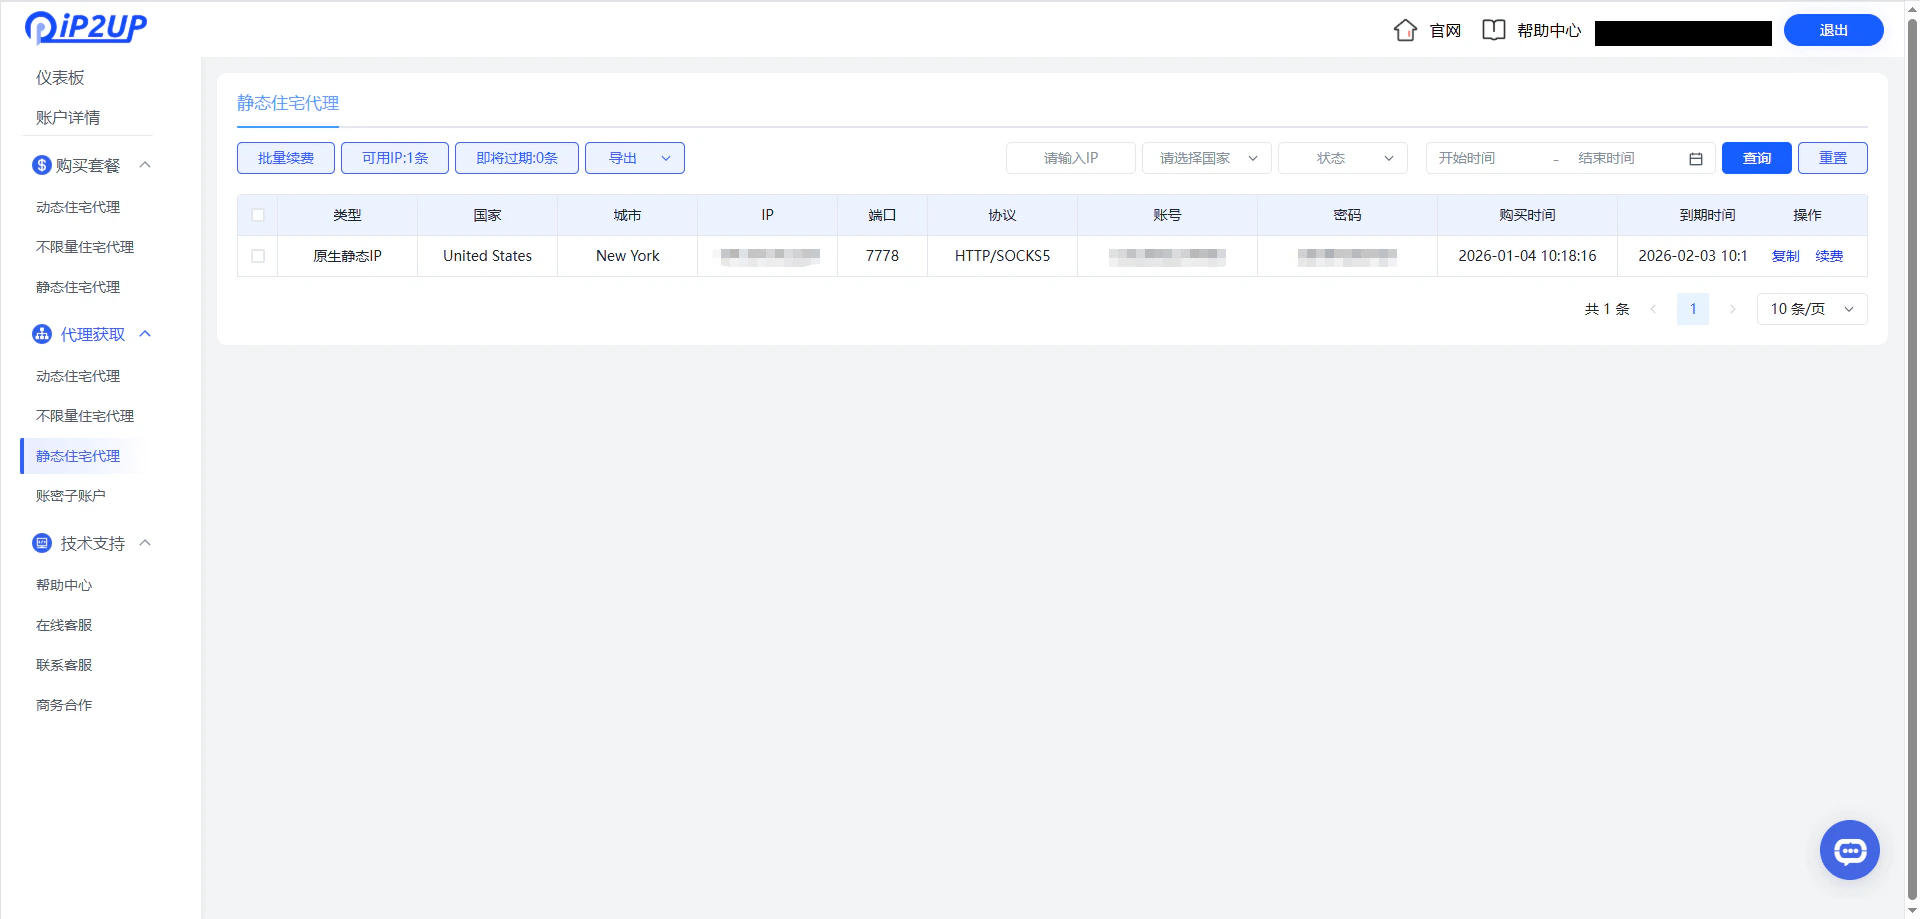
登入 [Ip2up代理平台](https://www.Ip2up.com/zh-cn/)，進入 **靜態住宅代理** 頁面，查看並複製您的代理資訊（伺服器地址、端口、帳號、密碼）。

<img src="https://mintcdn.com/acme-2c62d9fa/-I0epiSaeyhL94EG/res/images/VML5-image.png?fit=max&auto=format&n=-I0epiSaeyhL94EG&q=85&s=9b369b490aabe201e13d70d613bd55b7" alt="Ip2up代理資訊提取頁面" width="1920" height="919" data-path="res/images/VML5-image.png" />

### 步驟六：填寫代理資訊

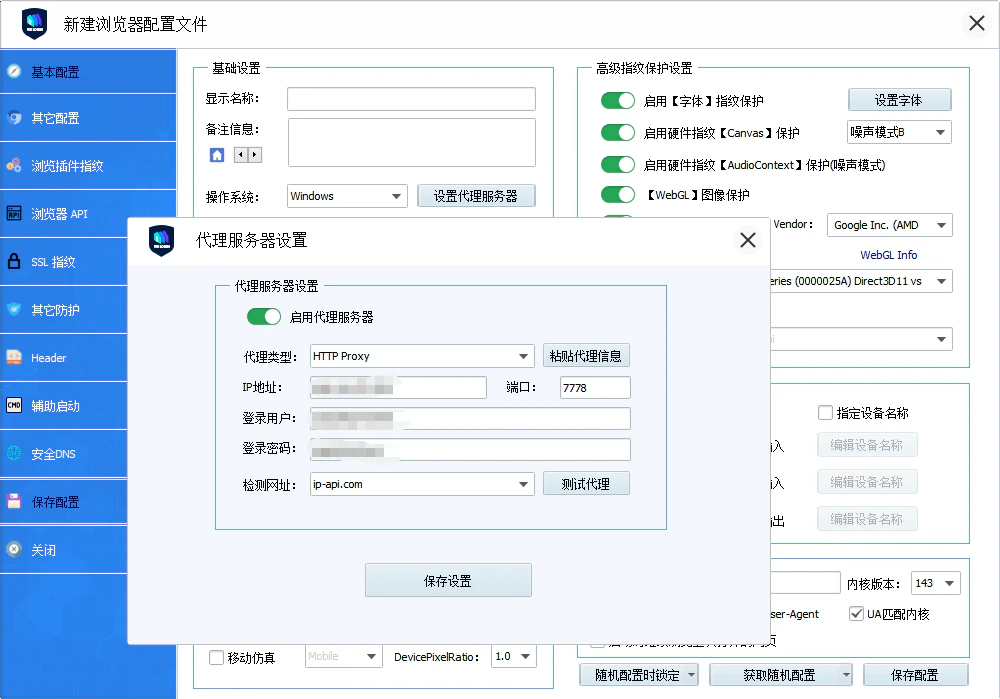
將複製的代理資訊填入VMLogin代理設定對應的輸入框中。

<img src="https://mintcdn.com/acme-2c62d9fa/-I0epiSaeyhL94EG/res/images/VML6-image.png?fit=max&auto=format&n=-I0epiSaeyhL94EG&q=85&s=857d79433b233329dc498ee78edee01a" alt="VMLogin代理資訊填寫範例" width="1000" height="699" data-path="res/images/VML6-image.png" />

### 步驟七：測試代理連通性

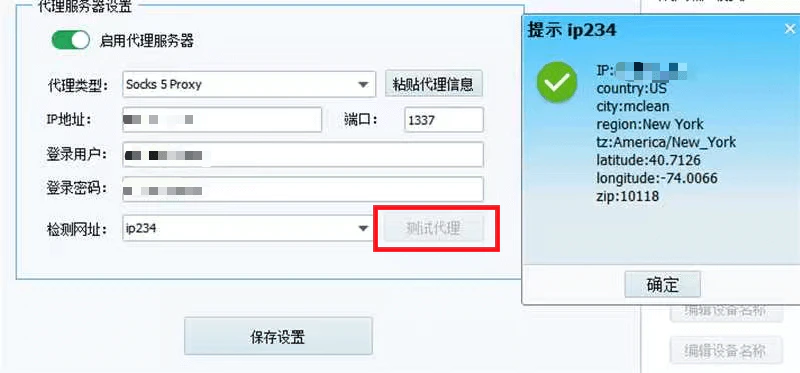
填寫完畢後，點擊 **“測試代理”** 按鈕，系統將自動檢測代理IP的連通性。若顯示 **“代理測試成功”**，則表示配置無誤。

<img src="https://mintcdn.com/acme-2c62d9fa/-I0epiSaeyhL94EG/res/images/VML7-image.png?fit=max&auto=format&n=-I0epiSaeyhL94EG&q=85&s=9f64a91b814fc0130457c9ba8405d87a" alt="代理測試成功提示" width="800" height="373" data-path="res/images/VML7-image.png" />

### 步驟八：啟動瀏覽器環境

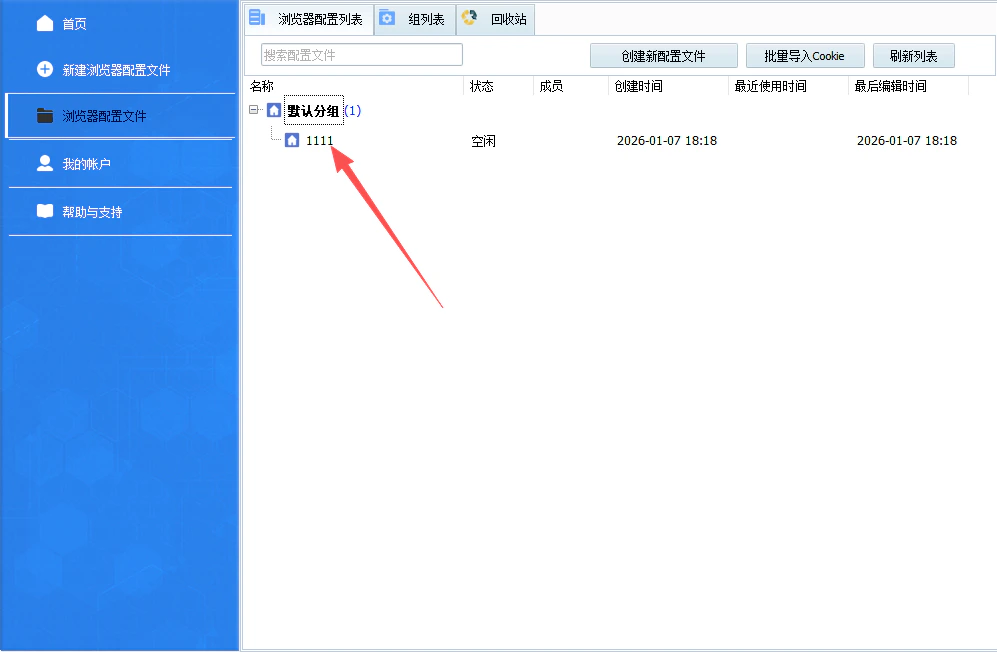
返回配置文件列表，找到剛剛創建的配置文件，雙擊該條目或點擊 **“啟動”** 按鈕，打開瀏覽器。

<img src="https://mintcdn.com/acme-2c62d9fa/-I0epiSaeyhL94EG/res/images/VML8-image.png?fit=max&auto=format&n=-I0epiSaeyhL94EG&q=85&s=dba98d4702f5faa17c9548bdedbee8e1" alt="啟動已配置的瀏覽器環境" width="997" height="652" data-path="res/images/VML8-image.png" />

### 步驟九：驗證代理IP

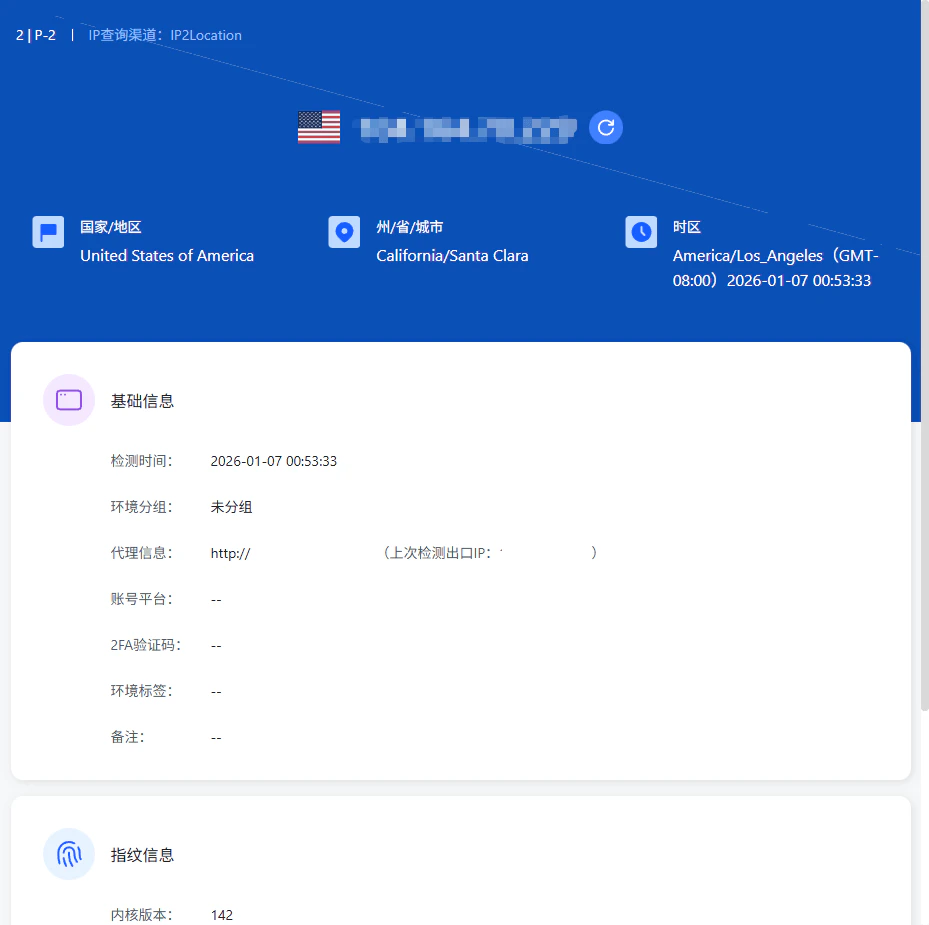
在打開的瀏覽器中存取IP檢測網站，確認顯示的IP地址與Ip2up提供的代理IP一致。

<img src="https://mintcdn.com/acme-2c62d9fa/-I0epiSaeyhL94EG/res/images/VML9-image.png?fit=max&auto=format&n=-I0epiSaeyhL94EG&q=85&s=479a98d03d4dbae62fa4c77e683ea4fb" alt="代理IP驗證頁面" width="929" height="925" data-path="res/images/VML9-image.png" />

✅ **至此，已成功在VMLogin防關聯瀏覽器中配置了Ip2up代理IP，可開始進行安全、隔離的多帳號操作。**