> ## Documentation Index
> Fetch the complete documentation index at: https://help.ip2up.com/llms.txt
> Use this file to discover all available pages before exploring further.

# 紫鳥瀏覽器整合使用教學

<Tip>平台的所有代理產品均需要在海外網路環境下使用，海外網路環境需要客戶自行配置。</Tip>

本教學將介紹如何在 **紫鳥指紋瀏覽器** 中配置 **[Ip2up](https://www.Ip2up.com/zh-cn/)** 代理IP，實現安全、隔離的多帳號操作環境。

<Info>動態住宅IP的使用方式和靜態住宅IP的使用方式一樣</Info>

### 步驟一：下載並安裝紫鳥指紋瀏覽器

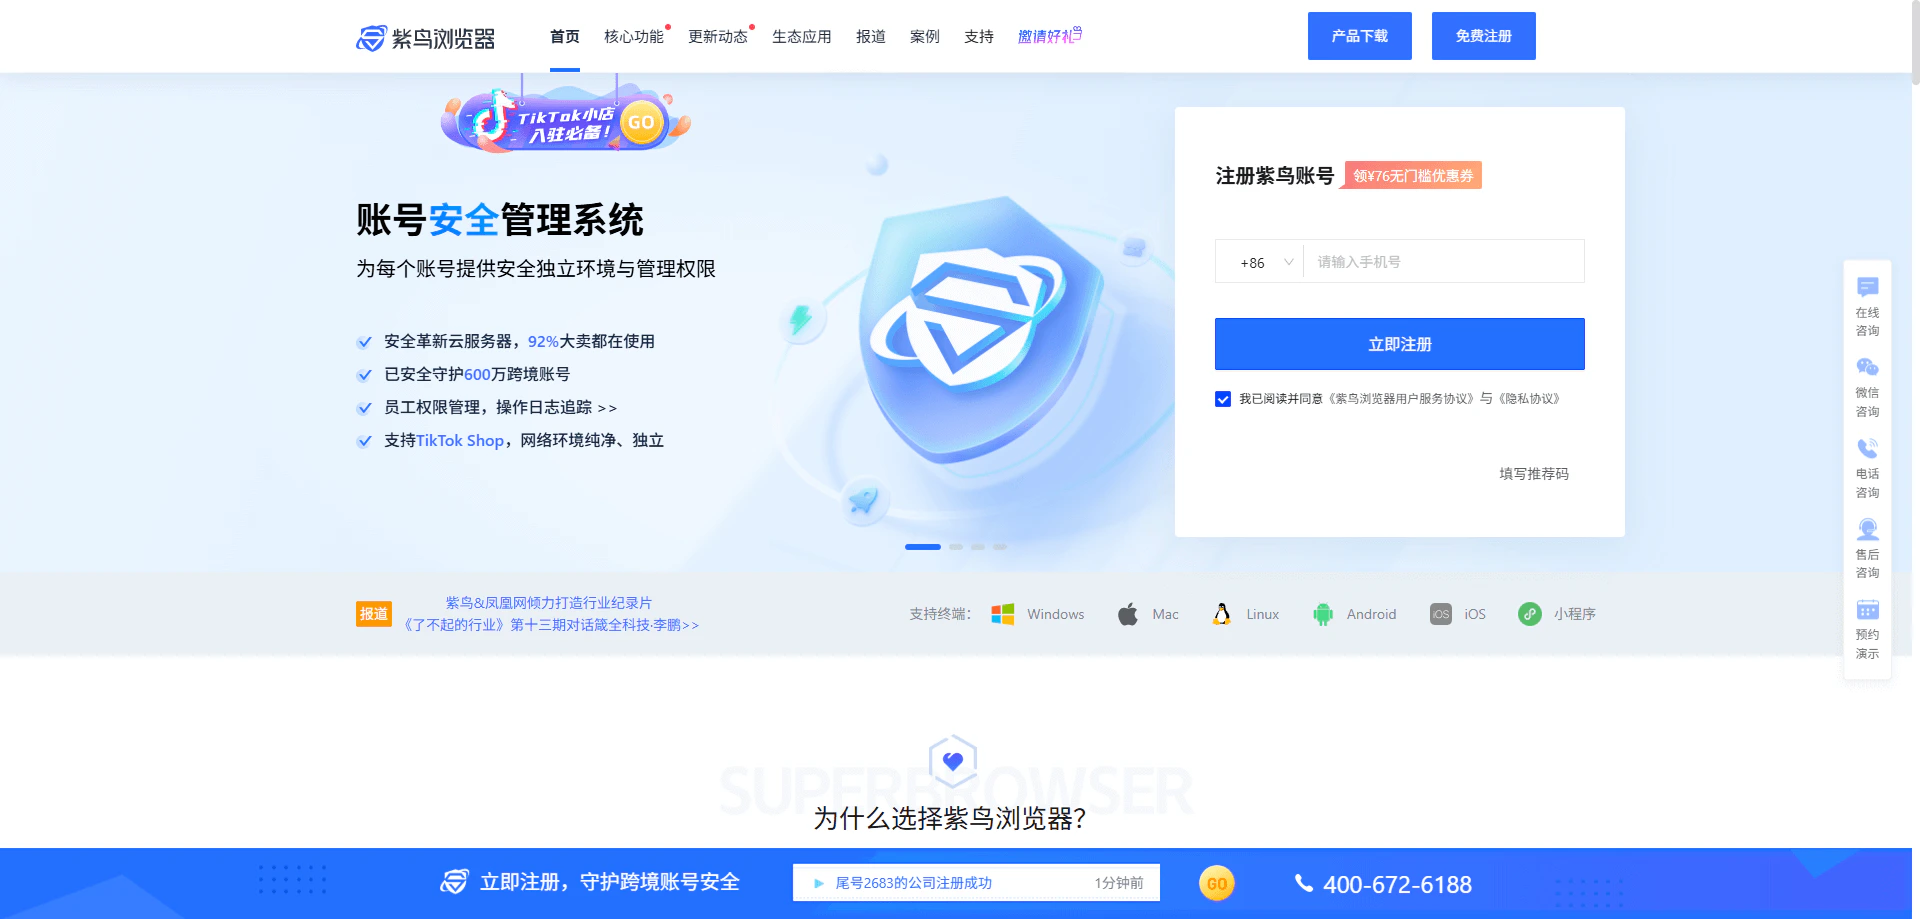
訪問 **紫鳥指紋瀏覽器官網** ，註冊帳號並下載客戶端，完成安裝後啟動軟體。

<img src="https://mintcdn.com/acme-2c62d9fa/n1p5_UTMKVe_S6VC/res/images/Zi11-image.png?fit=max&auto=format&n=n1p5_UTMKVe_S6VC&q=85&s=2565921c7950c62d29d8872b9345702a" alt="紫鳥指紋瀏覽器官網下載頁面" width="1920" height="919" data-path="res/images/Zi11-image.png" />

### 步驟二：進入設備管理頁面

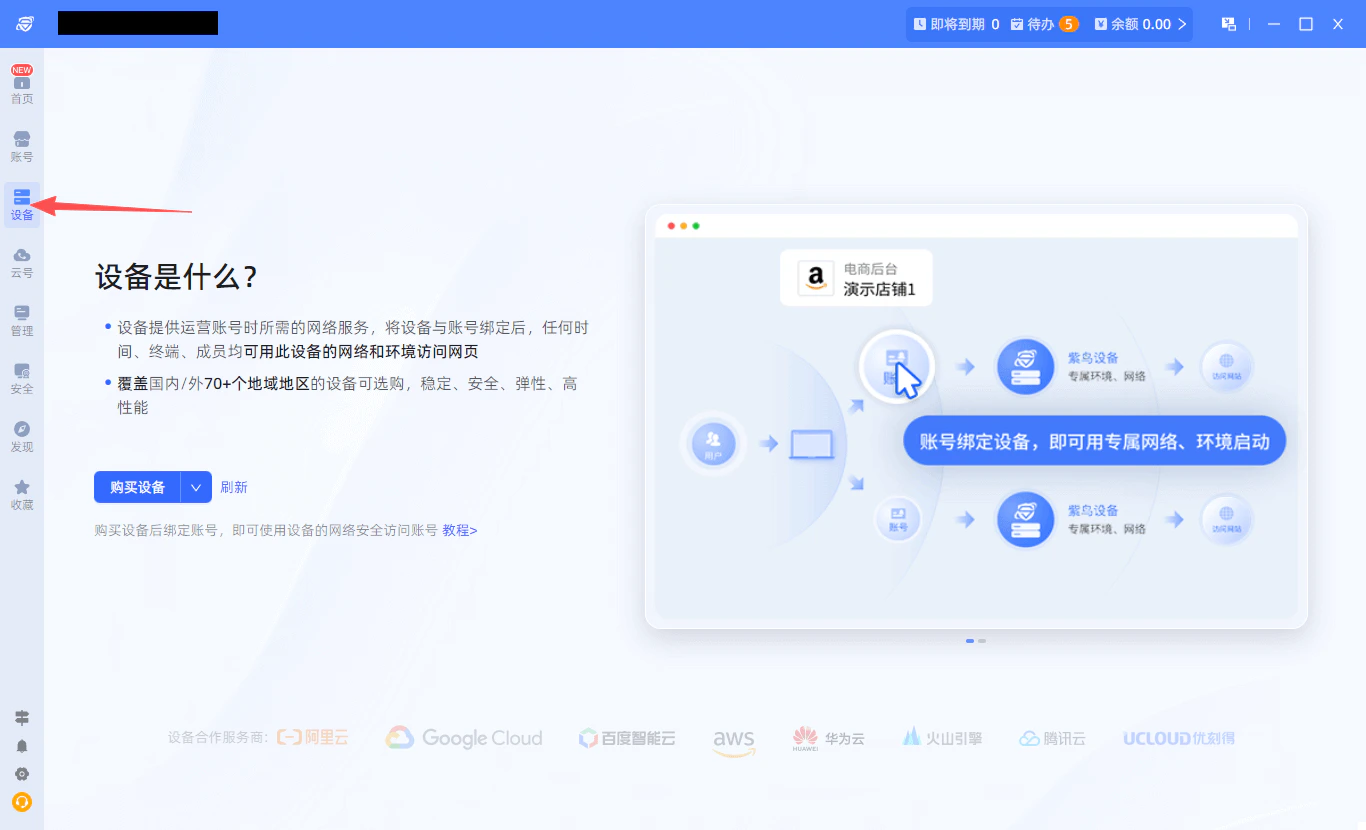
打開客戶端後，點擊左側導覽列中的 **設備** 選單，進入設備管理介面。

<img src="https://mintcdn.com/acme-2c62d9fa/n1p5_UTMKVe_S6VC/res/images/Zi1-image.png?fit=max&auto=format&n=n1p5_UTMKVe_S6VC&q=85&s=17ecddea3b8f42b30331092ae4328c60" alt="紫鳥瀏覽器設備管理頁面" width="1366" height="830" data-path="res/images/Zi1-image.png" />

### 步驟三：添加自有設備

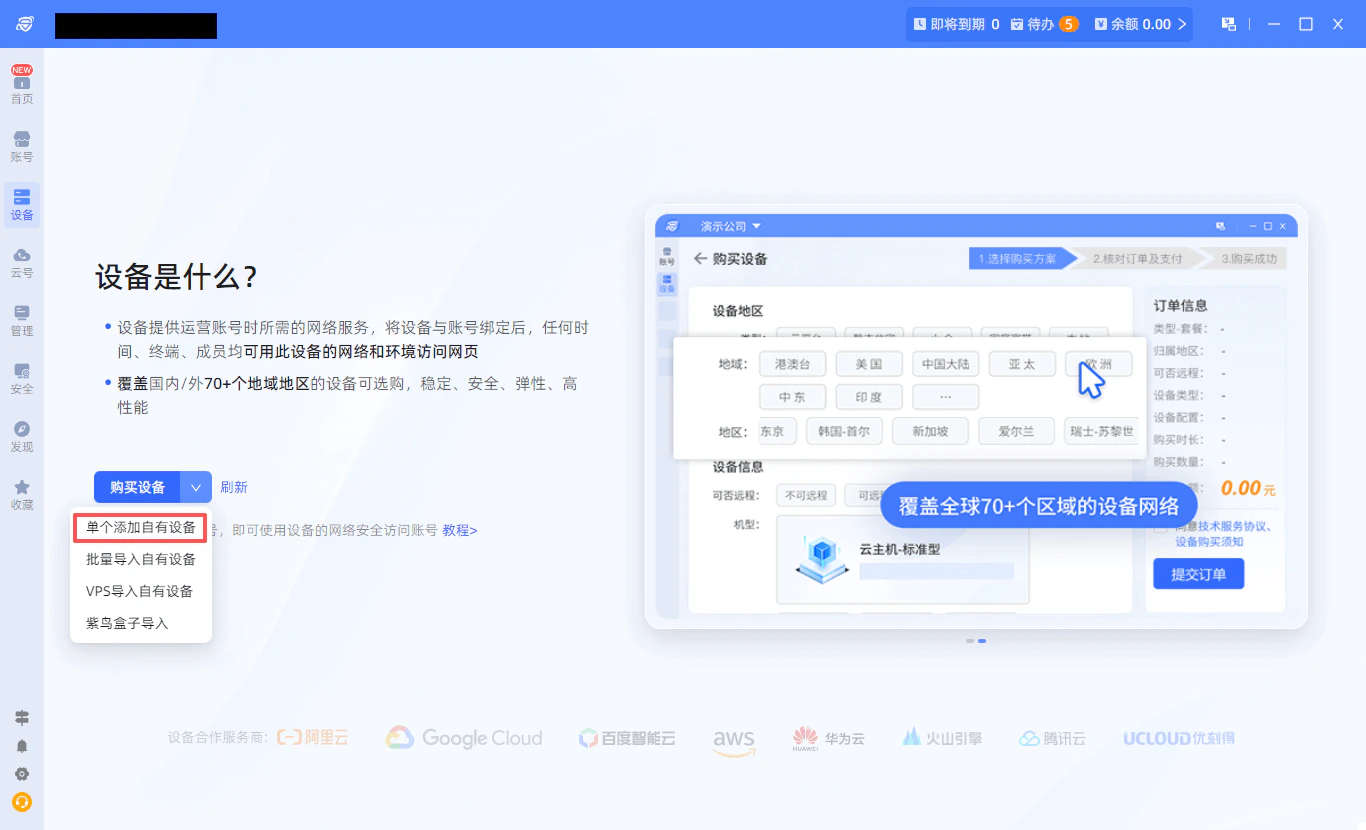
在設備管理介面中，點擊 **添加自有設備** 按鈕，開始配置新設備。

<img src="https://mintcdn.com/acme-2c62d9fa/n1p5_UTMKVe_S6VC/res/images/Zi2-image.png?fit=max&auto=format&n=n1p5_UTMKVe_S6VC&q=85&s=87b738b9e84b8ff0772fe57cfc71de69" alt="添加自有設備按鈕" width="1366" height="830" data-path="res/images/Zi2-image.png" />

### 步驟四：取得Ip2up代理資訊

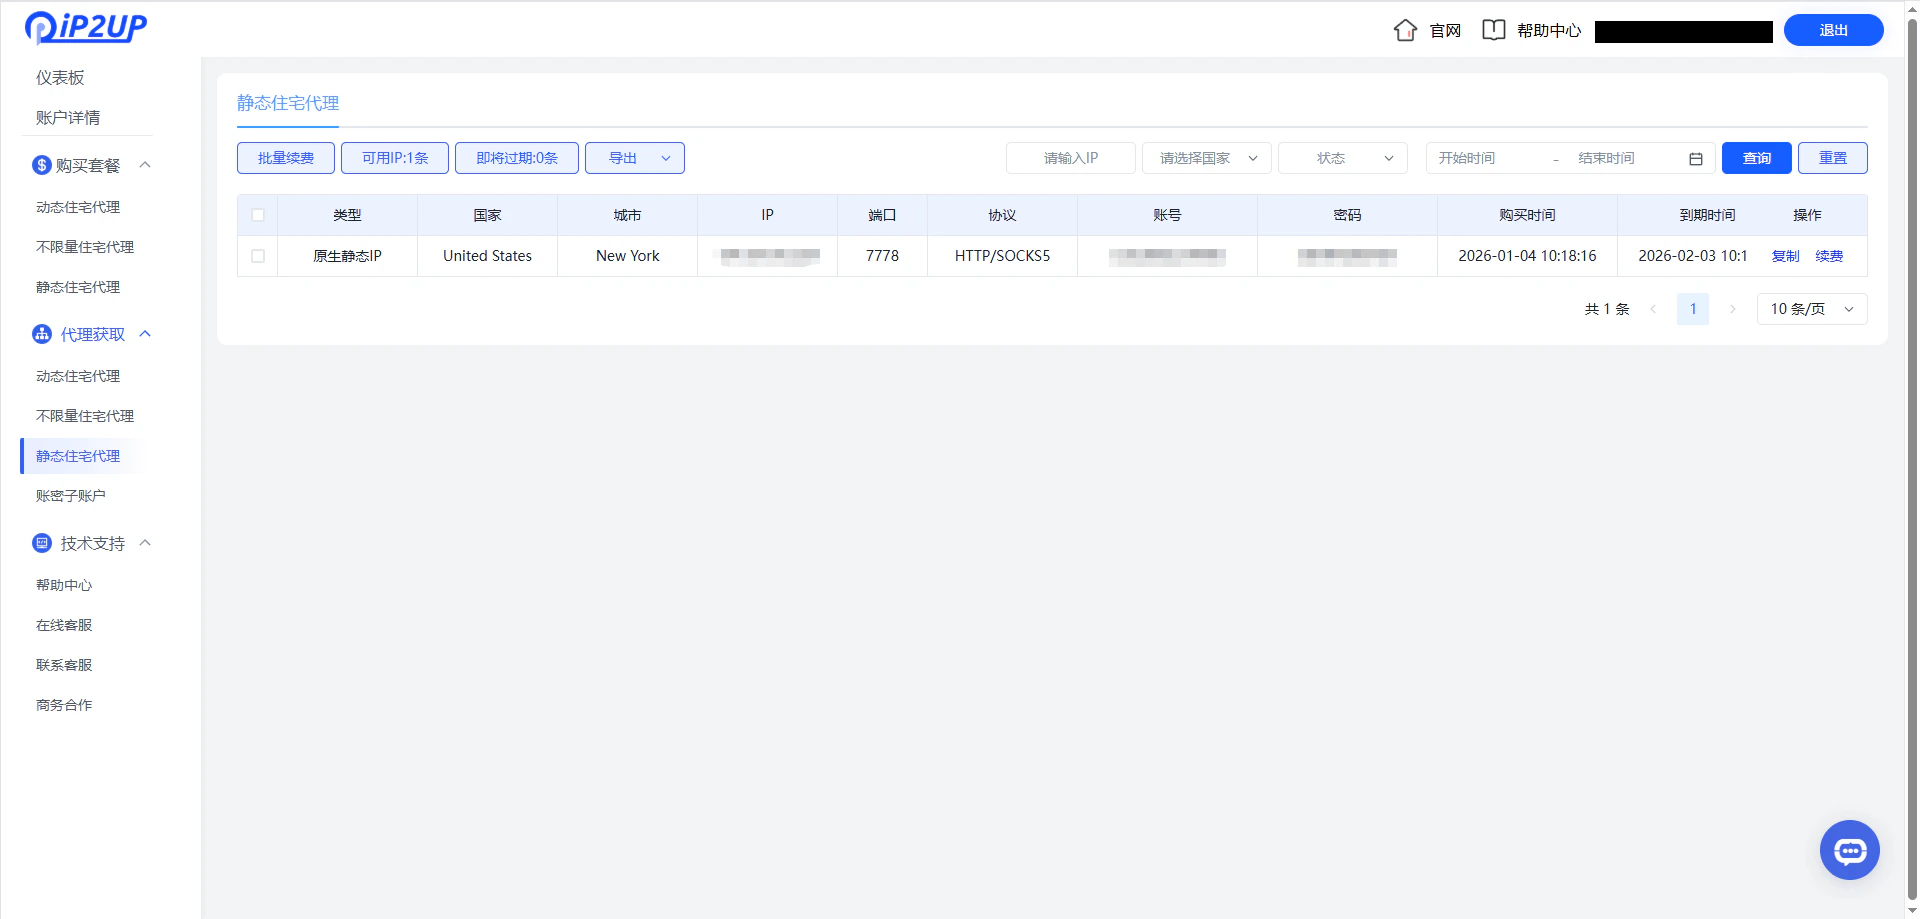
登入 [Ip2up代理平台](https://www.Ip2up.com/zh-cn/)，進入 **靜態住宅代理** 頁面，查看並複製您的代理資訊（伺服器地址、端口、帳號、密碼）。

<img src="https://mintcdn.com/acme-2c62d9fa/n1p5_UTMKVe_S6VC/res/images/Zi3-image.png?fit=max&auto=format&n=n1p5_UTMKVe_S6VC&q=85&s=d495195595bed34361f3444af6d42e96" alt="Ip2up代理資訊提取頁面" width="1920" height="919" data-path="res/images/Zi3-image.png" />

### 步驟五：配置代理類型與資訊

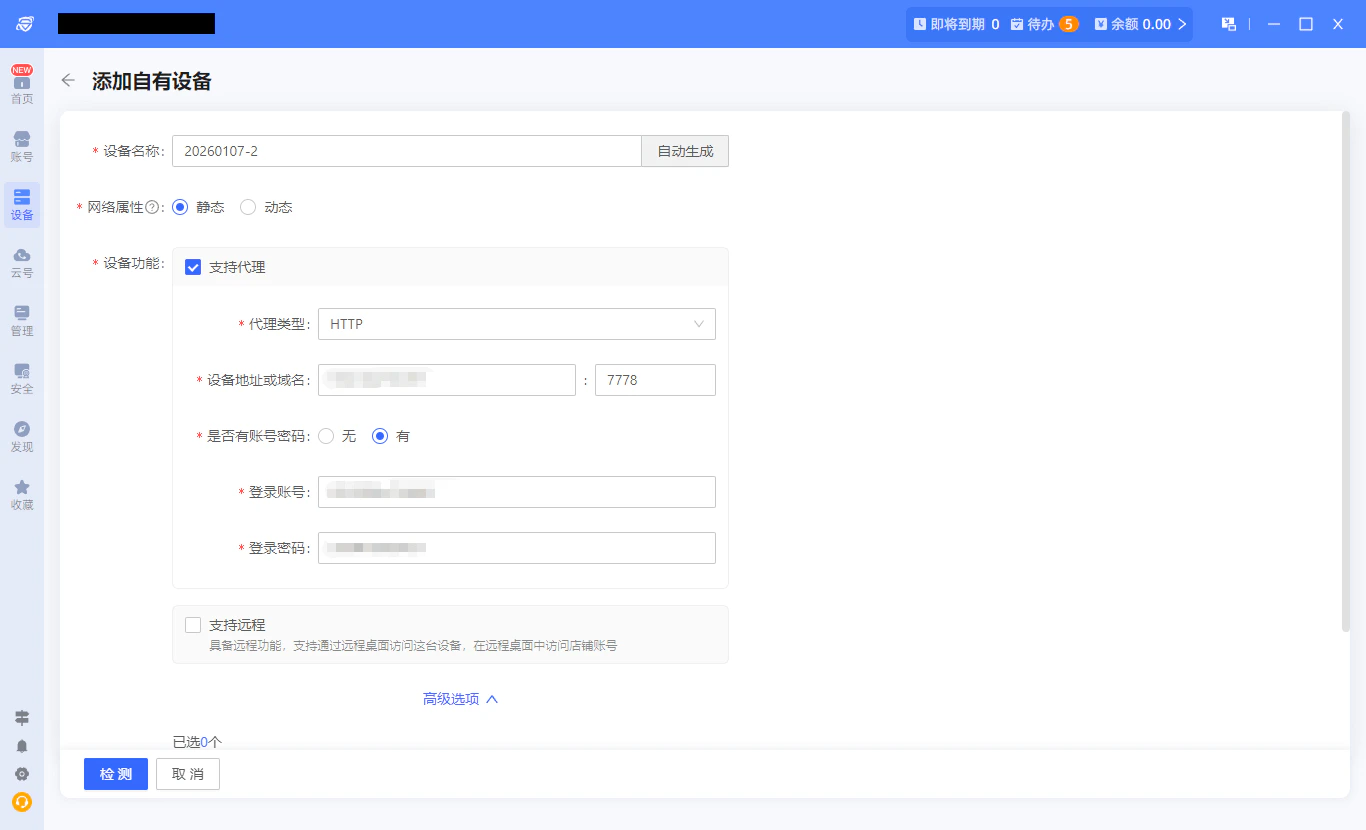
在設備功能配置中，找到 **支援代理** 選項，勾選並選擇與Ip2up代理對應的協議類型。

**請注意：** Ip2up 目前支援 **HTTP** 和 **SOCKS5** 兩種代理協議，請根據實際需求選擇。

<img src="https://mintcdn.com/acme-2c62d9fa/n1p5_UTMKVe_S6VC/res/images/Zi4-image.png?fit=max&auto=format&n=n1p5_UTMKVe_S6VC&q=85&s=21c394786c19166483becaf6a6e46a2d" alt="選擇代理協議類型" width="1366" height="830" data-path="res/images/Zi4-image.png" />

### 步驟六：填寫代理資訊並測試連通性

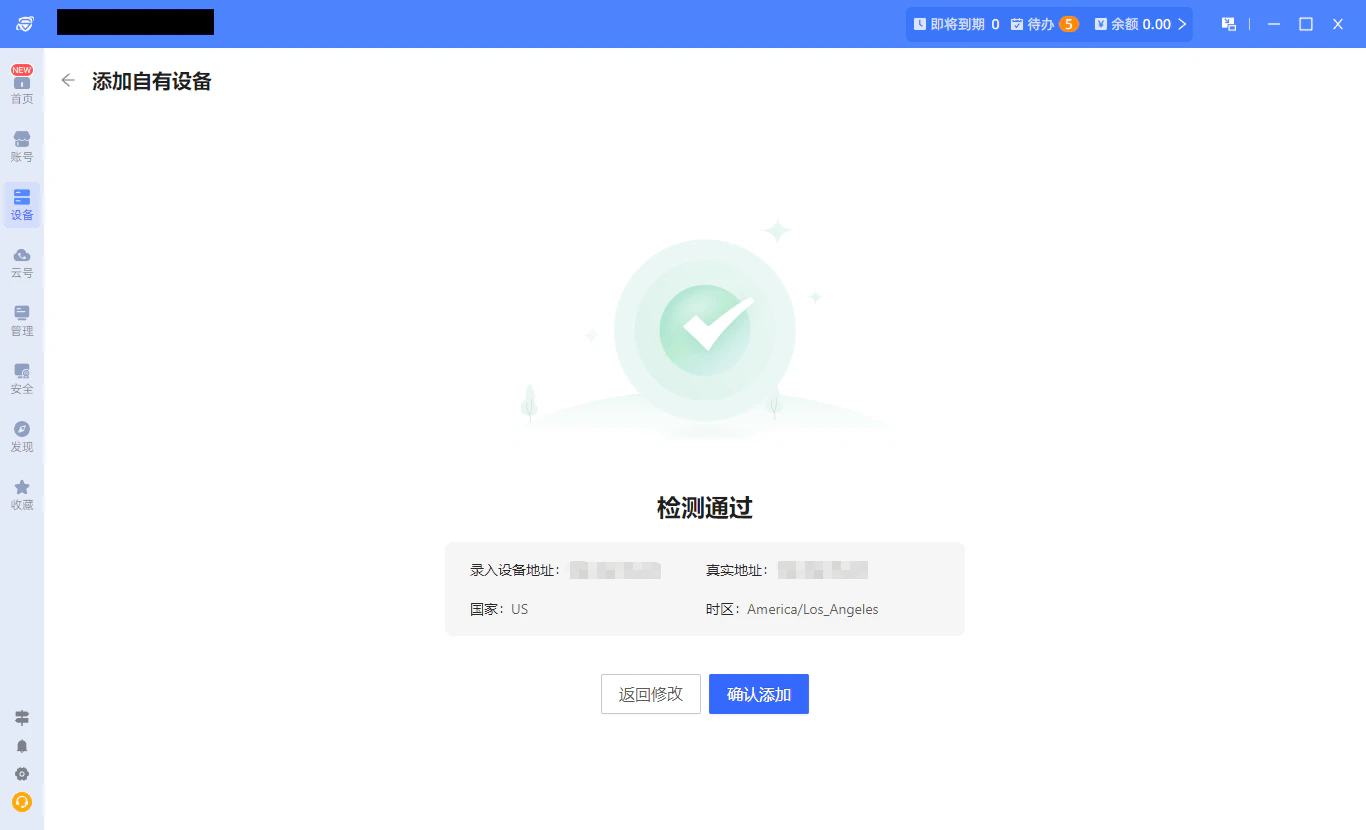
將取得的代理資訊填入對應的輸入框，然後點擊 **檢測** 按鈕，測試代理IP的連通性。確認無誤後，點擊 **確認添加** 完成設備配置。

您可以在 **設備 → 全部設備** 介面查看已配置的代理設備。
<img src="https://mintcdn.com/acme-2c62d9fa/n1p5_UTMKVe_S6VC/res/images/Zi5-image.png?fit=max&auto=format&n=n1p5_UTMKVe_S6VC&q=85&s=98836579336b4a6fe5a38ebd62e1fae1" alt="填寫代理資訊並測試連通性" width="1366" height="830" data-path="res/images/Zi5-image.png" />

### 步驟七：創建帳號並綁定設備

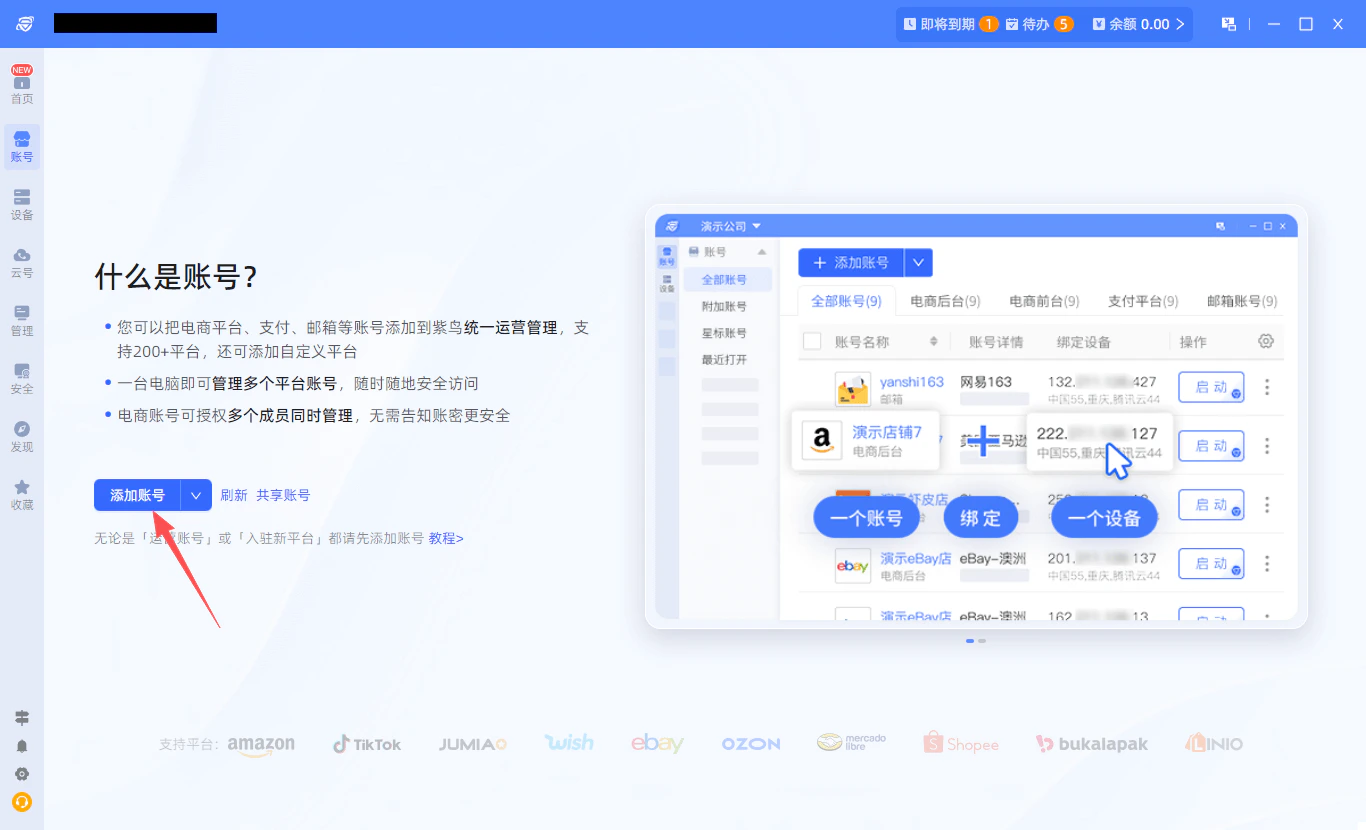
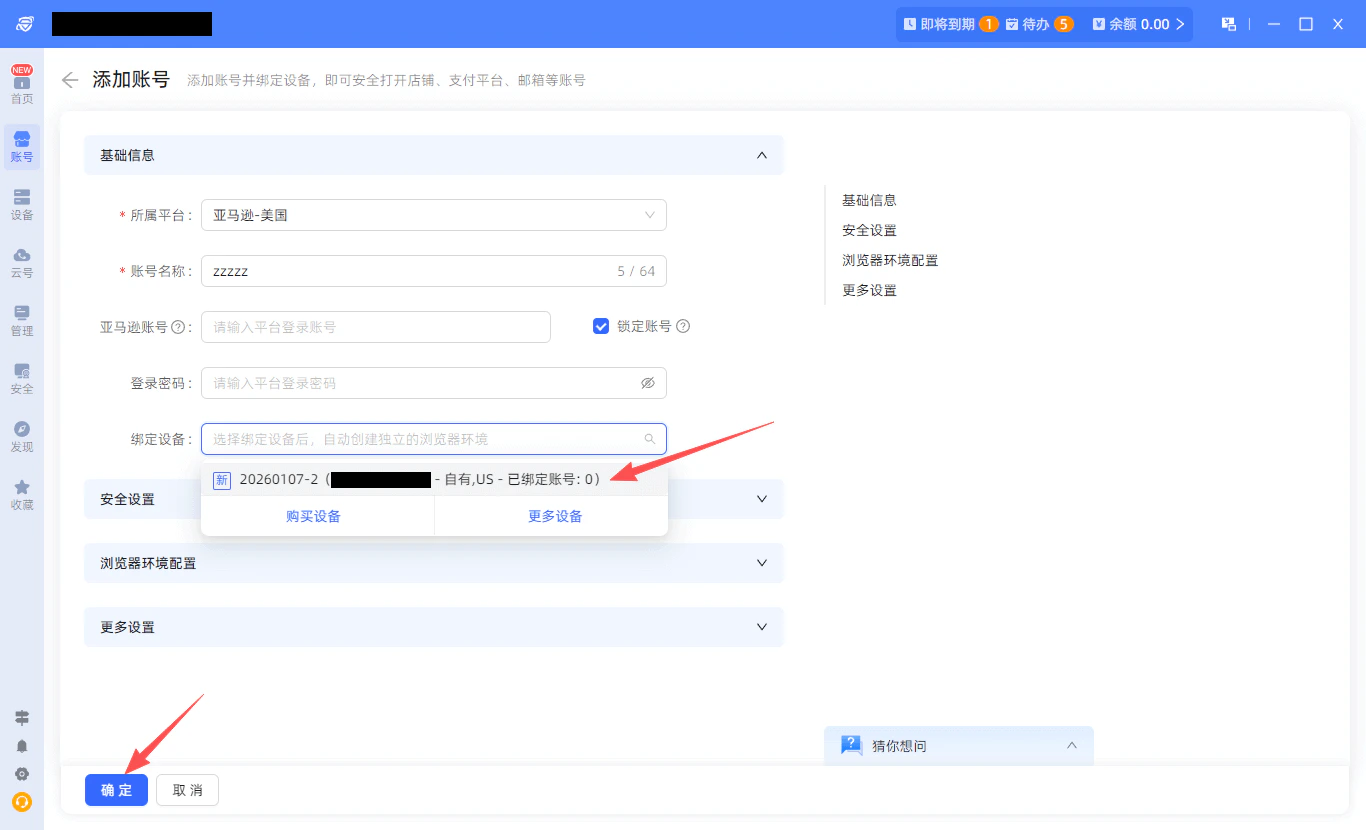
點擊左側導覽列的 **帳號**，選擇 **添加帳號**。在彈出的視窗中：

1. 選擇目標平台
2. 自定義帳號名稱
3. 在 **綁定設備** 中選擇剛剛創建的自有設備
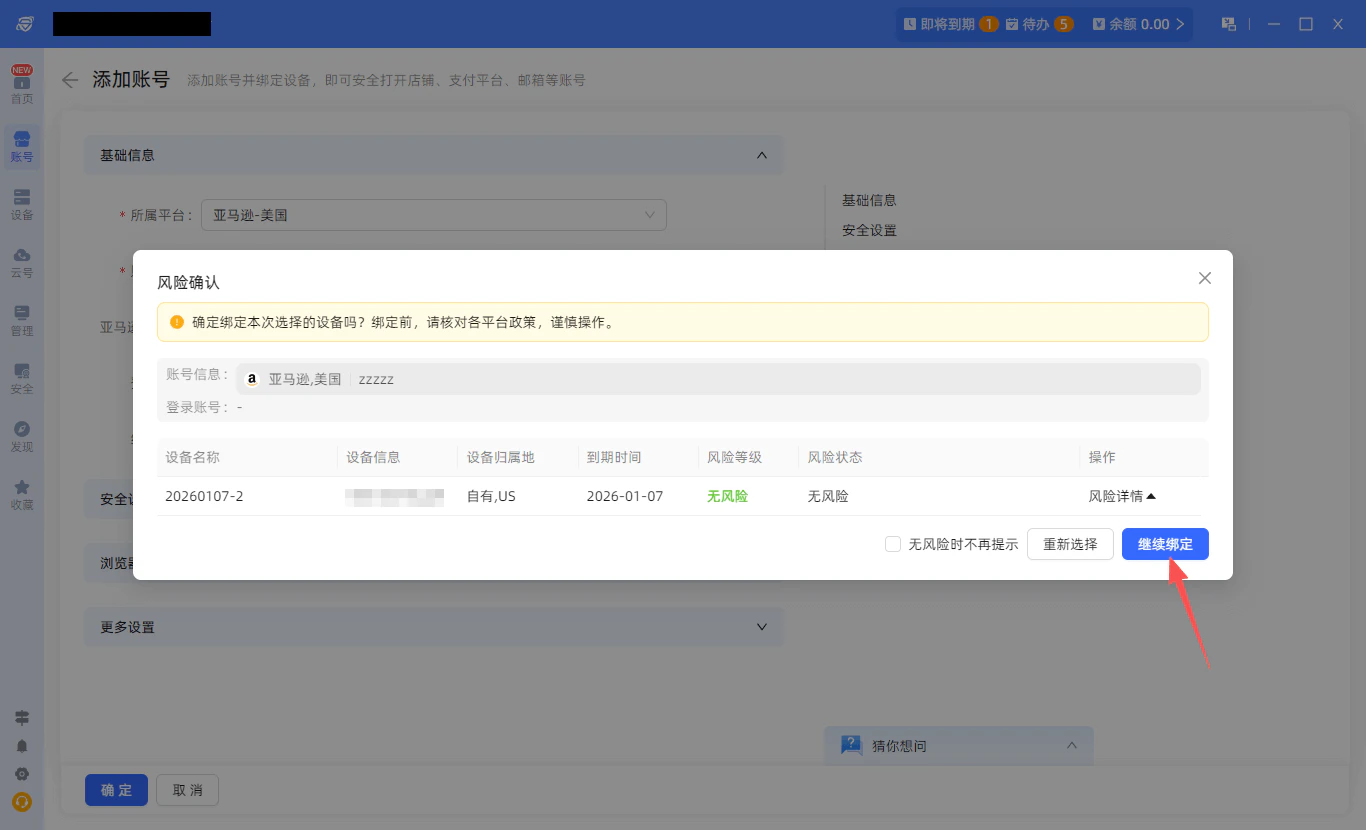
4. 點擊 **確定**，並在風險提示中選擇 **繼續綁定**

<img src="https://mintcdn.com/acme-2c62d9fa/n1p5_UTMKVe_S6VC/res/images/Zi6-image.png?fit=max&auto=format&n=n1p5_UTMKVe_S6VC&q=85&s=eefdb3fc6a5d6d14502fa1de65499fc2" alt="添加帳號配置介面" width="1366" height="830" data-path="res/images/Zi6-image.png" />

<img src="https://mintcdn.com/acme-2c62d9fa/n1p5_UTMKVe_S6VC/res/images/Zi7-image.png?fit=max&auto=format&n=n1p5_UTMKVe_S6VC&q=85&s=b488fb1f072a9bbbef064ccec503a714" alt="綁定設備選擇介面" width="1366" height="830" data-path="res/images/Zi7-image.png" />

<img src="https://mintcdn.com/acme-2c62d9fa/n1p5_UTMKVe_S6VC/res/images/Zi8-image.png?fit=max&auto=format&n=n1p5_UTMKVe_S6VC&q=85&s=d1a38d83a337bd0a4f173086292a1e8d" alt="風險提示確認頁面" width="1366" height="830" data-path="res/images/Zi8-image.png" />

### 步驟八：啟動帳號並存取瀏覽器

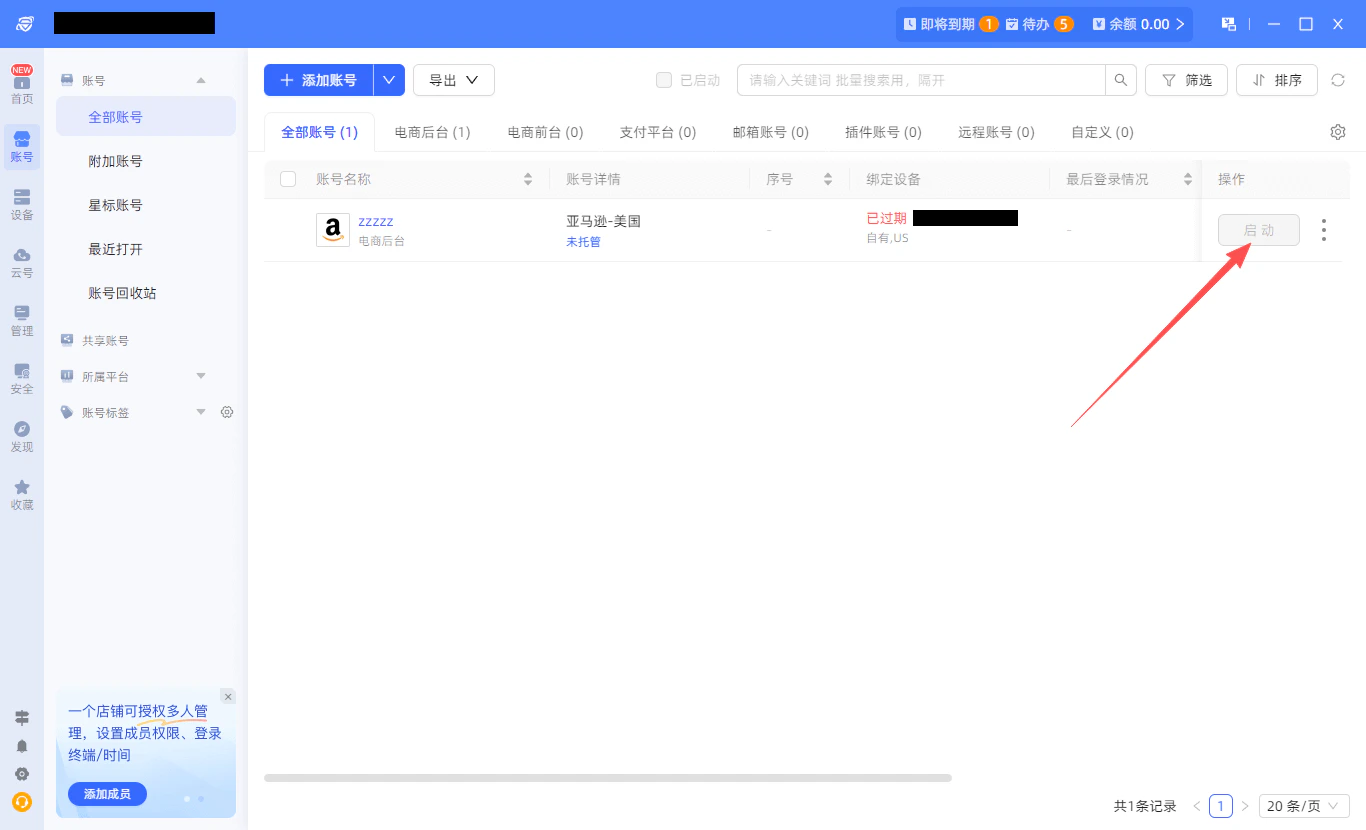
在 **帳號 → 全部帳號** 介面，找到剛剛創建的帳號，點擊 **啟動** 按鈕打開瀏覽器。

<img src="https://mintcdn.com/acme-2c62d9fa/n1p5_UTMKVe_S6VC/res/images/Zi9-image.png?fit=max&auto=format&n=n1p5_UTMKVe_S6VC&q=85&s=2cf679ebbd906136ecacec6926afb0ab" alt="啟動已配置帳號" width="1366" height="830" data-path="res/images/Zi9-image.png" />

### 步驟九：驗證代理IP

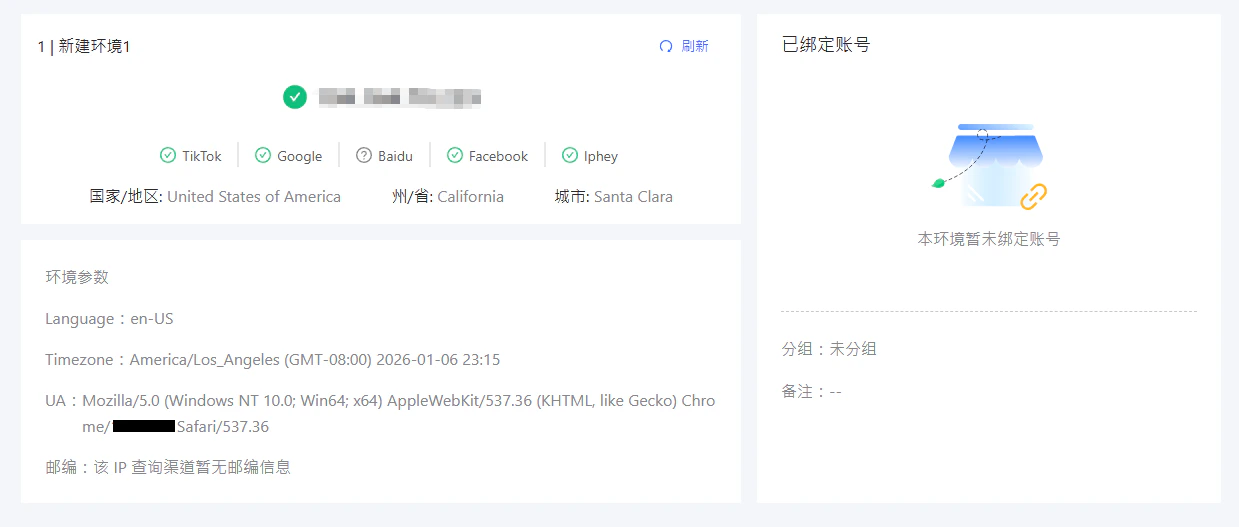
在打開的瀏覽器中存取IP檢測網站，確認顯示的IP地址與Ip2up提供的代理IP一致。

<img src="https://mintcdn.com/acme-2c62d9fa/n1p5_UTMKVe_S6VC/res/images/Zi10-image.png?fit=max&auto=format&n=n1p5_UTMKVe_S6VC&q=85&s=43b6ca64253fa4d124c4335925afff97" alt="代理IP驗證頁面" width="1239" height="527" data-path="res/images/Zi10-image.png" />

✅ **至此，已成功在紫鳥指紋瀏覽器中配置了Ip2up代理IP，可開始進行安全、隔離的多帳號操作。**