> ## Documentation Index
> Fetch the complete documentation index at: https://help.ip2up.com/llms.txt
> Use this file to discover all available pages before exploring further.
# v2rayNG
平台的所有代理產品均需要在海外網路環境下使用,海外網路環境需要客戶自行配置。
本文將指導您如何在安卓設備上使用 **v2rayNG** 配置 **Ip2up** 住宅代理,實現安全訪問網路資源。
### 第一步:設定全域路由模式
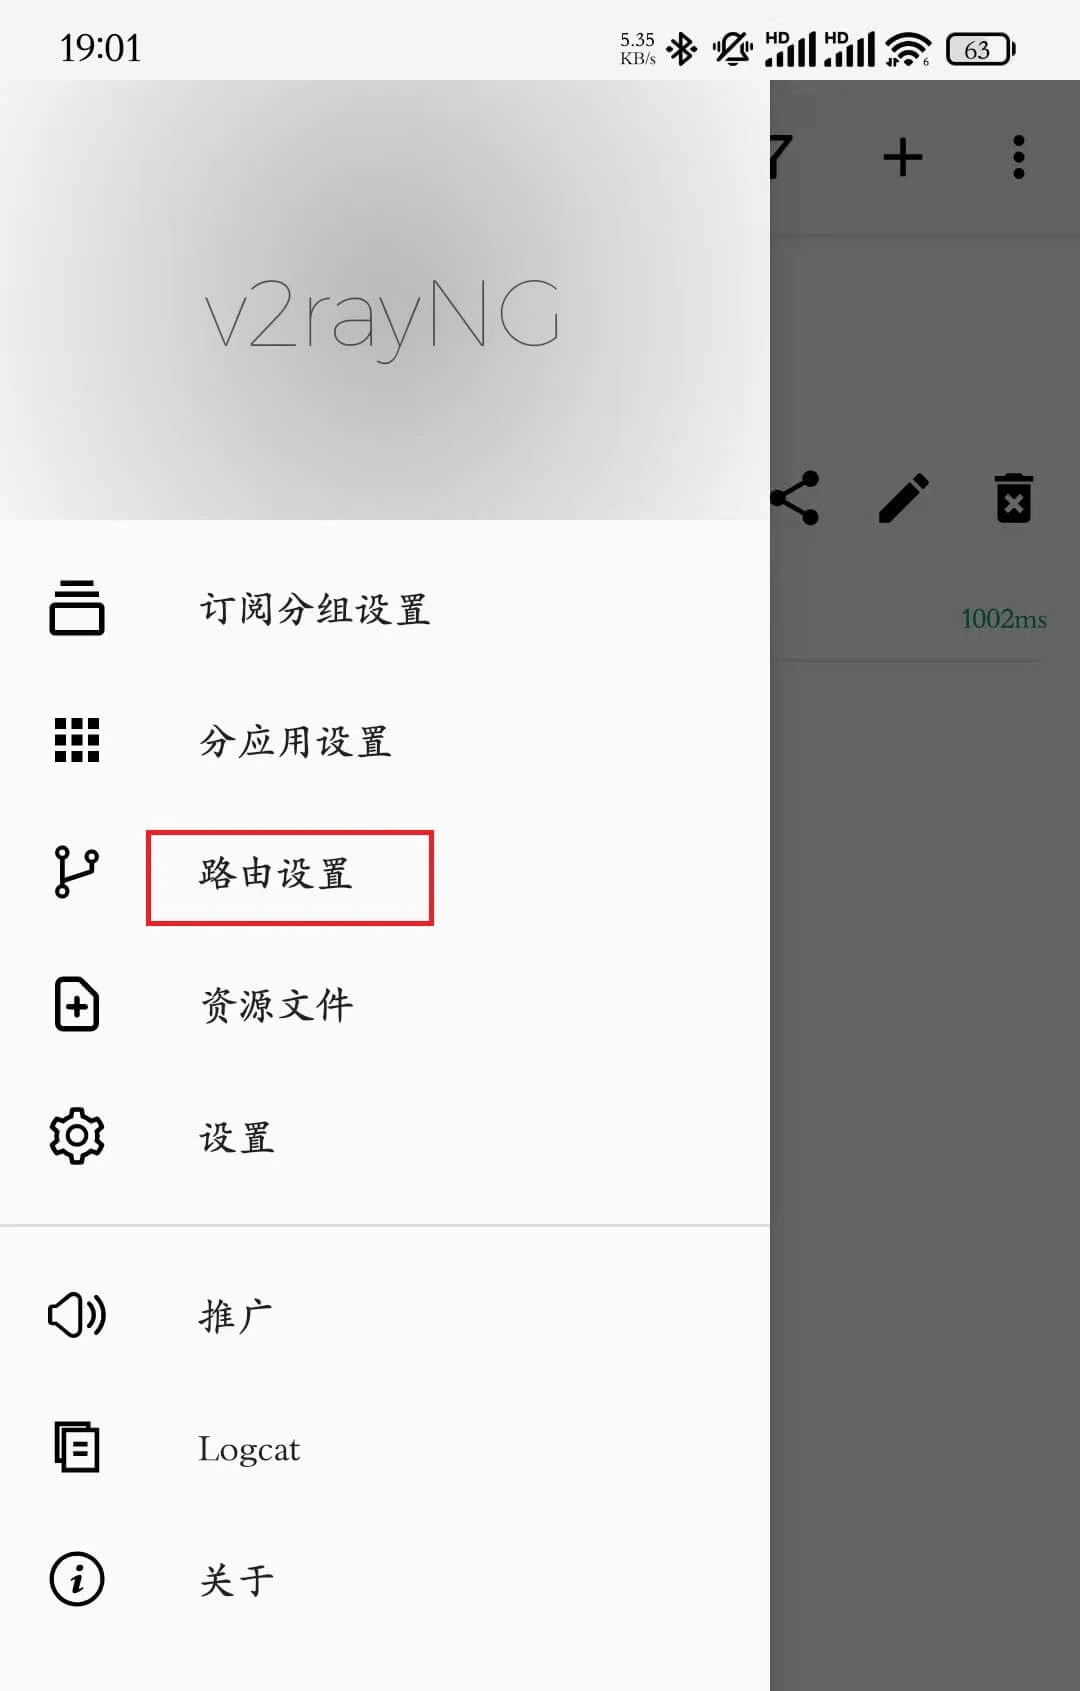
開啟 v2rayNG 應用,點擊左上角選單進入 **「路由設定」**。
 ### 第二步:調整路由配置
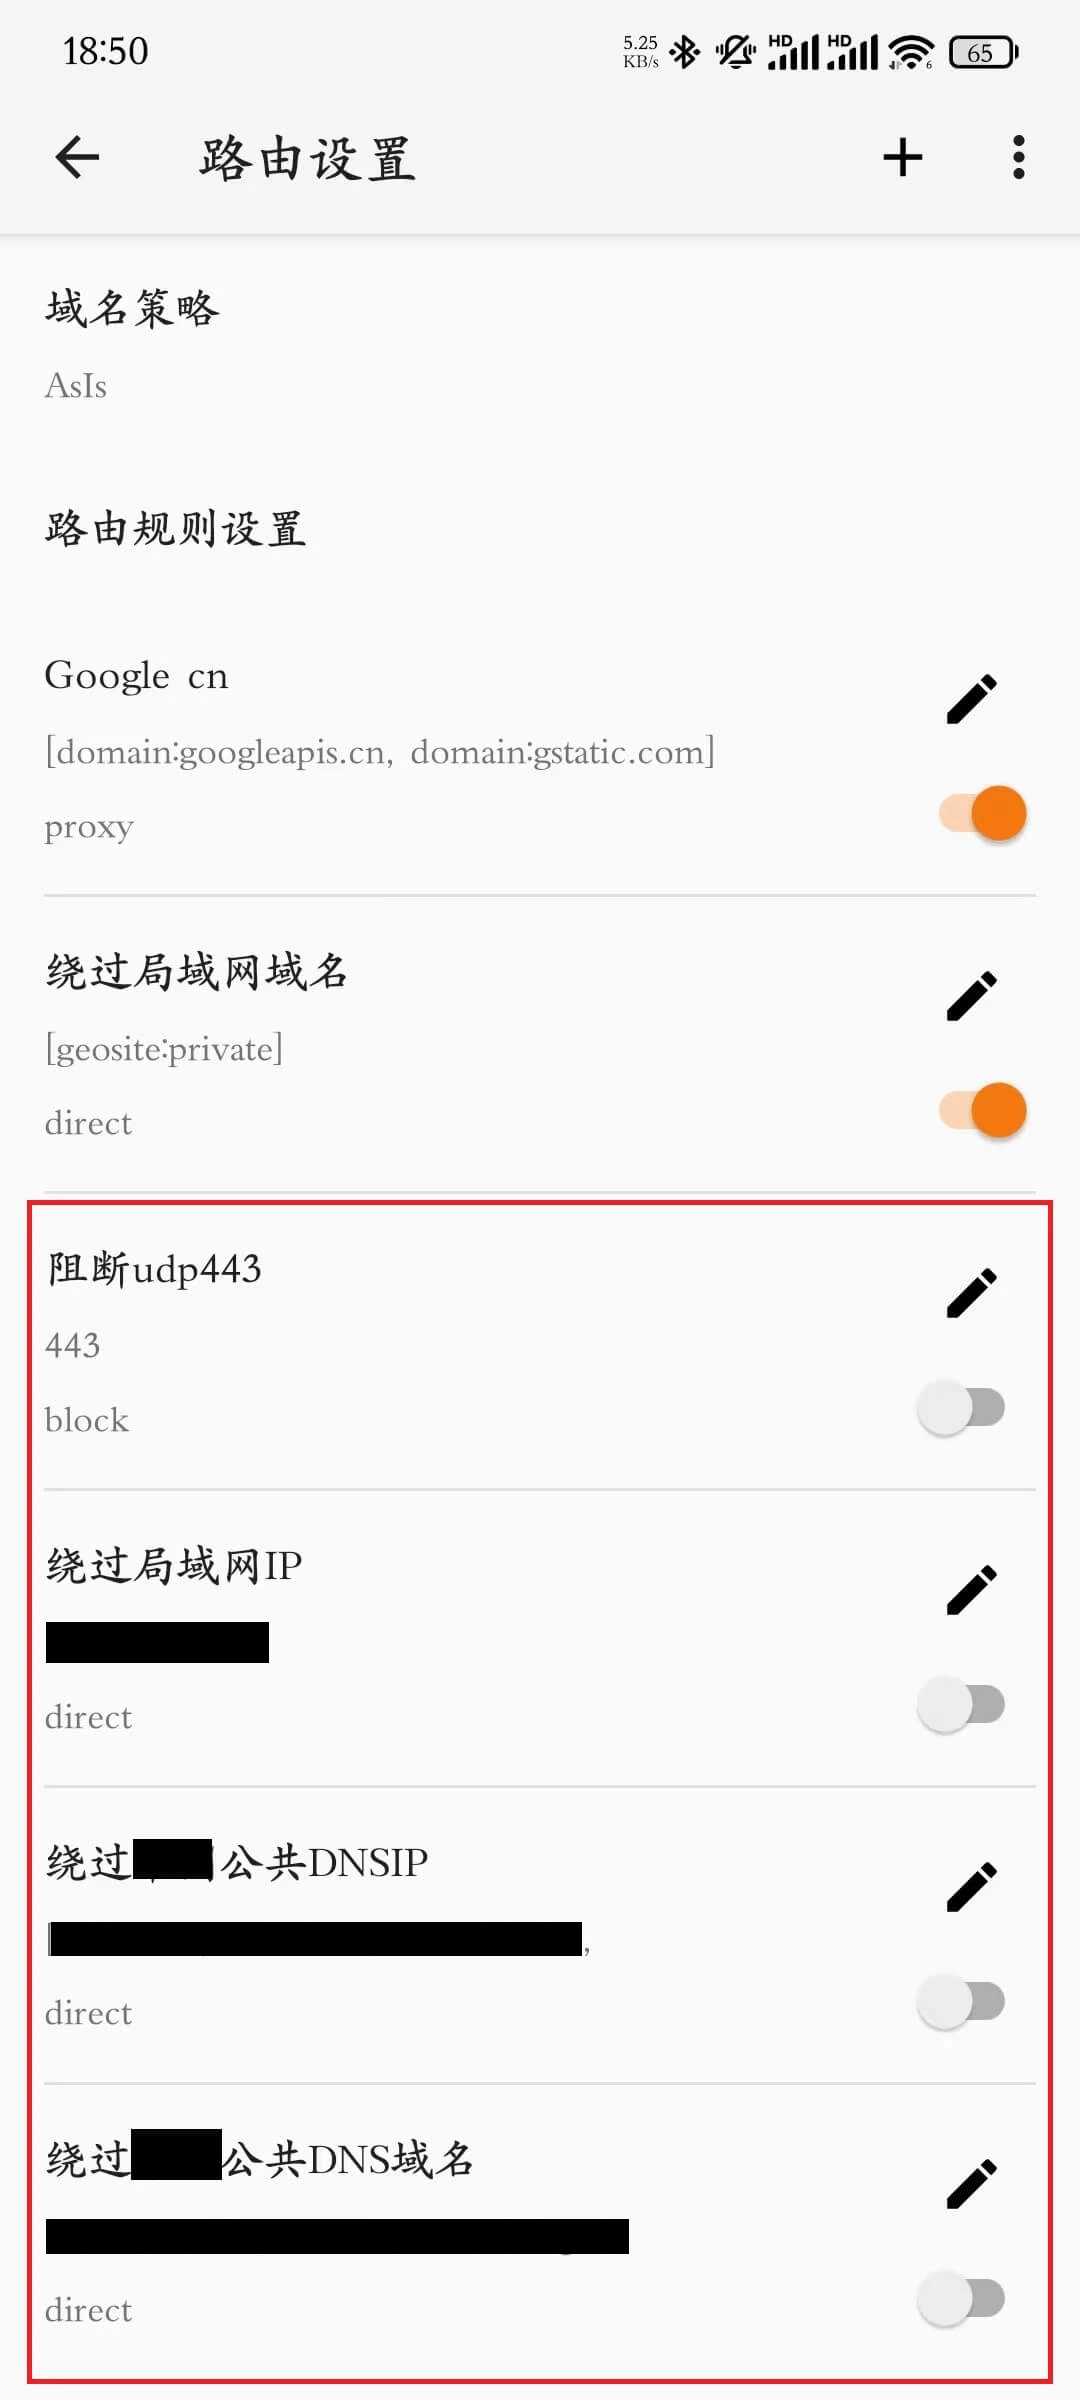
在「路由設定」頁面中,關閉圖片中框選的四個選項,確保代理流量正常通過。
### 第二步:調整路由配置
在「路由設定」頁面中,關閉圖片中框選的四個選項,確保代理流量正常通過。
 ### 第三步:進入訂閱分組設定
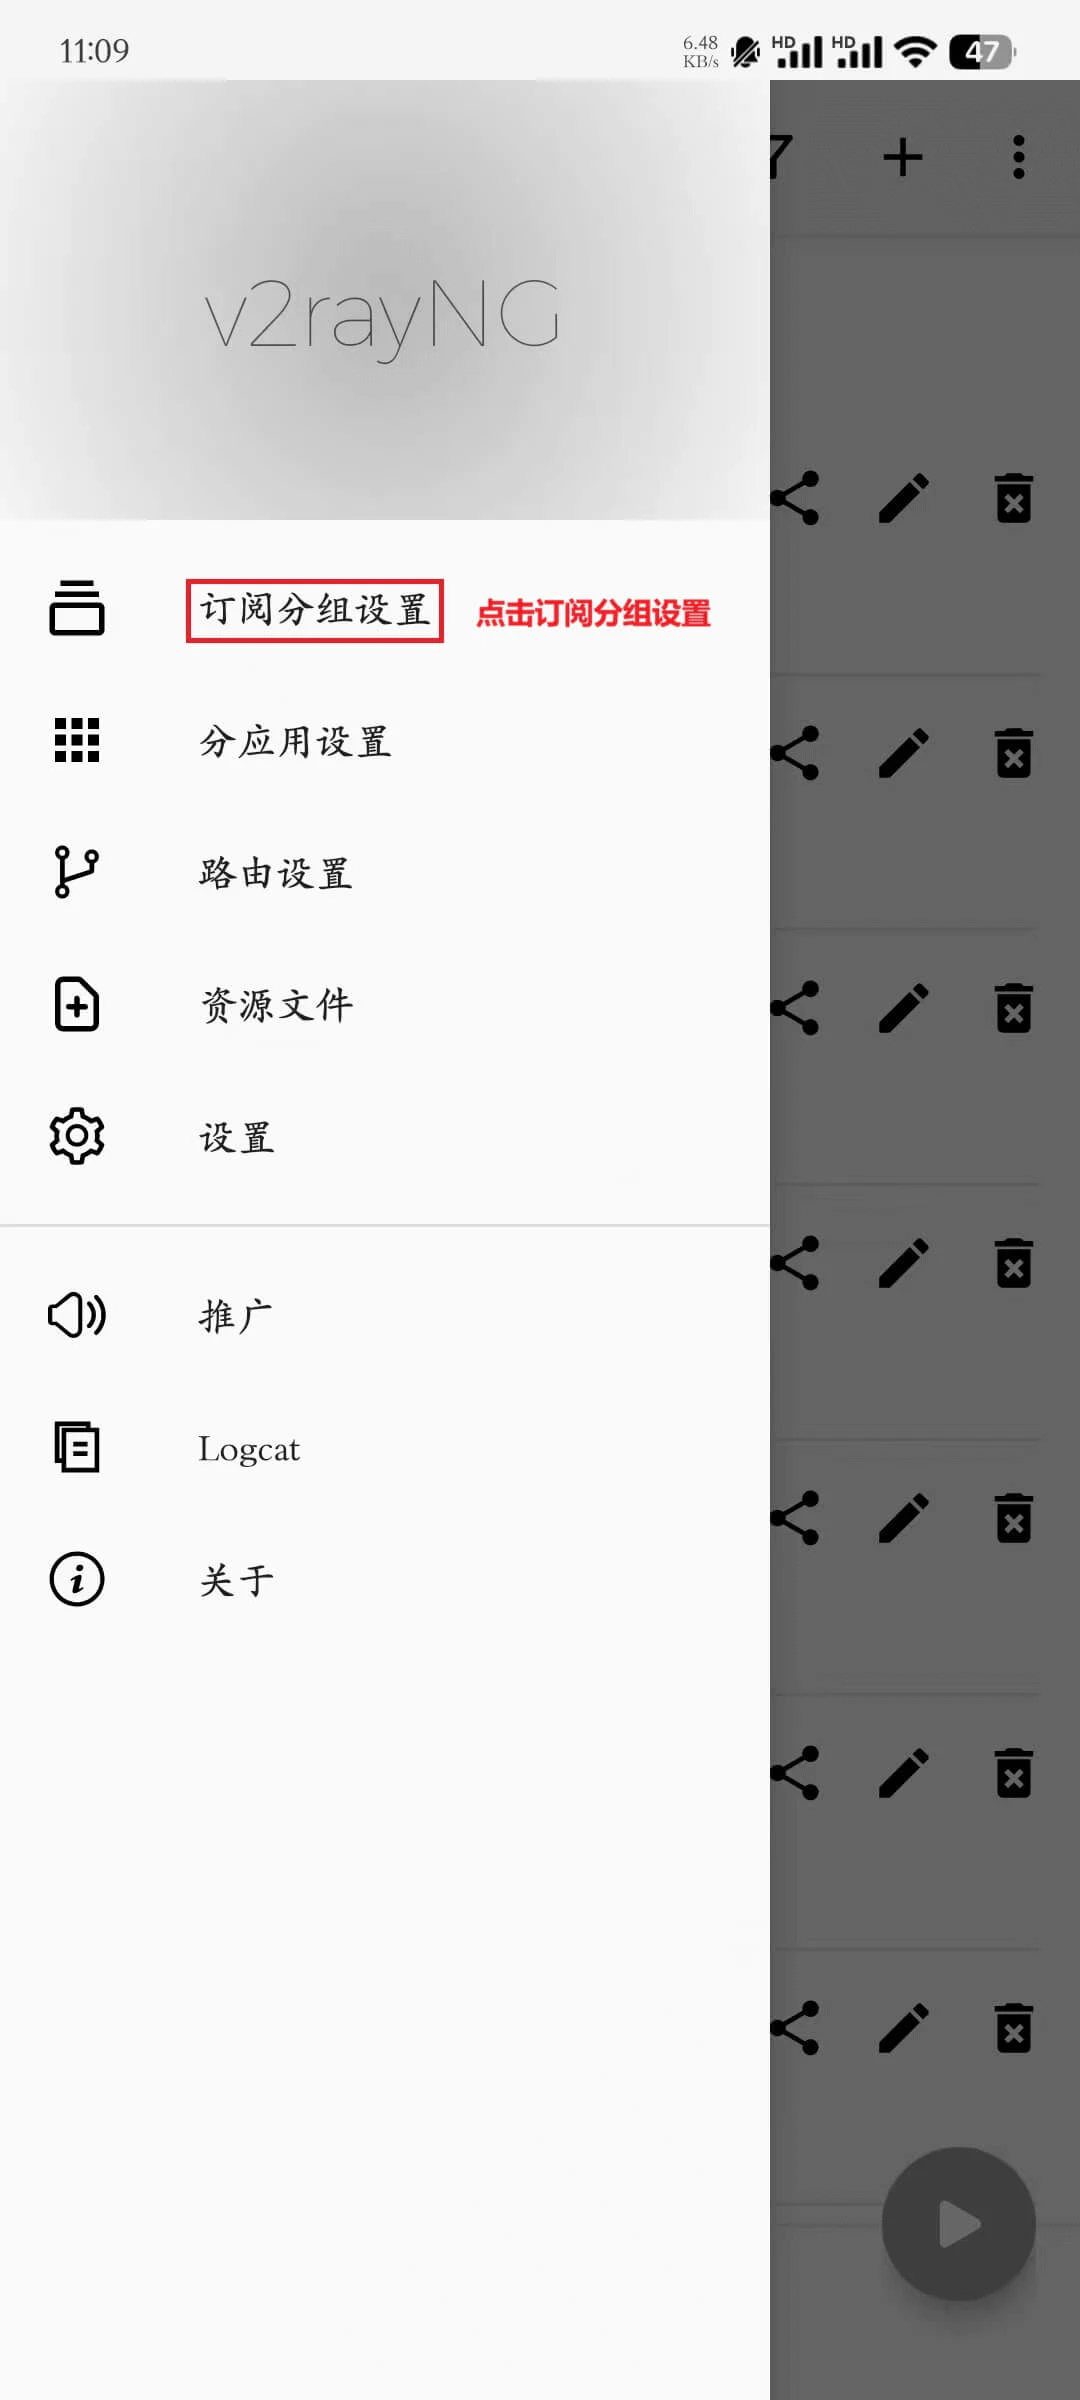
點擊左上角選單,選擇 **「訂閱分組設定」**。
### 第三步:進入訂閱分組設定
點擊左上角選單,選擇 **「訂閱分組設定」**。
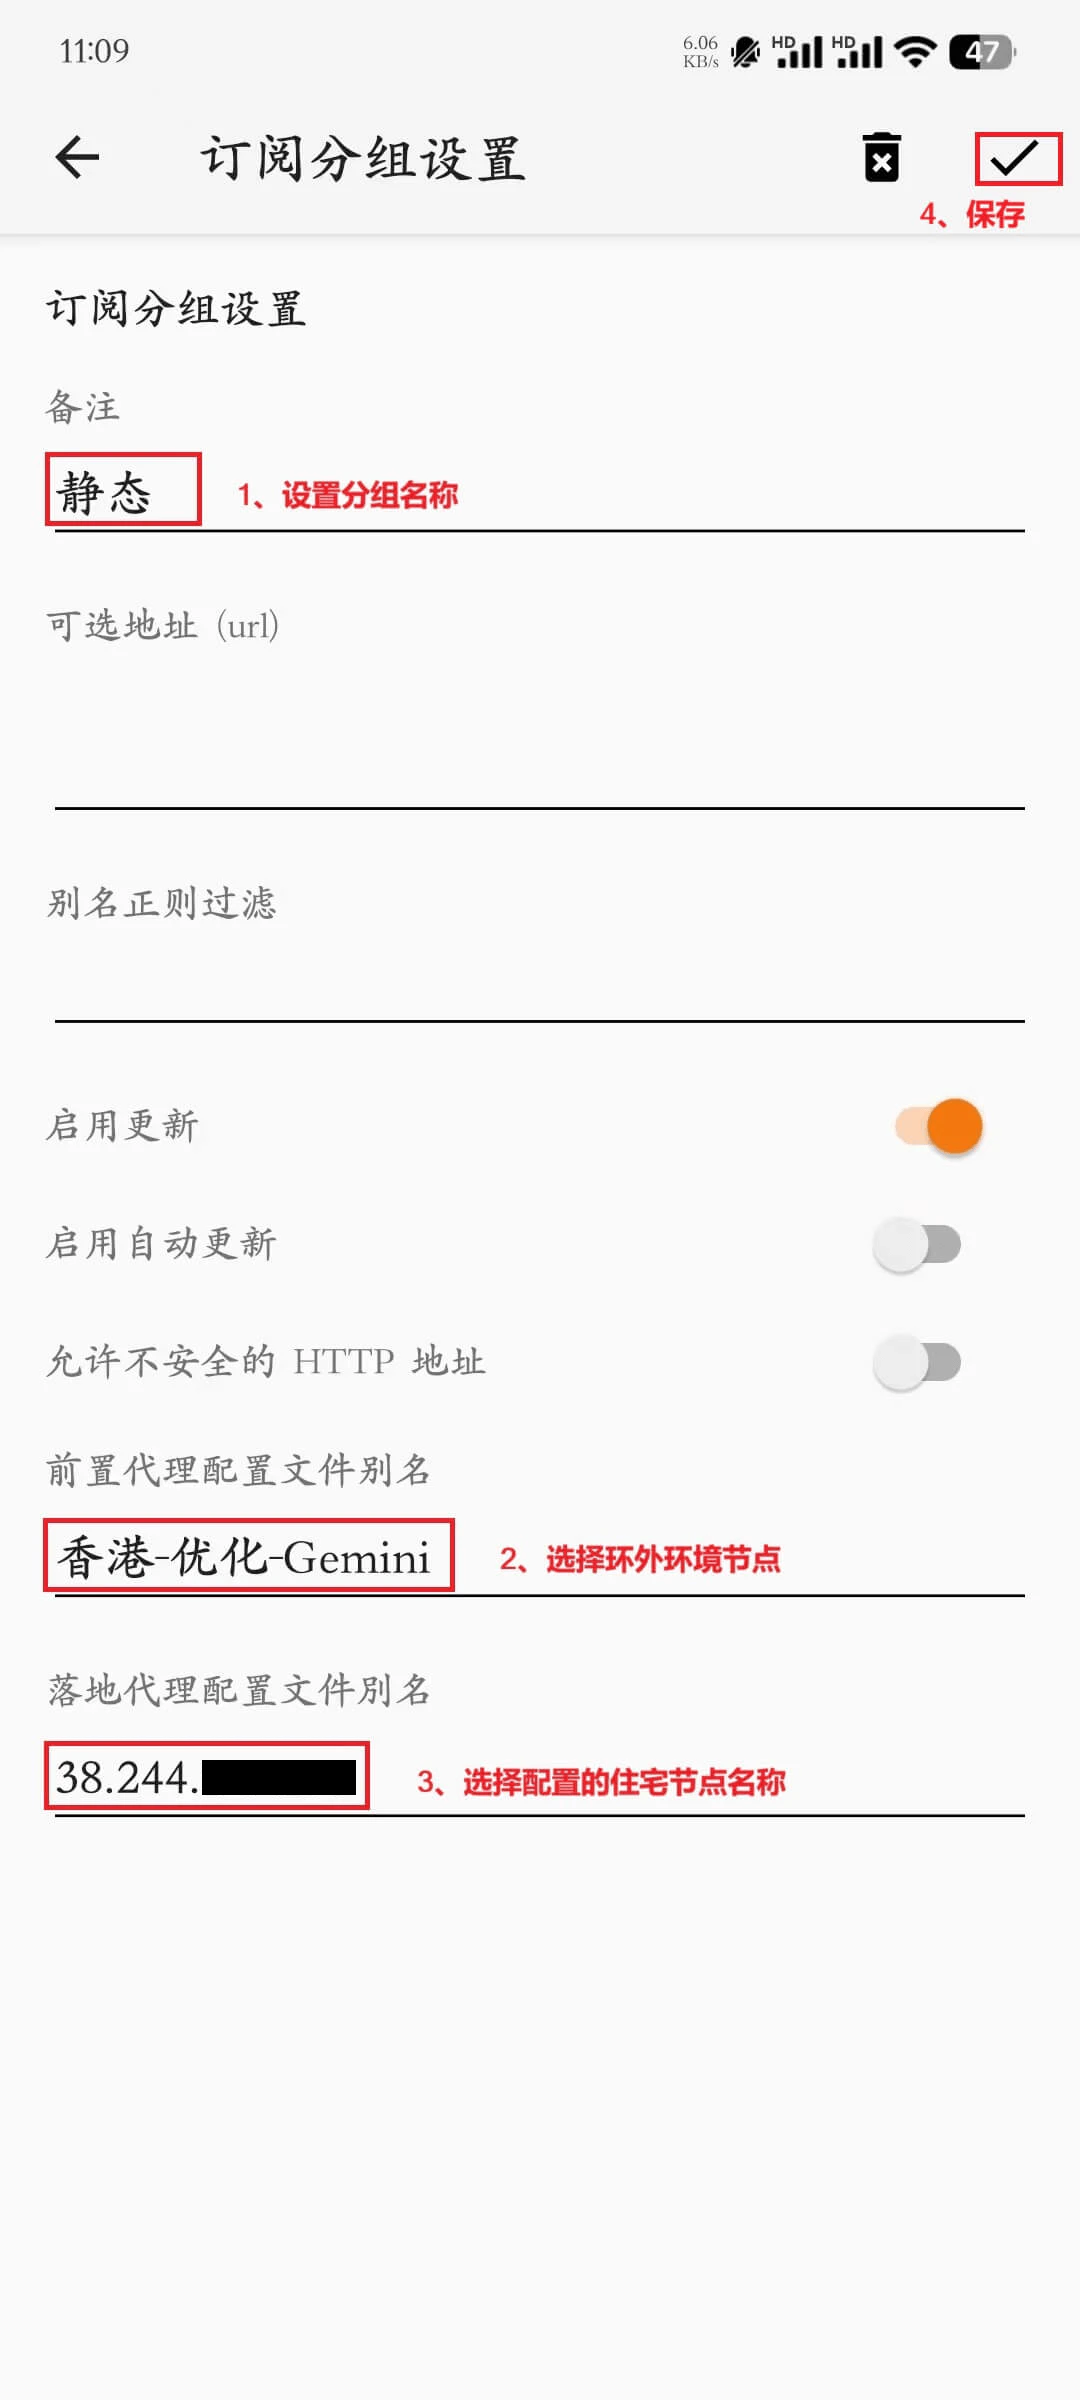
 ### 第四步:建立新分組
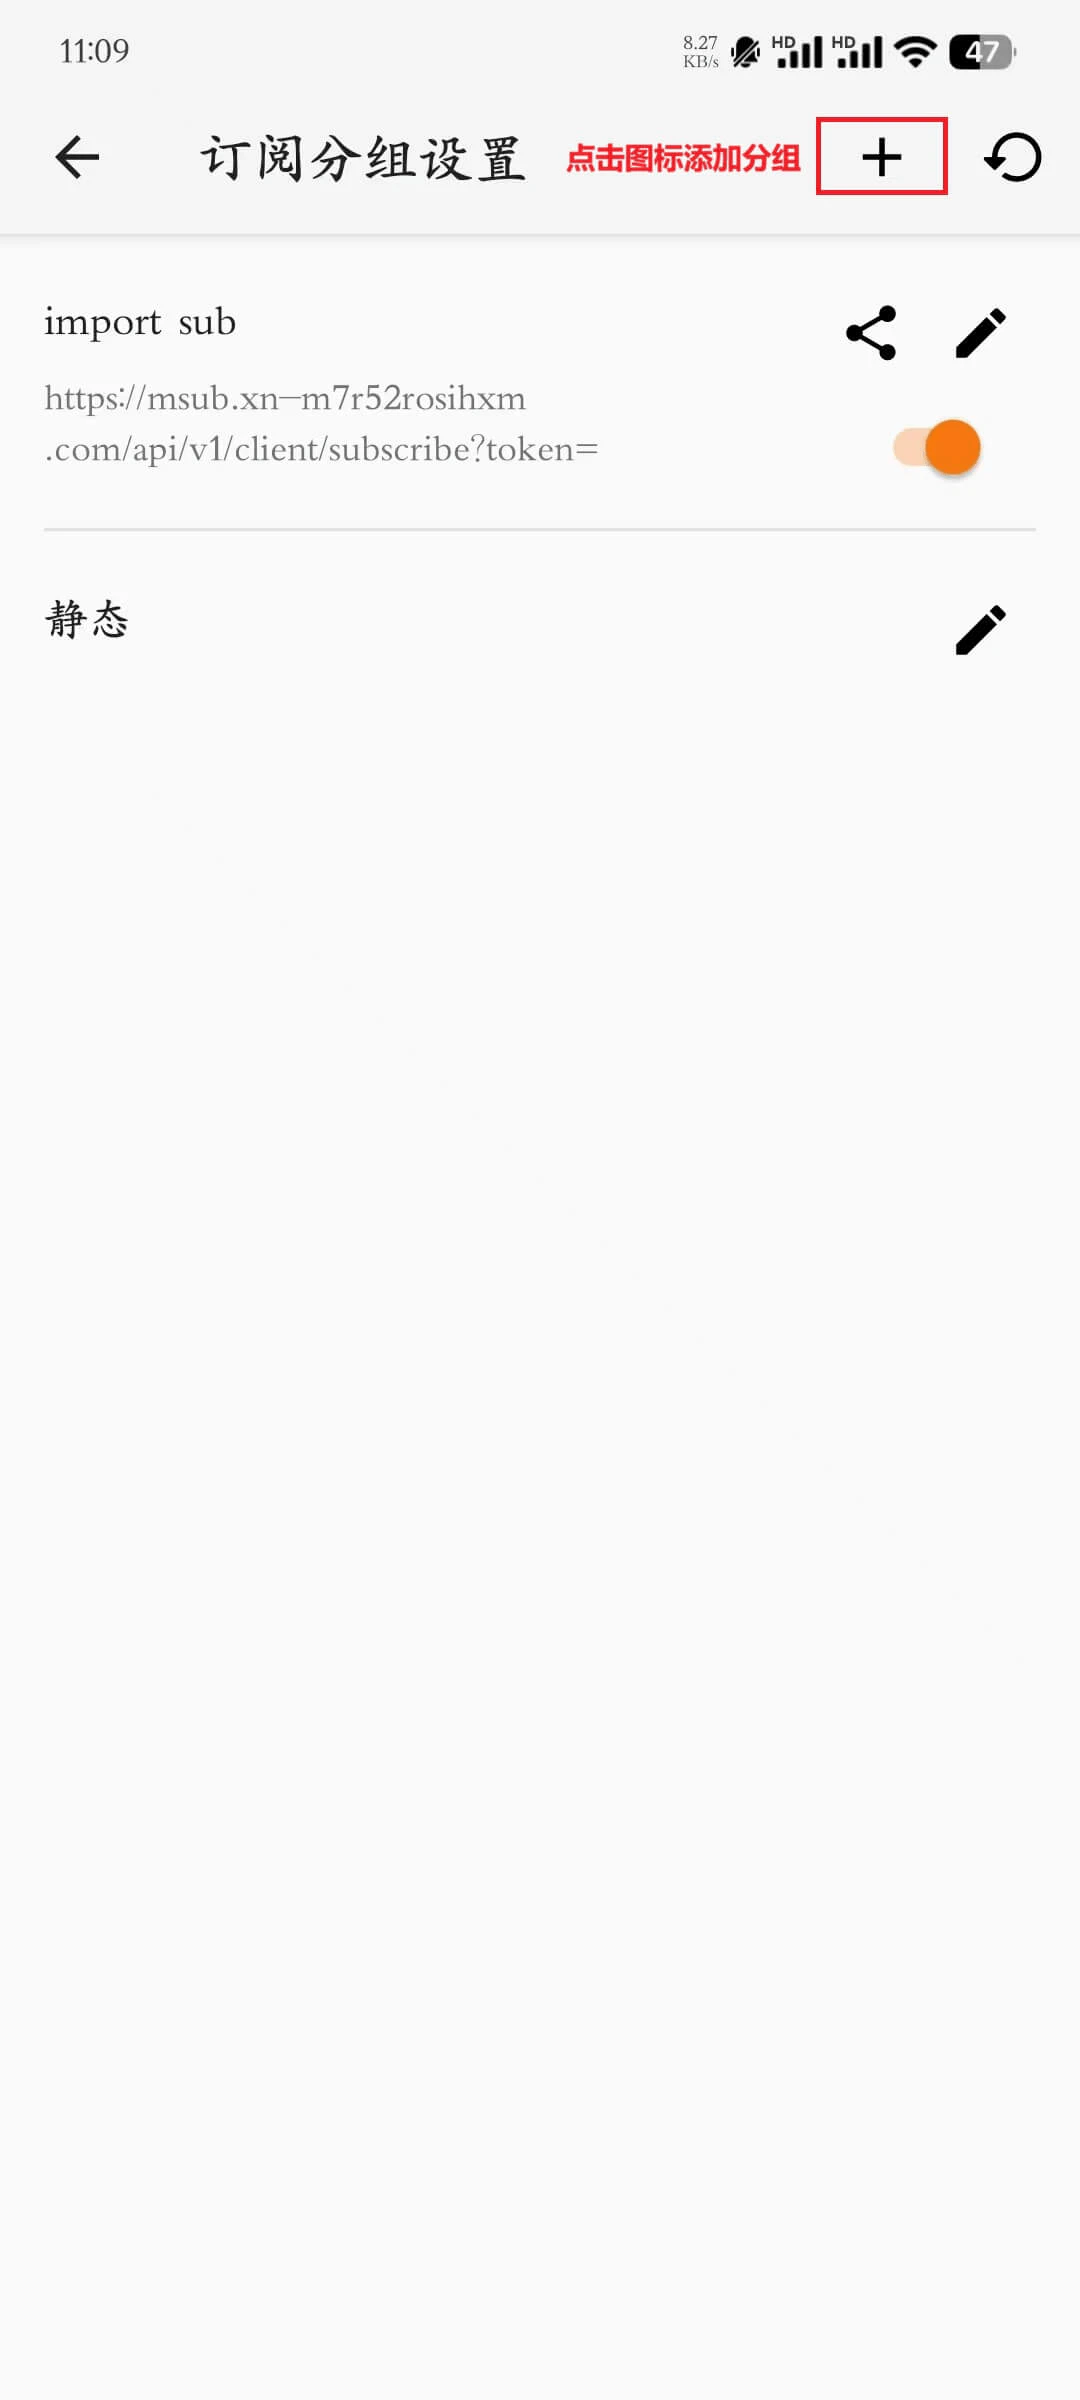
1. 點擊右上角 **「+」** 加入新分組
2. 填寫分組必填資訊:
* **分組名稱**:自訂分組識別
* **前置代理名稱**:選擇海外網路節點(用於連接海外環境)
* **落地代理名稱**:選擇 Ip2up 住宅節點(用於最終訪問)
3. 點擊 **「儲存」** 完成分組建立
### 第四步:建立新分組
1. 點擊右上角 **「+」** 加入新分組
2. 填寫分組必填資訊:
* **分組名稱**:自訂分組識別
* **前置代理名稱**:選擇海外網路節點(用於連接海外環境)
* **落地代理名稱**:選擇 Ip2up 住宅節點(用於最終訪問)
3. 點擊 **「儲存」** 完成分組建立
 ### 第五步:在分組中加入住宅節點
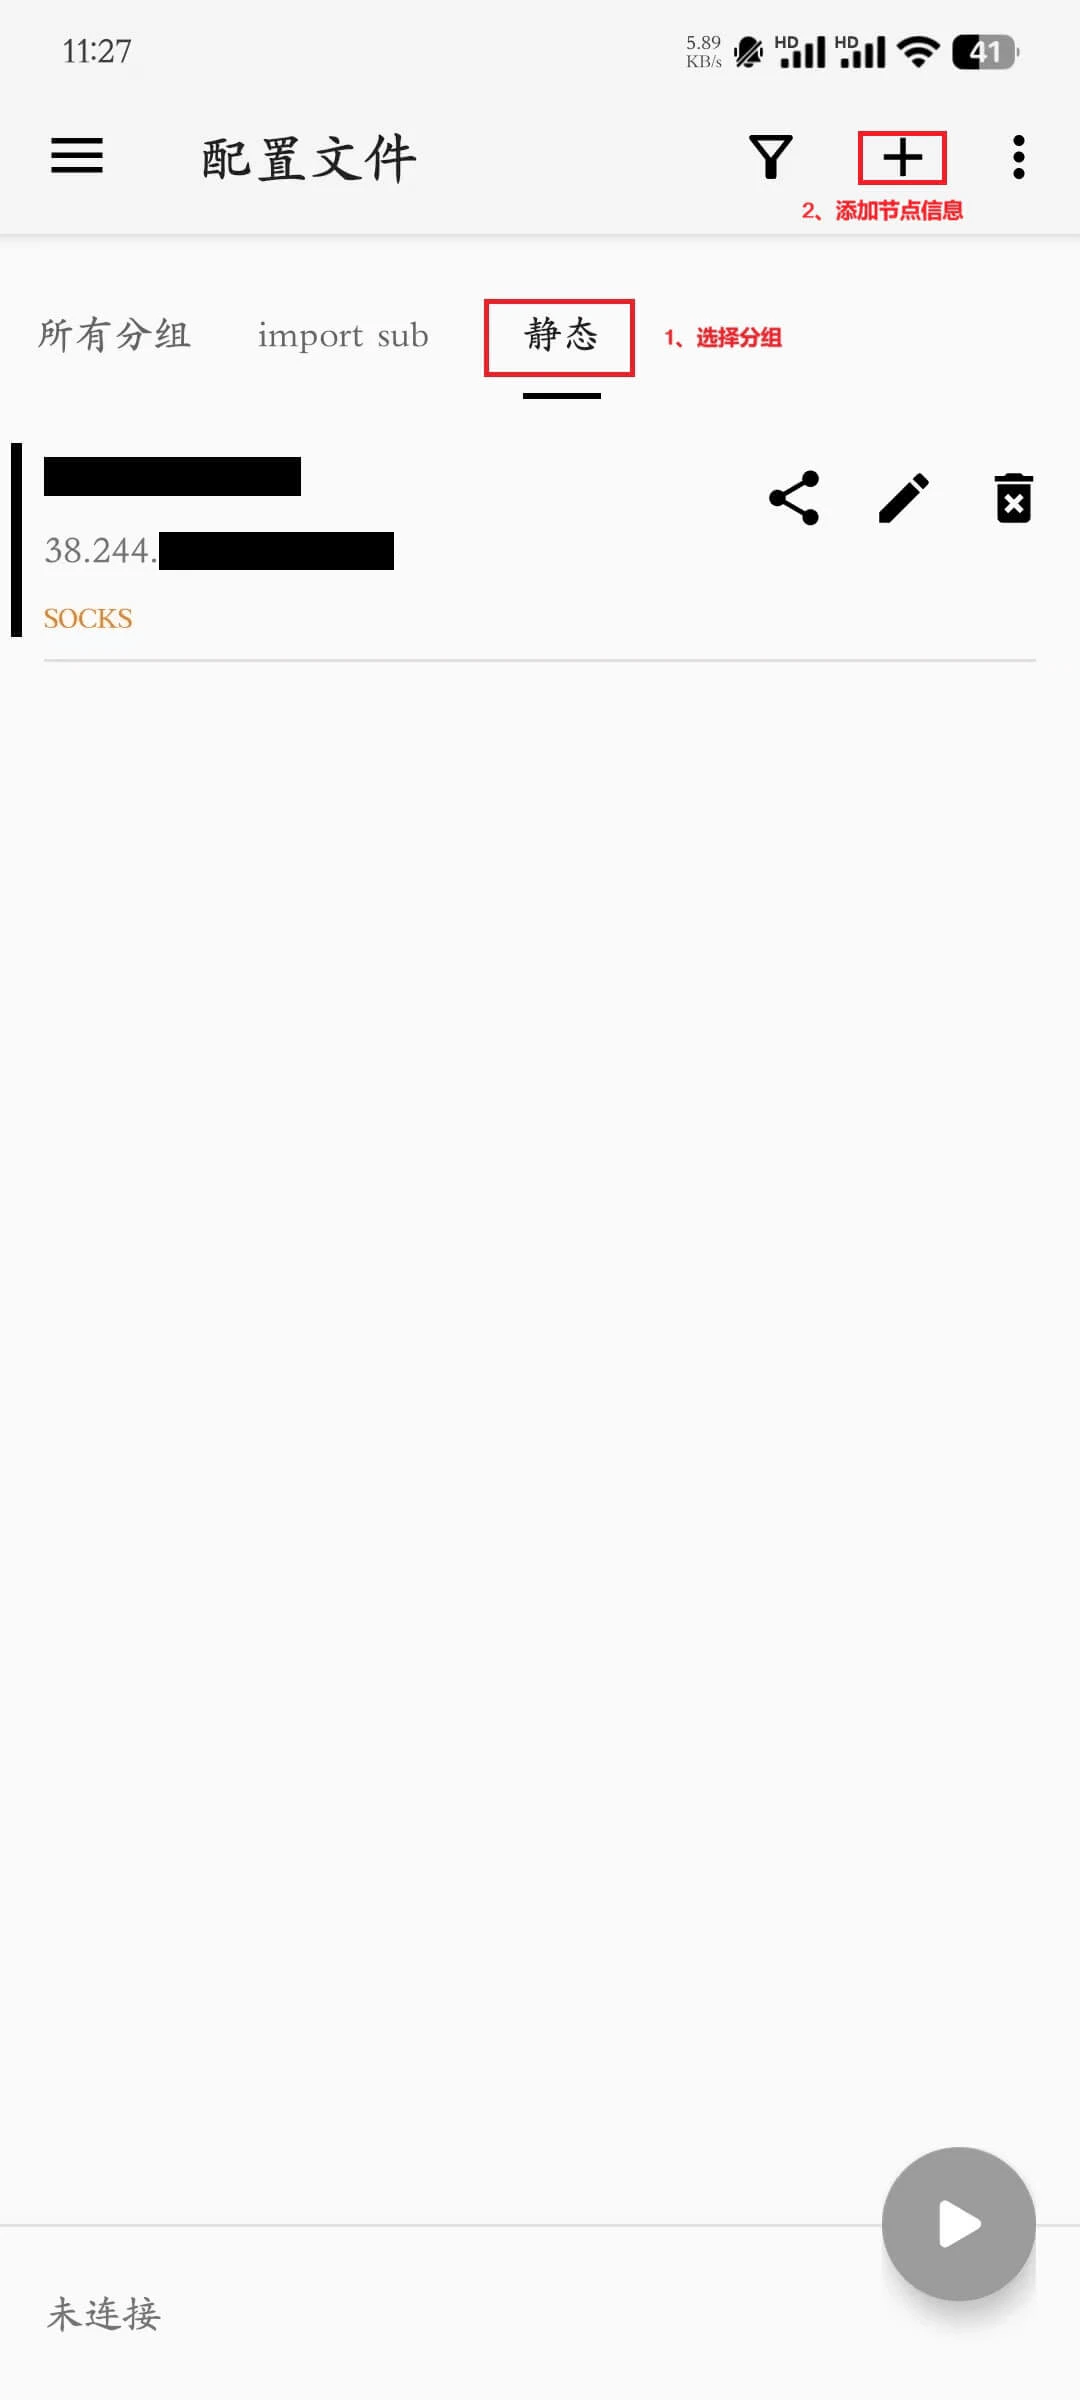
1. 選擇剛建立的分組
2. 點擊右上角 **「+」** 加入新配置
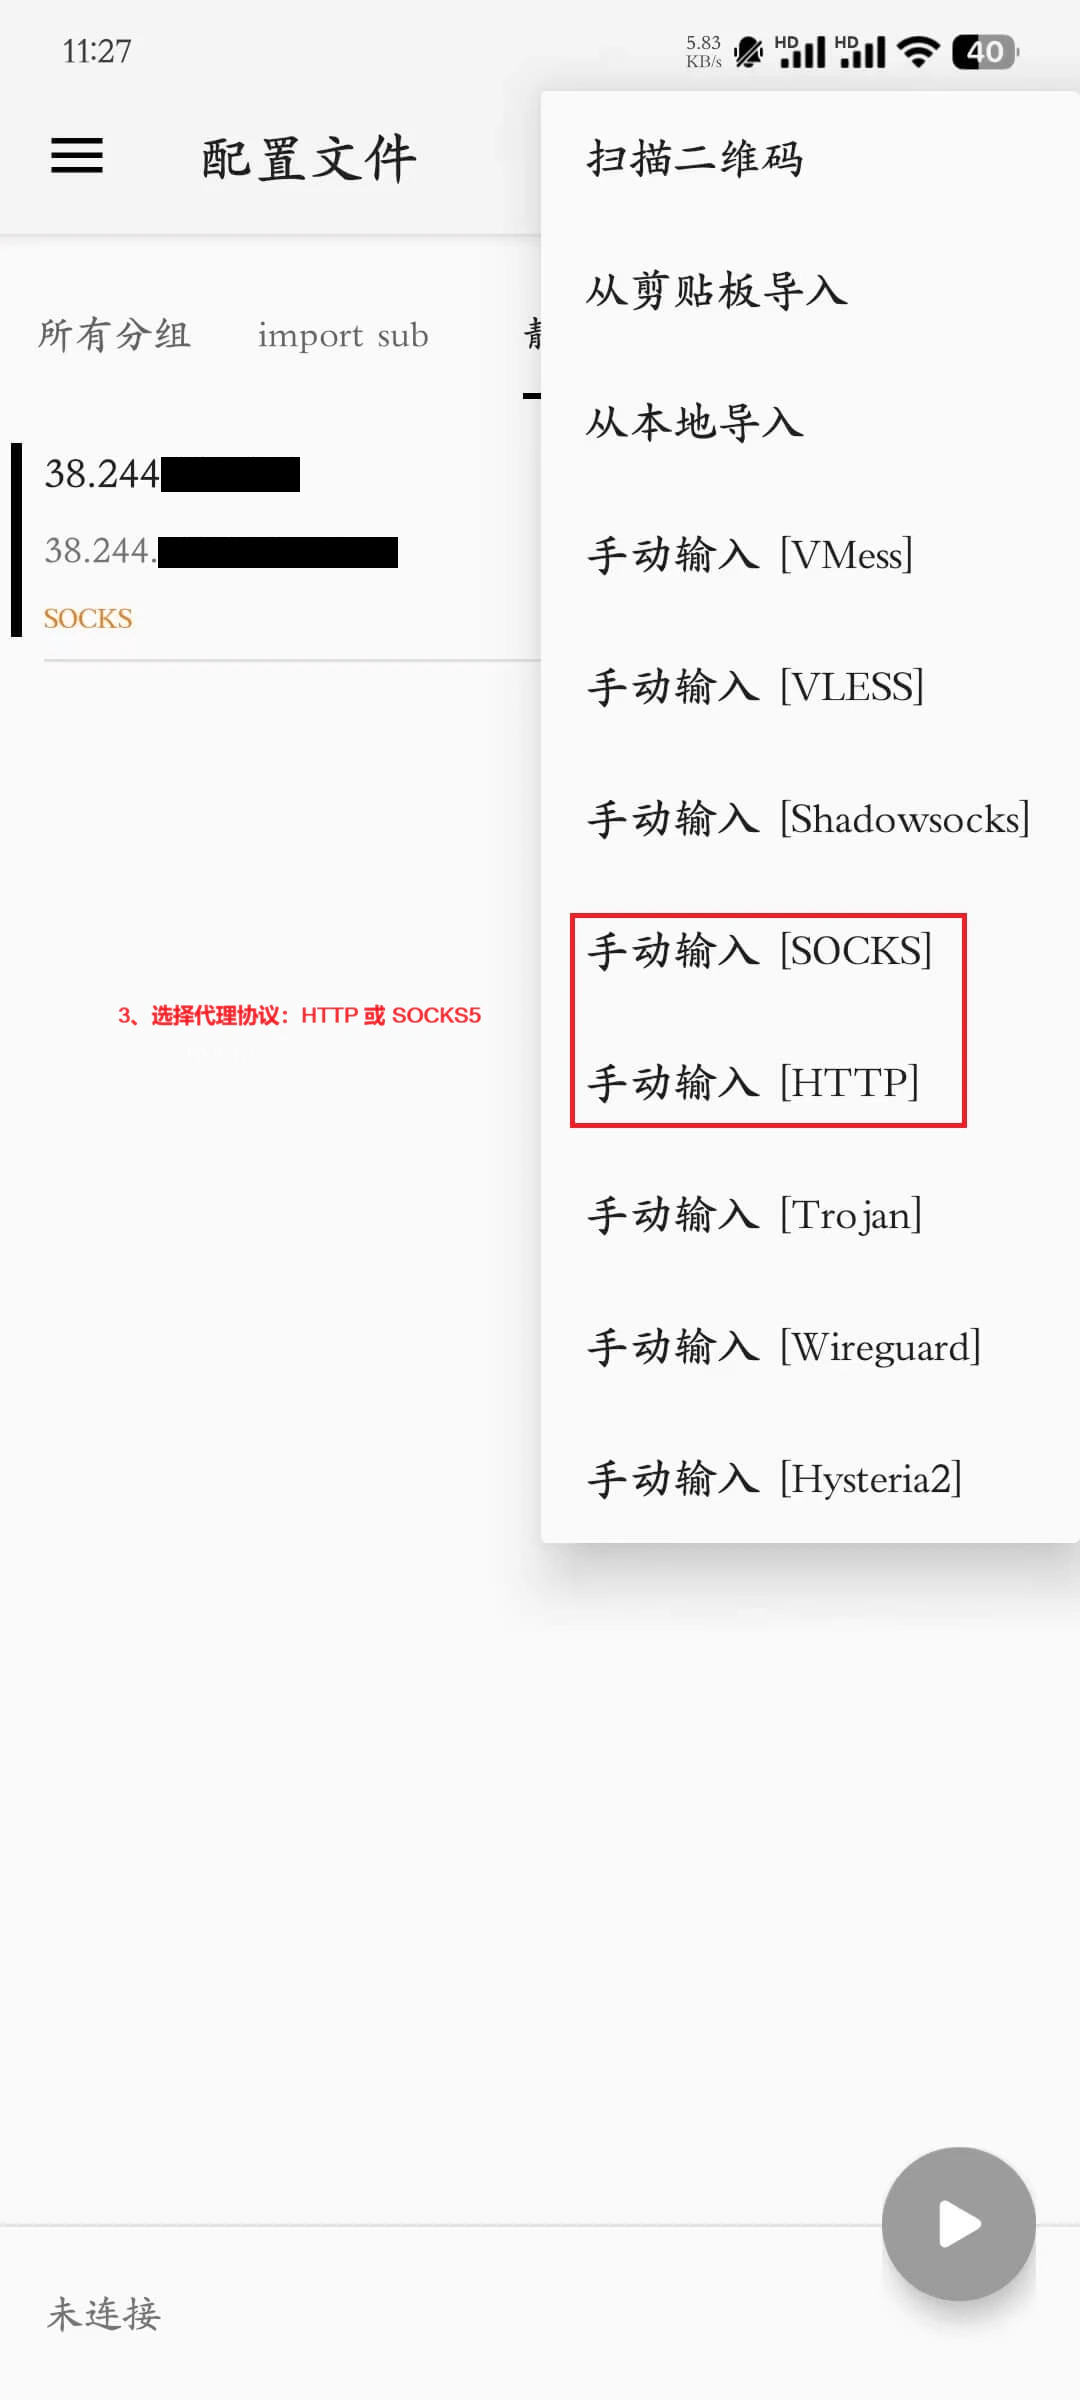
3. 選擇代理協定:**HTTP** 或 **SOCKS5**
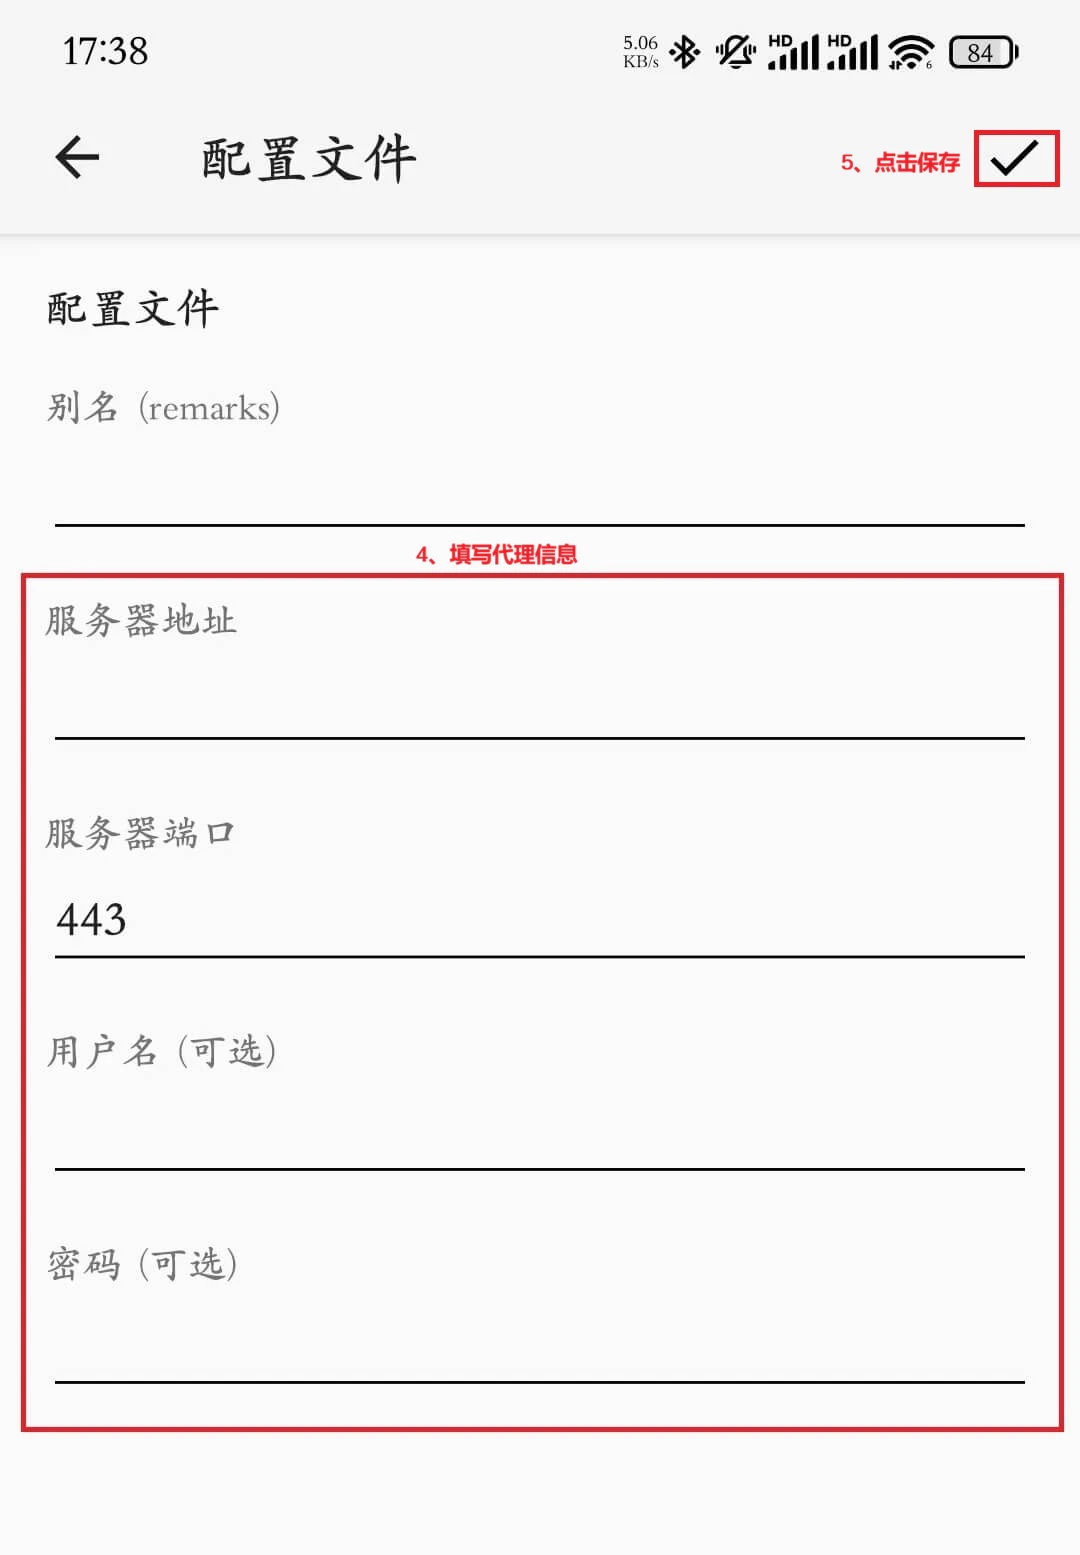
4. 填寫從 [Ip2up](https://www.ip2up.com/) 取得的代理資訊:
* **伺服器位址**
* **伺服器連接埠**
* **使用者名稱**
* **密碼**
5. 點擊右上角 **「完成」** 或 **「儲存」** 儲存配置
### 第五步:在分組中加入住宅節點
1. 選擇剛建立的分組
2. 點擊右上角 **「+」** 加入新配置
3. 選擇代理協定:**HTTP** 或 **SOCKS5**
4. 填寫從 [Ip2up](https://www.ip2up.com/) 取得的代理資訊:
* **伺服器位址**
* **伺服器連接埠**
* **使用者名稱**
* **密碼**
5. 點擊右上角 **「完成」** 或 **「儲存」** 儲存配置
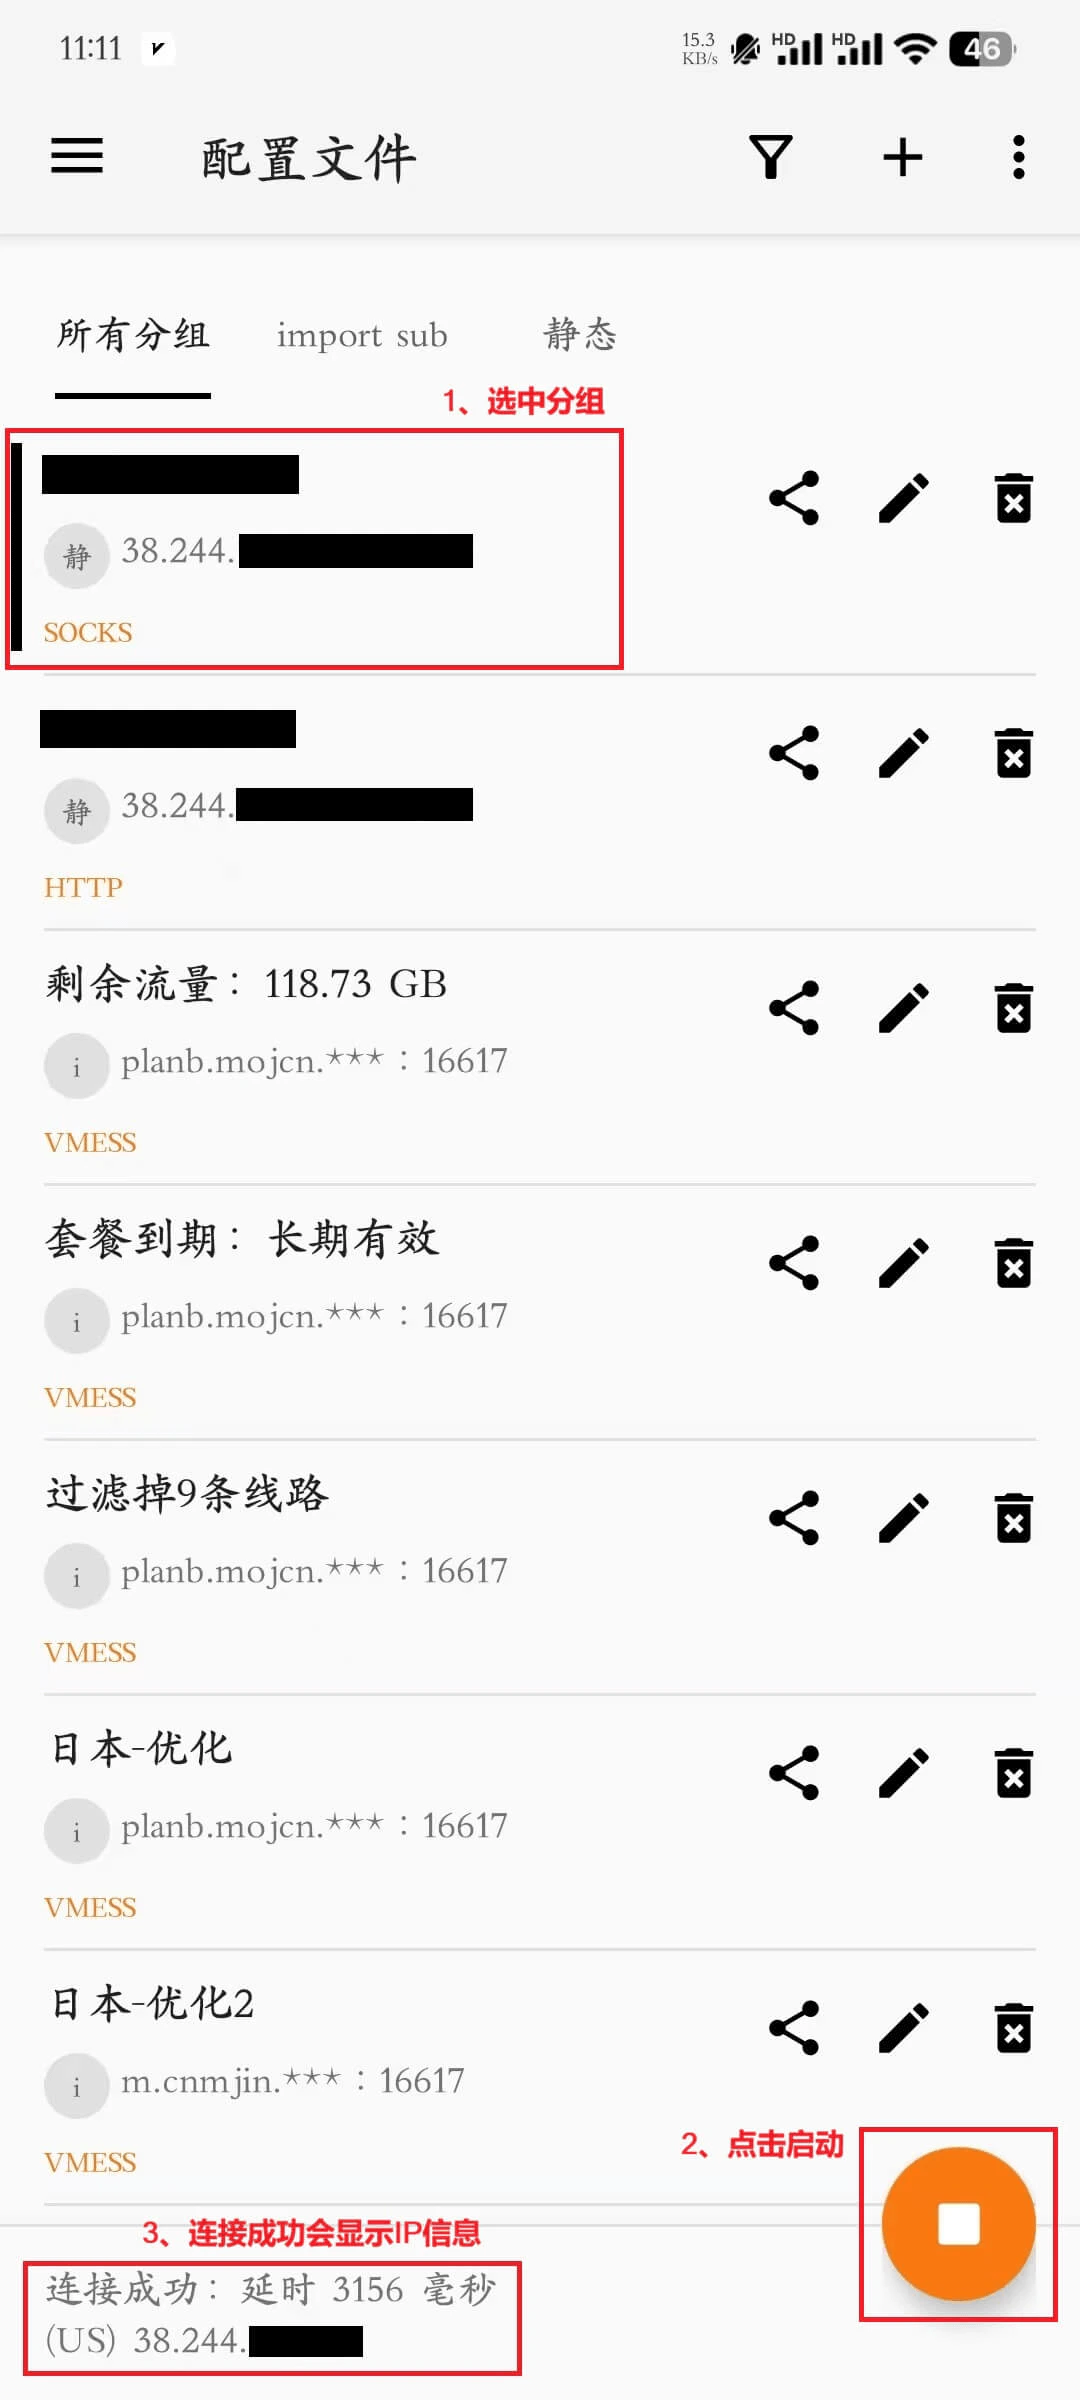
 ### 第六步:連接並測試代理
1. 返回 v2rayNG 主介面
2. 在分組清單中找到配置好的分組
3. **選擇該分組**(確保選中狀態)
4. 點擊底部 **「啟動」** 按鈕
5. 介面顯示 **「連接成功」** 即表示代理配置完成
### 第六步:連接並測試代理
1. 返回 v2rayNG 主介面
2. 在分組清單中找到配置好的分組
3. **選擇該分組**(確保選中狀態)
4. 點擊底部 **「啟動」** 按鈕
5. 介面顯示 **「連接成功」** 即表示代理配置完成
 ### 第七步:驗證代理連接
1. 連接成功後,開啟手機瀏覽器
2. 訪問 IP 檢測網站(如 [ipinfo.io](https://ipinfo.io))
3. 確認顯示的 IP 位址與 Ip2up 提供的代理 IP 一致
4. 如顯示代理 IP,則表示配置成功
### 注意事項
* 確保已取得正確的 Ip2up 代理資訊
* 代理服務需在海外網路環境下使用
* 建議在連接前測試節點延遲,選擇最優節點
* 保持 v2rayNG 背景執行以維持代理連接
✅ **至此,已成功在安卓設備上配置 v2rayNG 使用 Ip2up 代理。**
### 第七步:驗證代理連接
1. 連接成功後,開啟手機瀏覽器
2. 訪問 IP 檢測網站(如 [ipinfo.io](https://ipinfo.io))
3. 確認顯示的 IP 位址與 Ip2up 提供的代理 IP 一致
4. 如顯示代理 IP,則表示配置成功
### 注意事項
* 確保已取得正確的 Ip2up 代理資訊
* 代理服務需在海外網路環境下使用
* 建議在連接前測試節點延遲,選擇最優節點
* 保持 v2rayNG 背景執行以維持代理連接
✅ **至此,已成功在安卓設備上配置 v2rayNG 使用 Ip2up 代理。**