All proxy products of the platform need to be used in an overseas network environment, which requires customers to configure themselves.
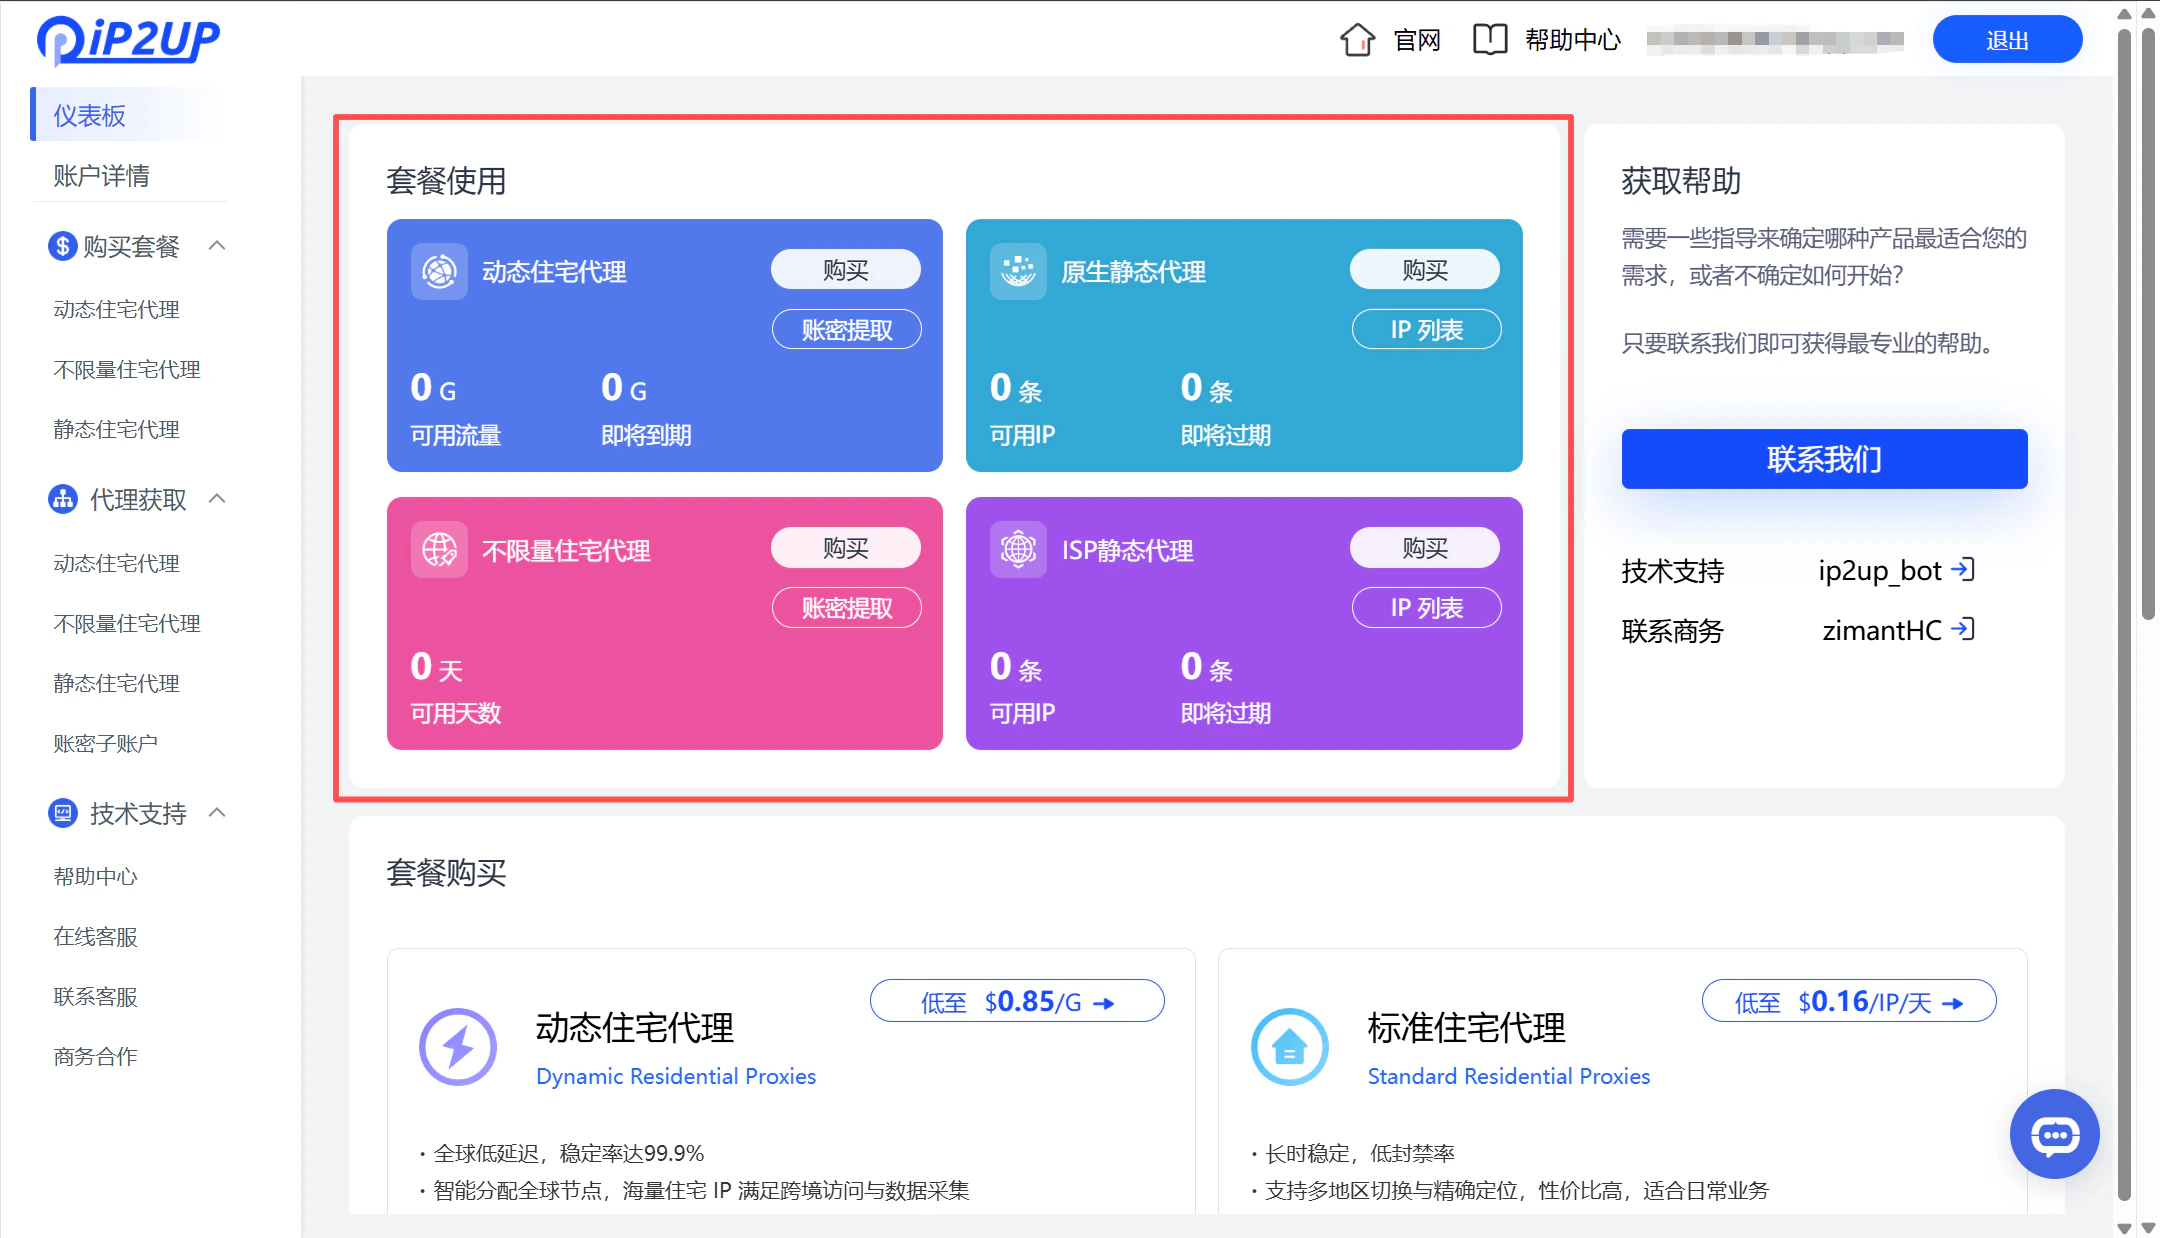
Log In and View Account Status
Visit the Ip2up Official Website and log in to your account. The system will automatically redirect you to the dashboard interface, where you can view your purchased proxy packages and overall account status.
Select and Purchase a Proxy Package
-
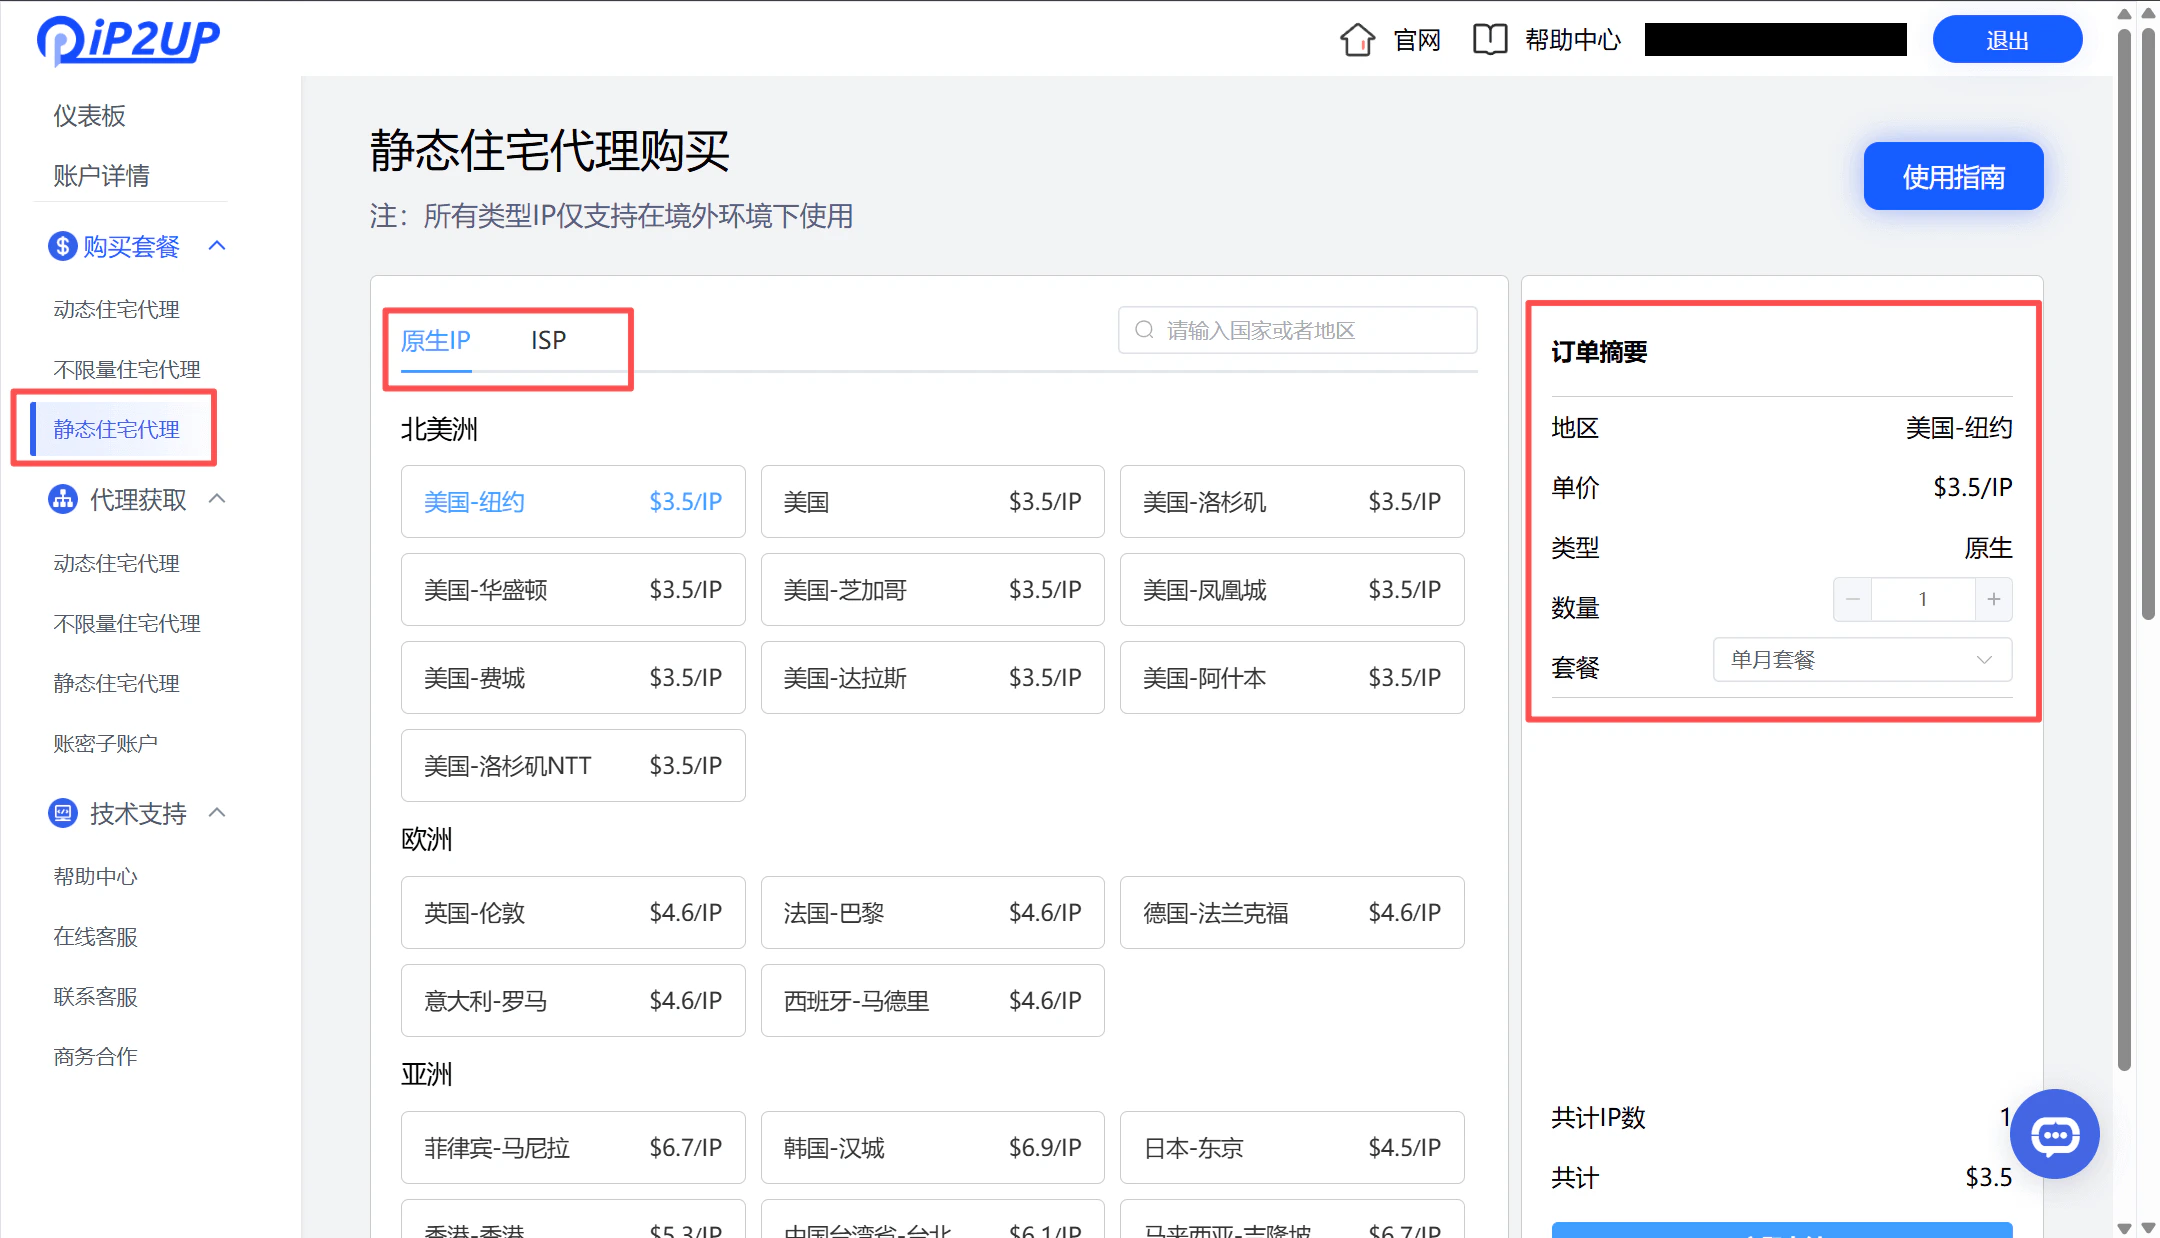
Click Purchase Package → Static Residential Proxy in the left-side menu.
-
Configure the following options based on your needs:
- Country/Region: Select the target country
- IP Type: Choose Native or ISP
- Quantity: Select the required number of IPs
-
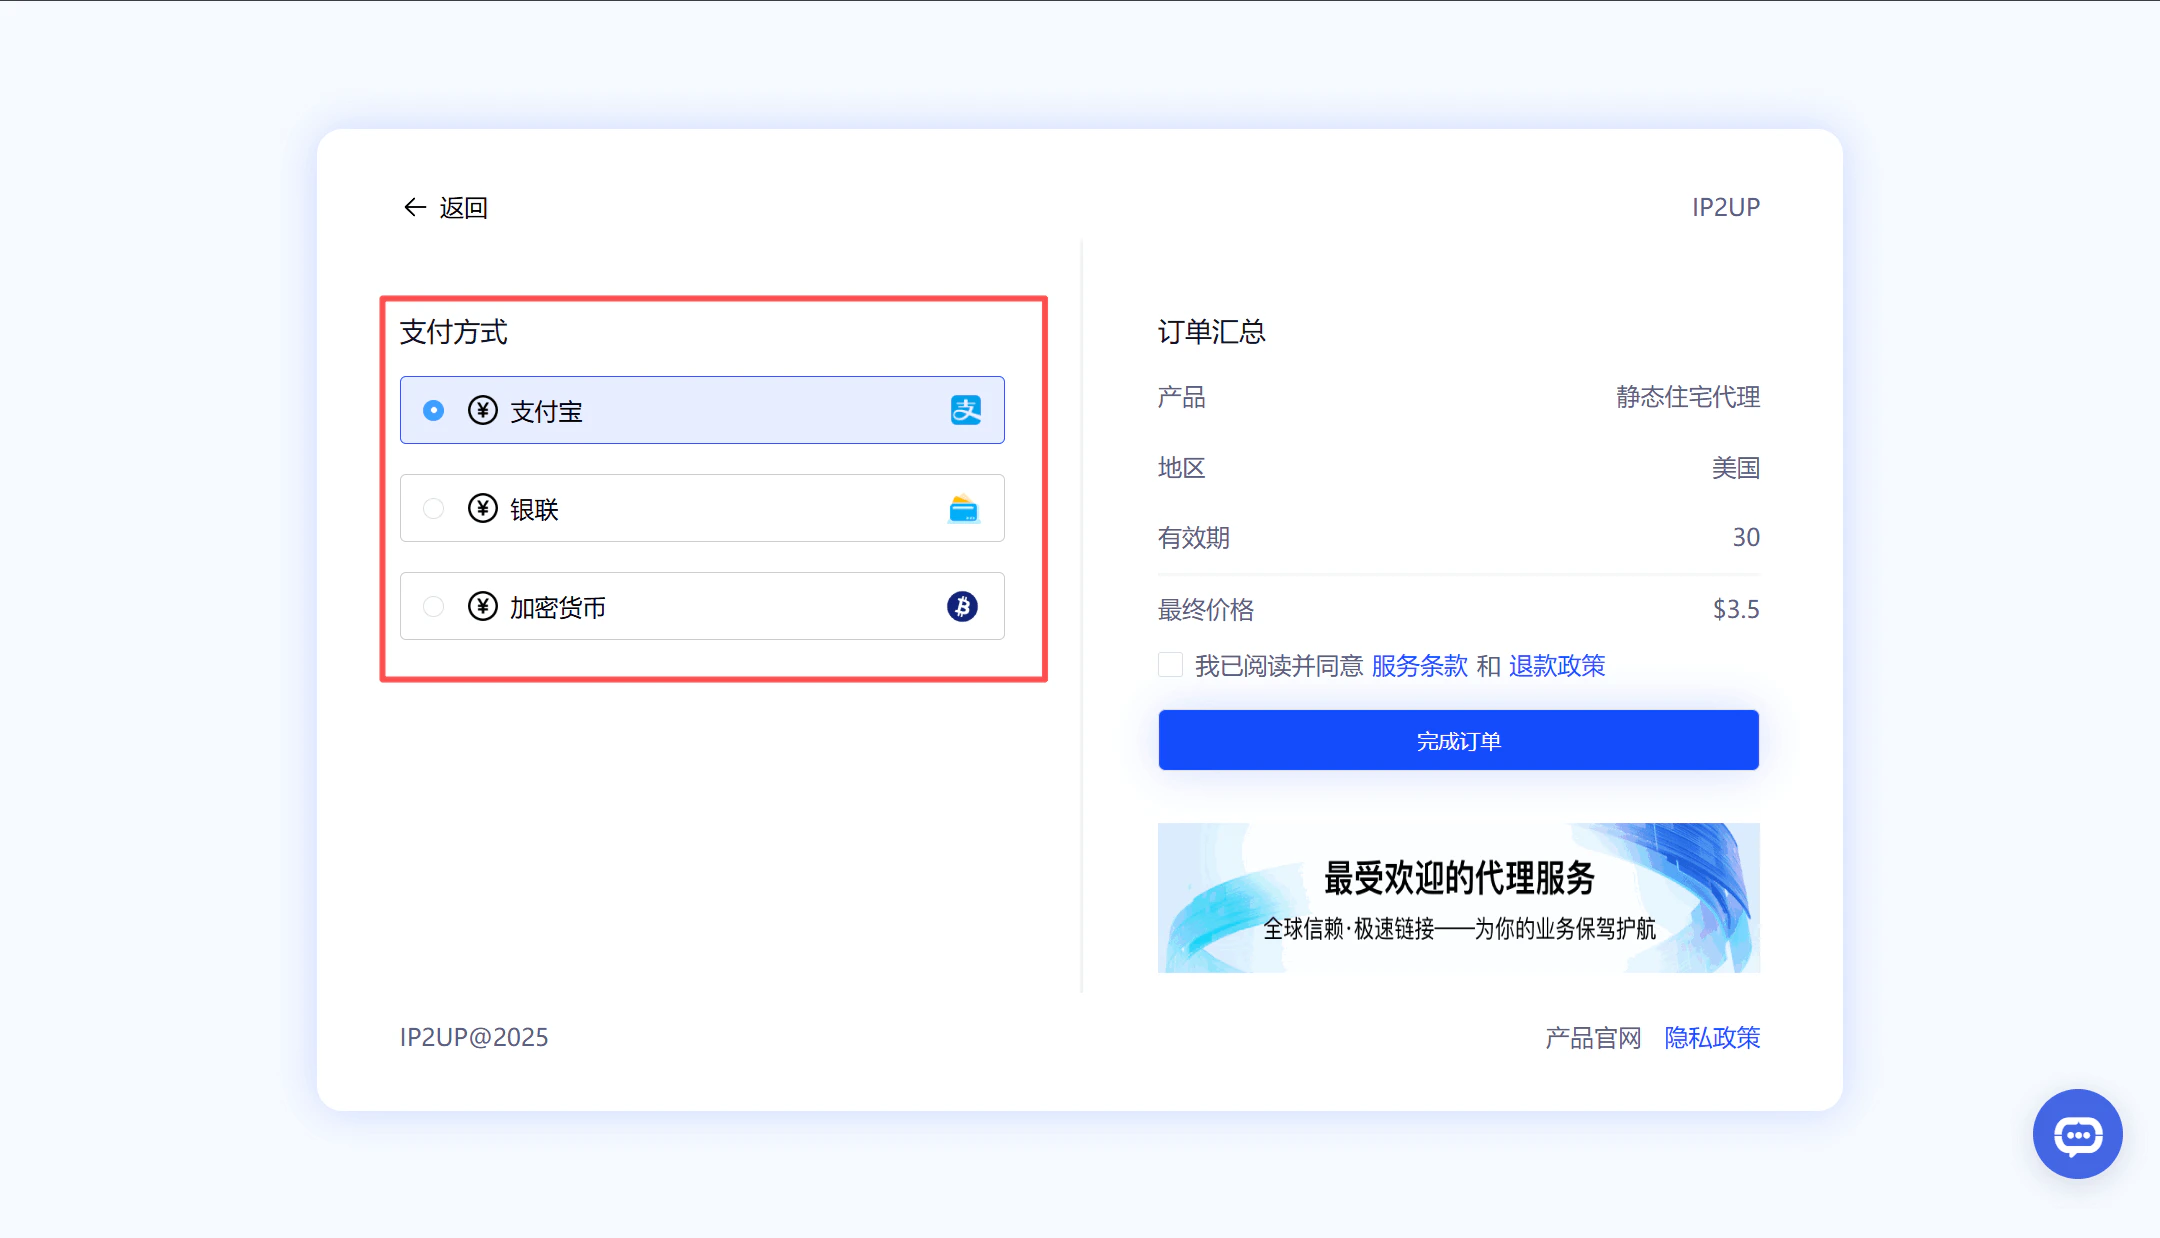
Click Pay to complete the purchase.
-
Supported payment methods:
- Alipay
- Cryptocurrency payment
- UnionPay
- For other payment methods, please contact customer service
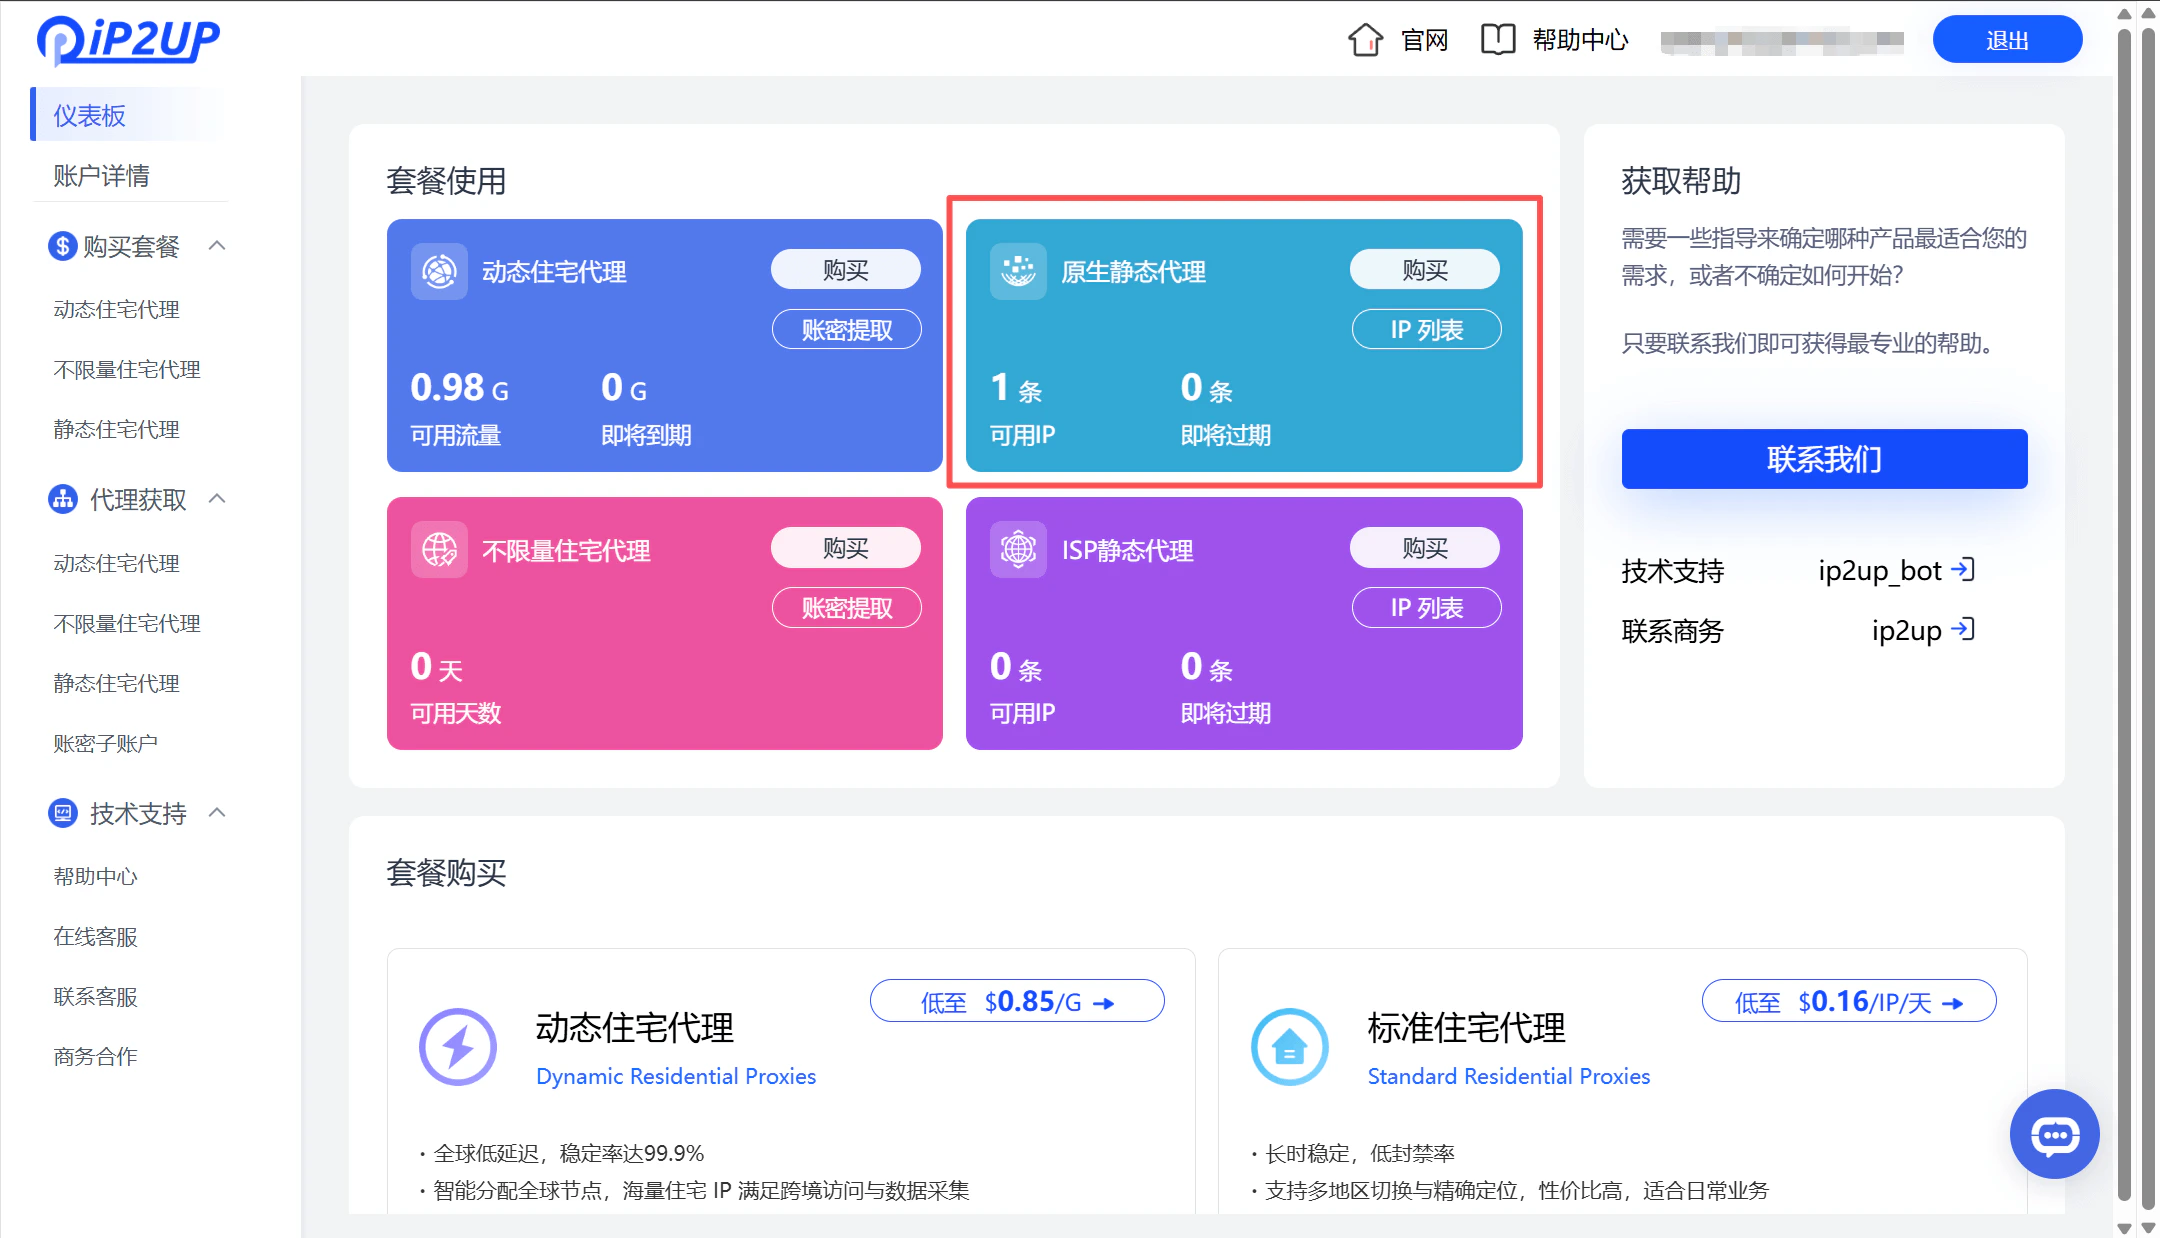
View Purchase Results
After completing the payment, return to the dashboard page to view your current purchase details and available resource status.
- Click Proxy Acquisition → Static Residential Proxy in the left-side menu.
- On this page, you can view and obtain detailed information of the purchased static IPs, including IP address, port, username, and password.
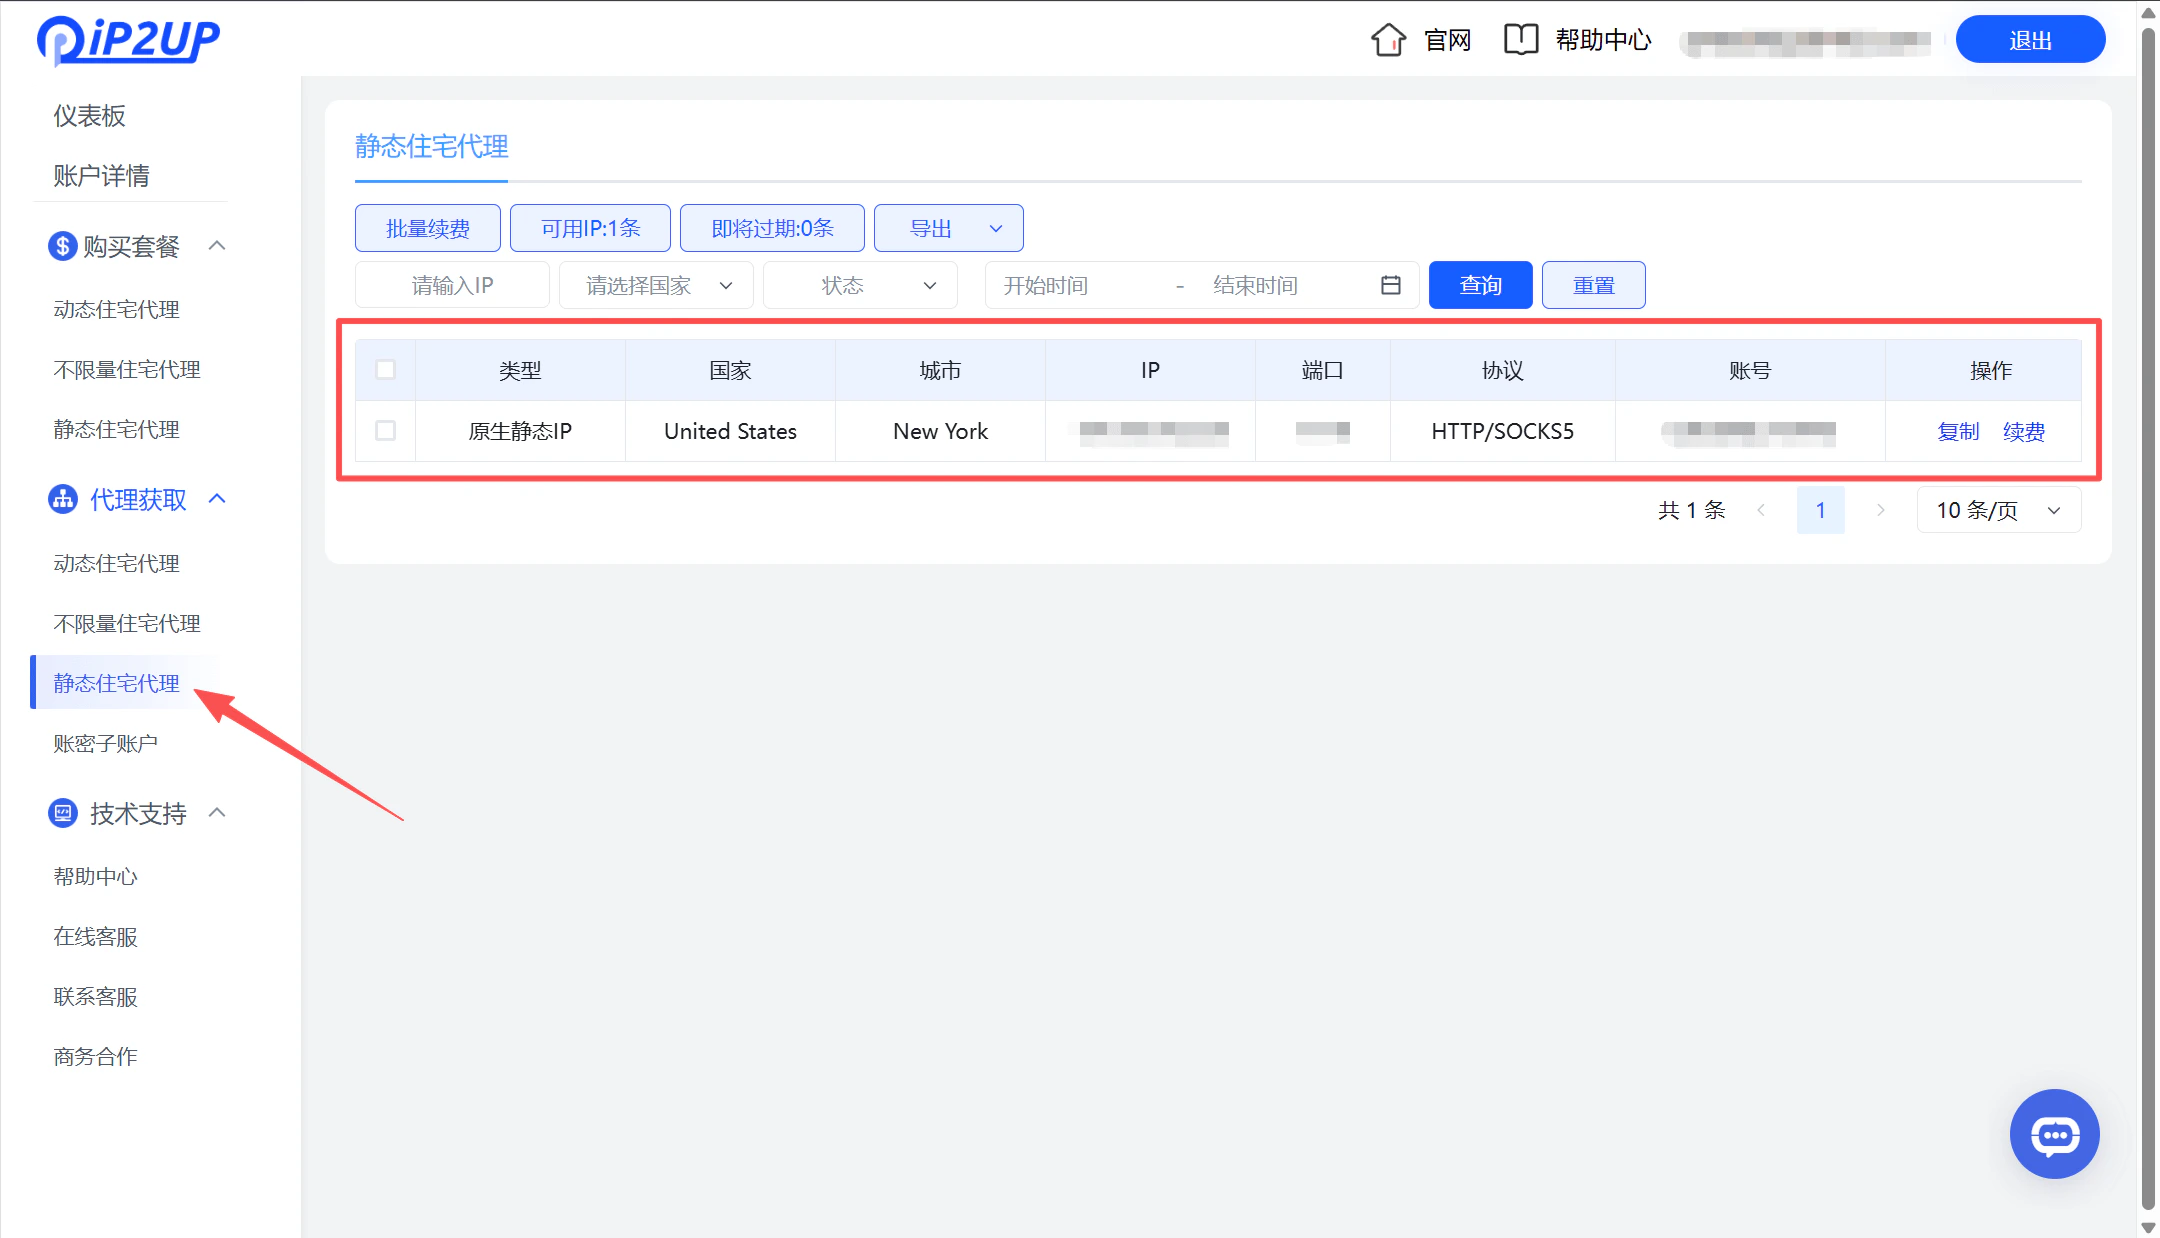
- Proxy Connectivity Test: You can verify whether the generated proxy information is functioning properly using testing tools (example testing tool: AdsPrower).
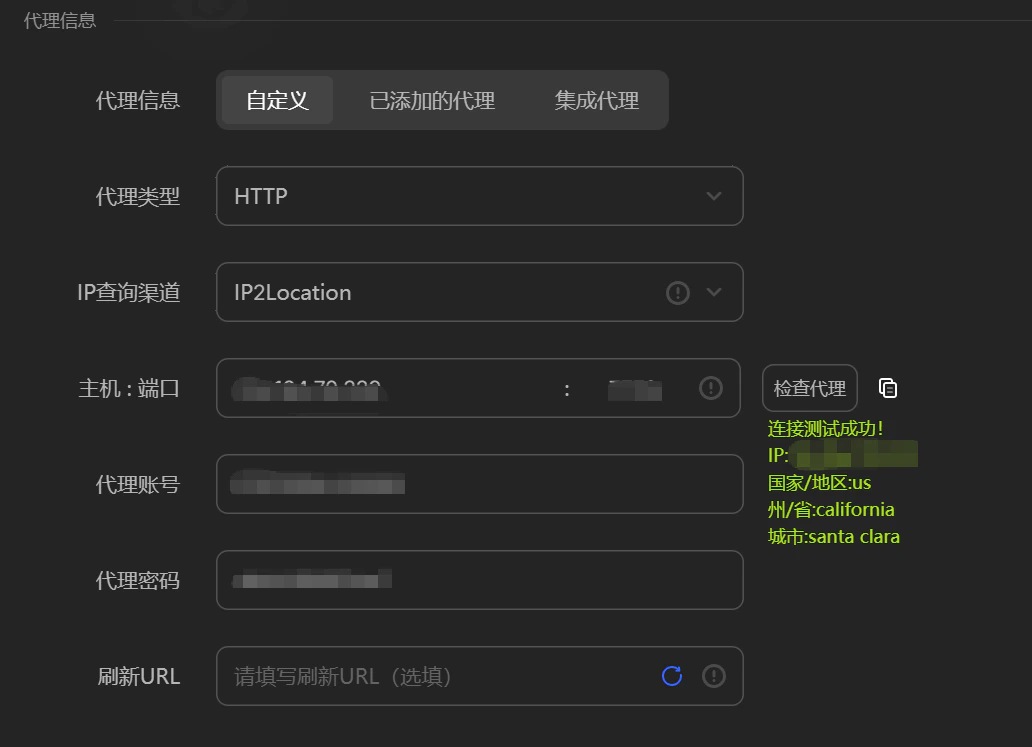
Next Step: For instructions on how to use these proxy IPs in third-party tools (such as fingerprint browsers), please refer to: Third-party Integration Tutorial。