
Log In and View Account Status
Visit the Ip2up official website to log in, and the system will automatically enter the dashboard interface. You can view your wallet balance and proxy plan purchases on this page.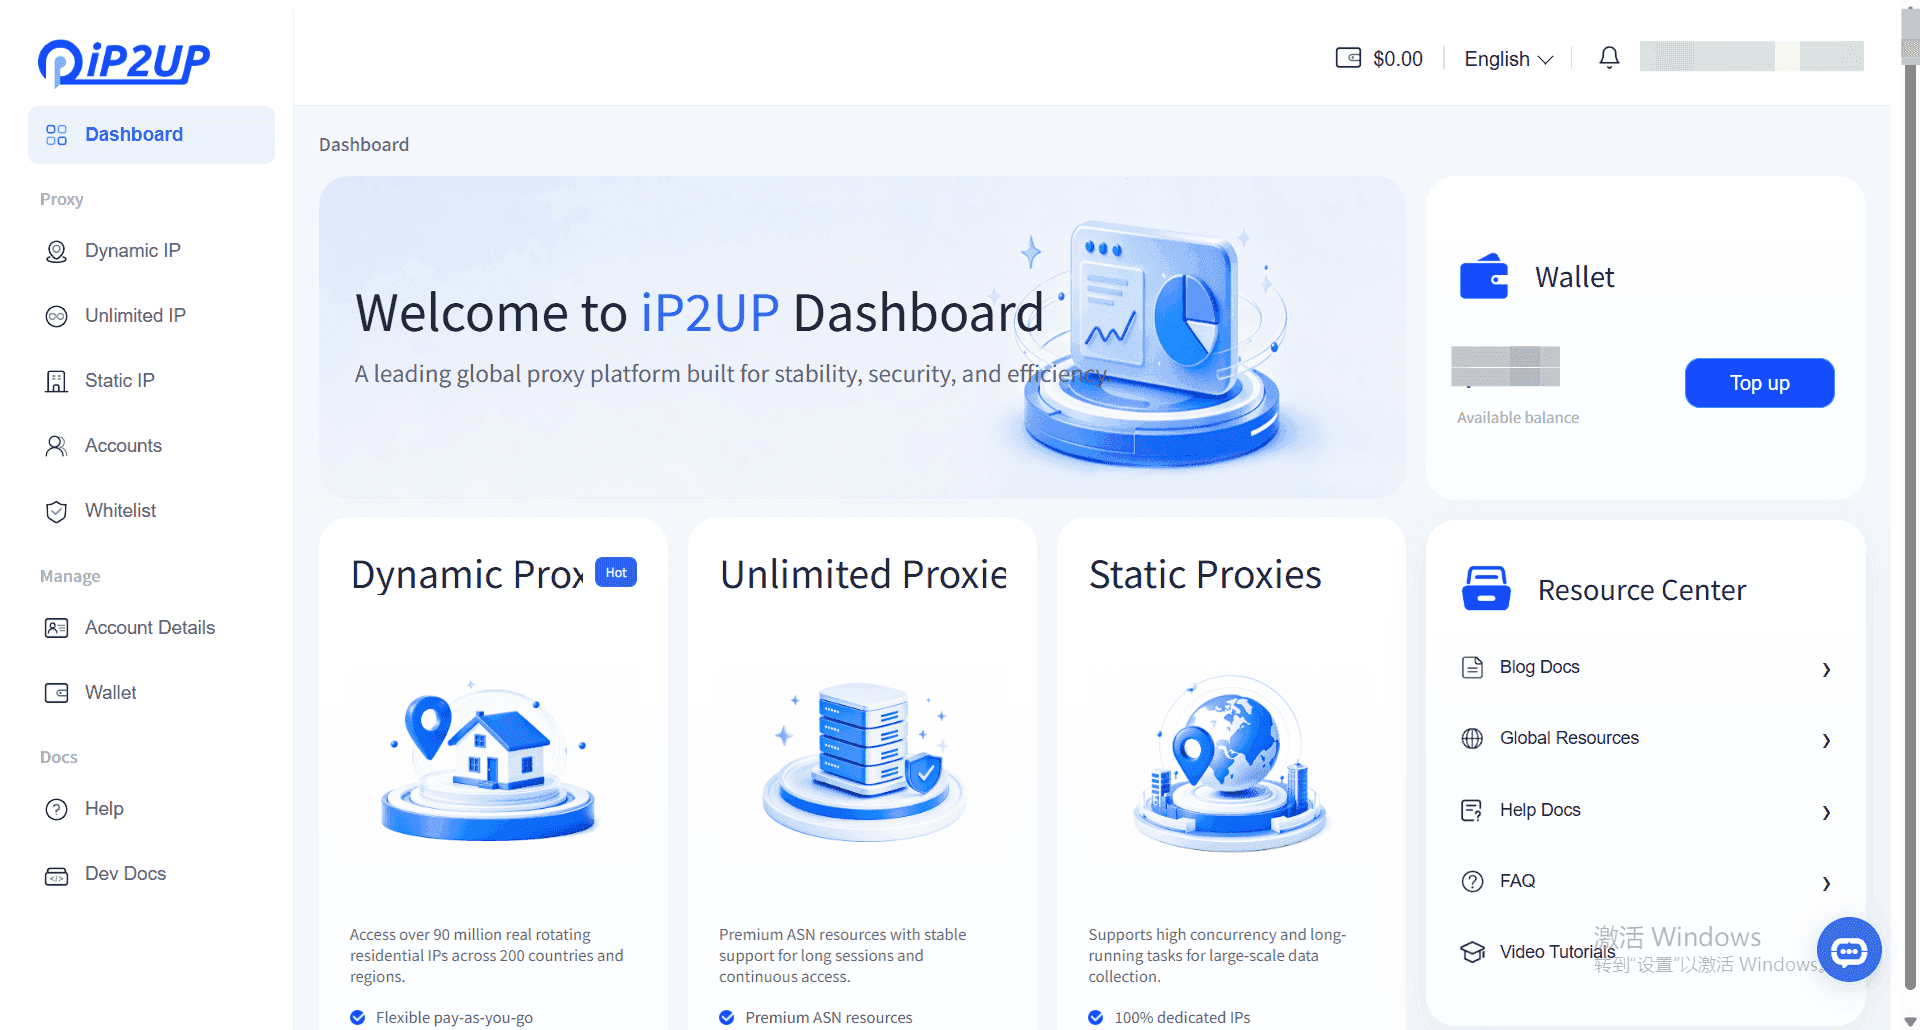
Select and Purchase a Proxy Package
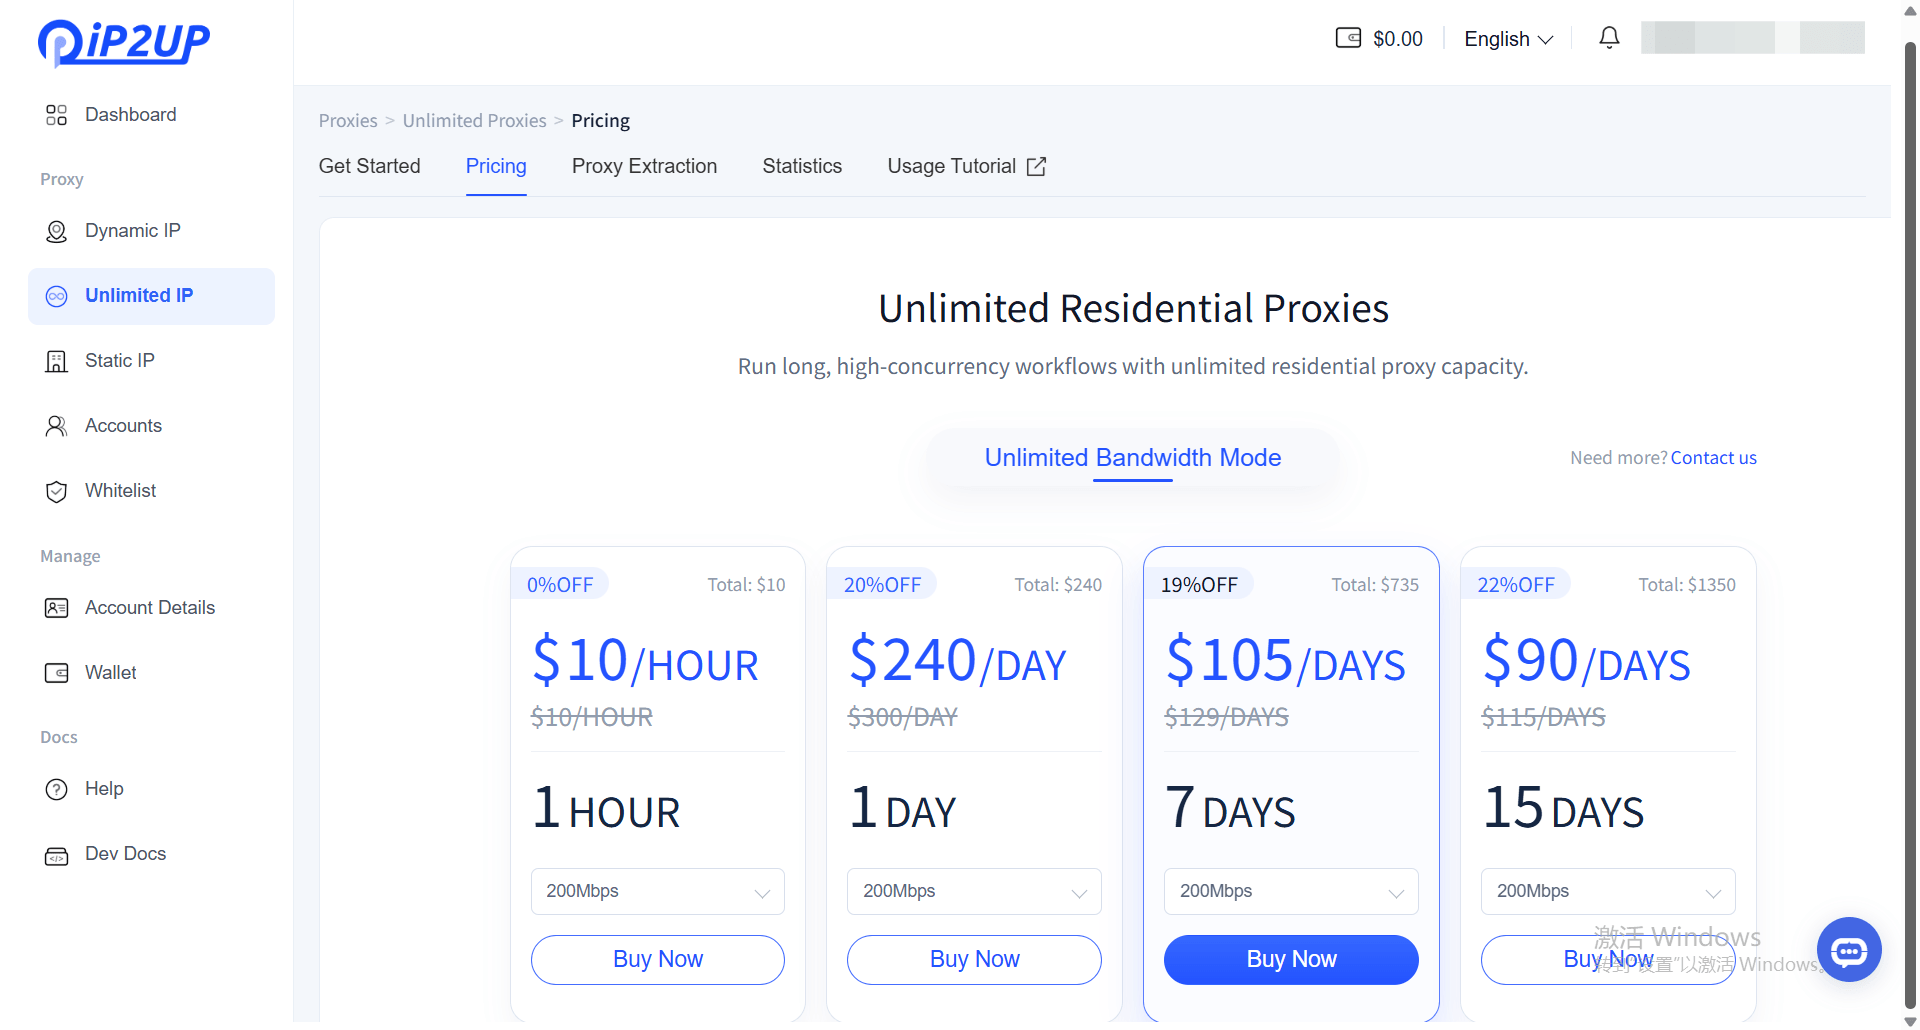
- Click the left menu bar → Unlimited Residential Proxy → click Pricing at the top
- Select the appropriate package configuration according to your needs
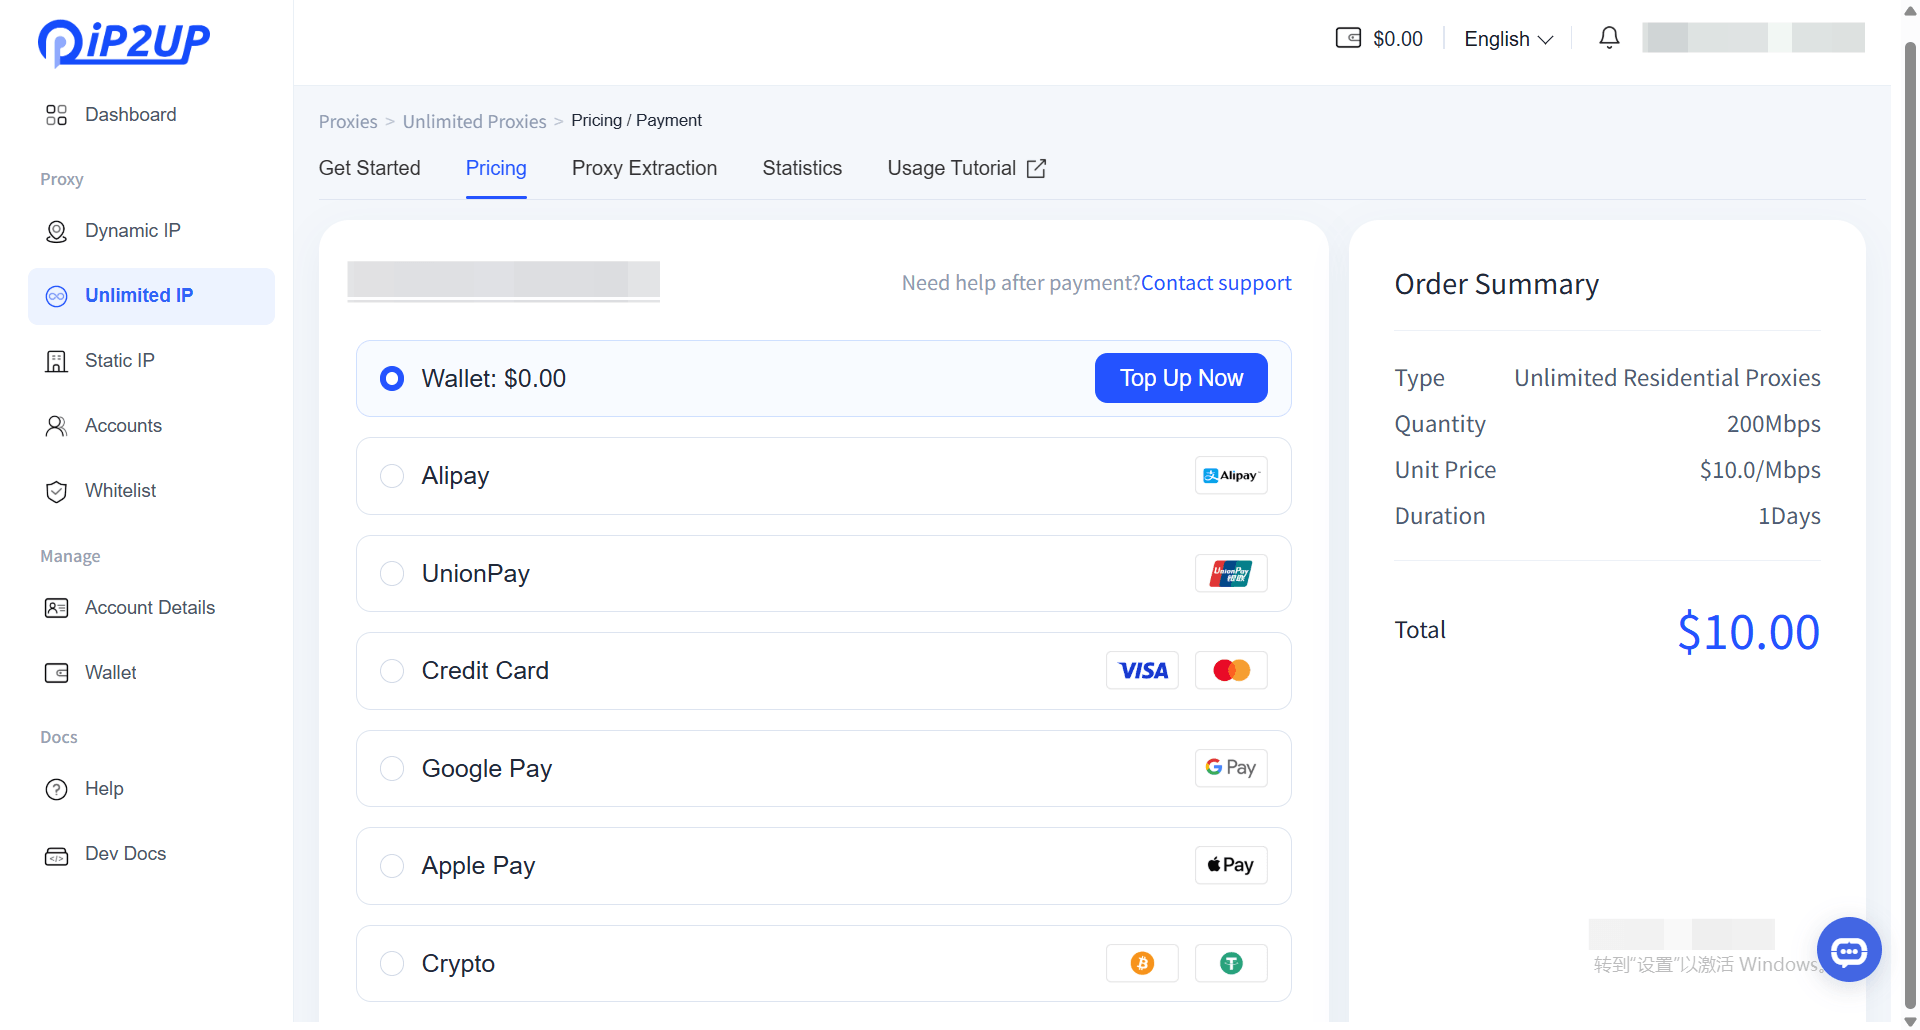
- Click Pay to complete the purchase
- Supported payment methods:
- Wallet balance
- Alipay
- UnionPay
- Credit card
- Google Pay
- Apple Pay
- Cryptocurrency payment
- After payment is completed, you can view the current purchase information and available resource status.
Obtain and Configure Proxy Information
-
Proxy Acquisition Rules
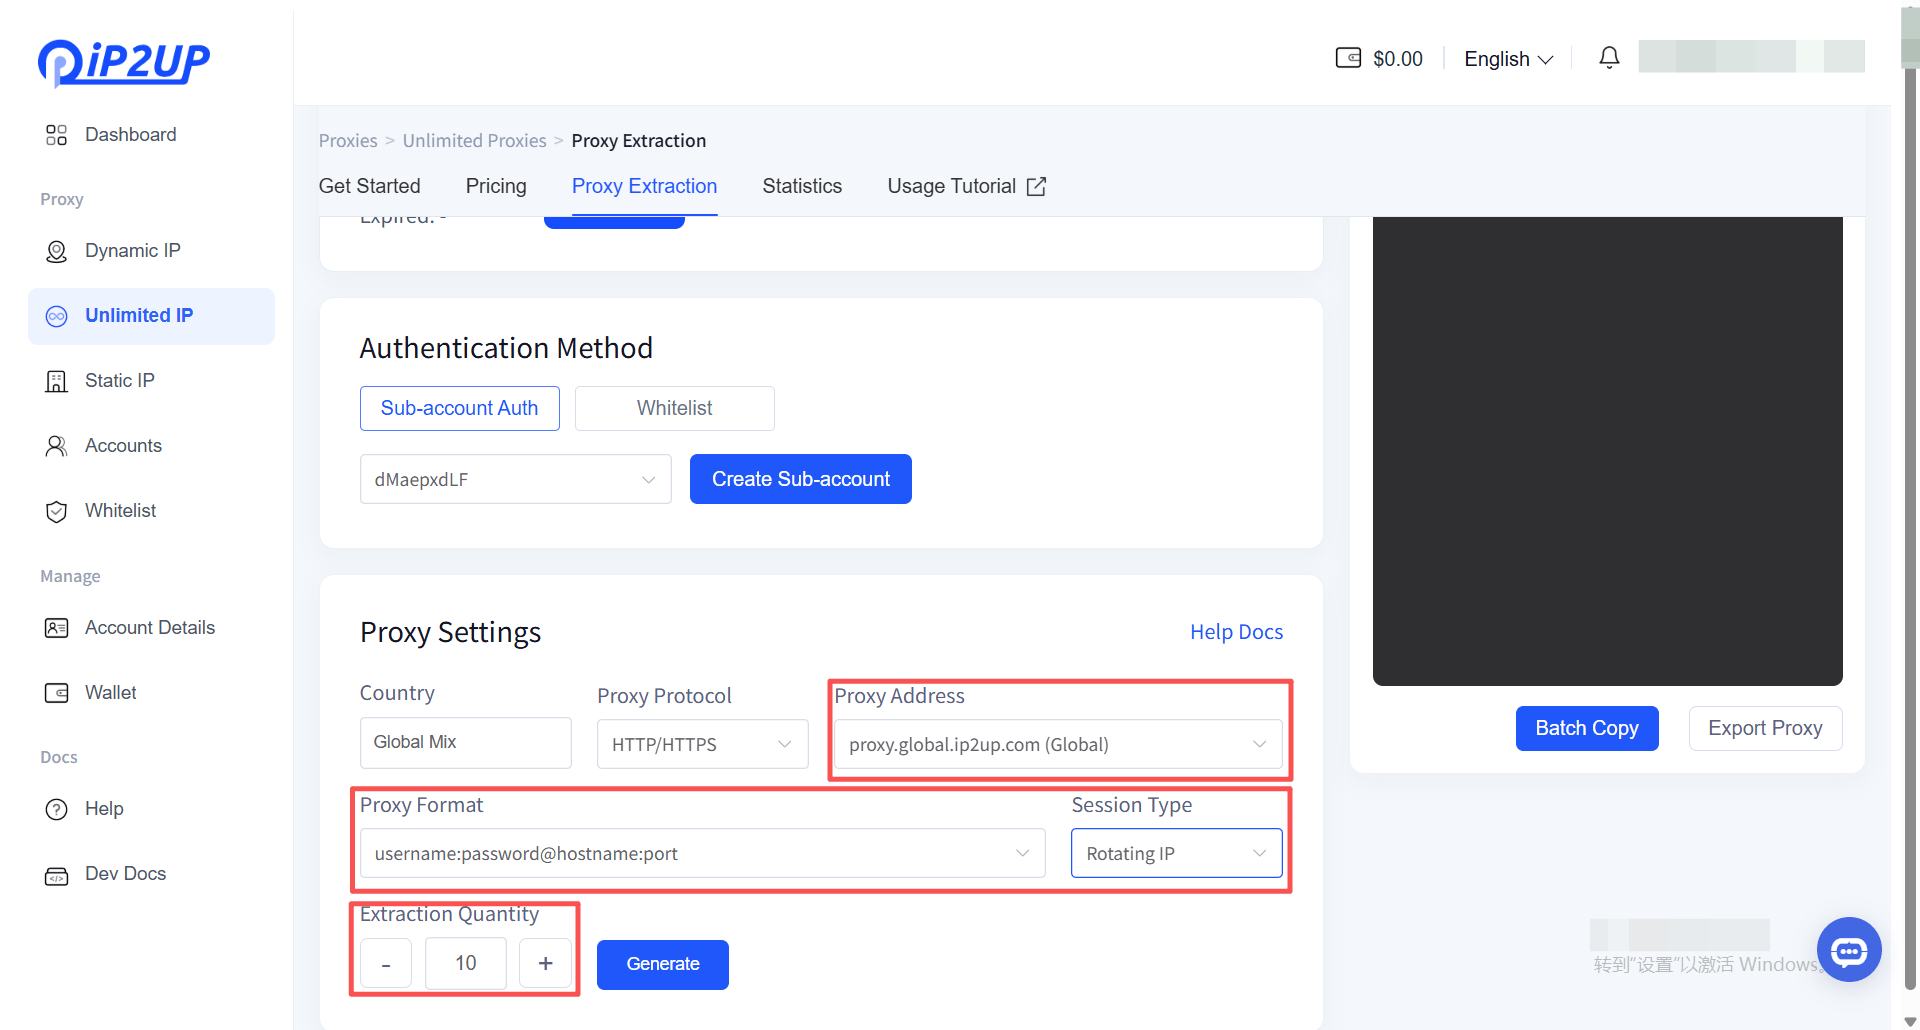
When obtaining Unlimited Residential Proxy IPs, country/region selection is not available. The system will automatically assign available IP resources. -
Proxy Information Composition
The generated proxy information contains the following four parts:- Proxy Account
- Password
- Server Address
- Port Number
- Proxy Format Example
- Usage Instructions
- When generating proxy information, you can choose the proxy protocol according to the requirements of your proxy software
- Supports account-and-password sub-account authentication for proxy connections
- Sub-accounts are used only for proxy connection authentication and cannot be used to log in to the main platform
Next Step: For instructions on how to use these proxy IPs in third-party tools (such as fingerprint browsers), please refer to: Third-party Integration Tutorial。