1. Open Wi-Fi Settings
Open Settings on your iPhone → tap Wi-Fi.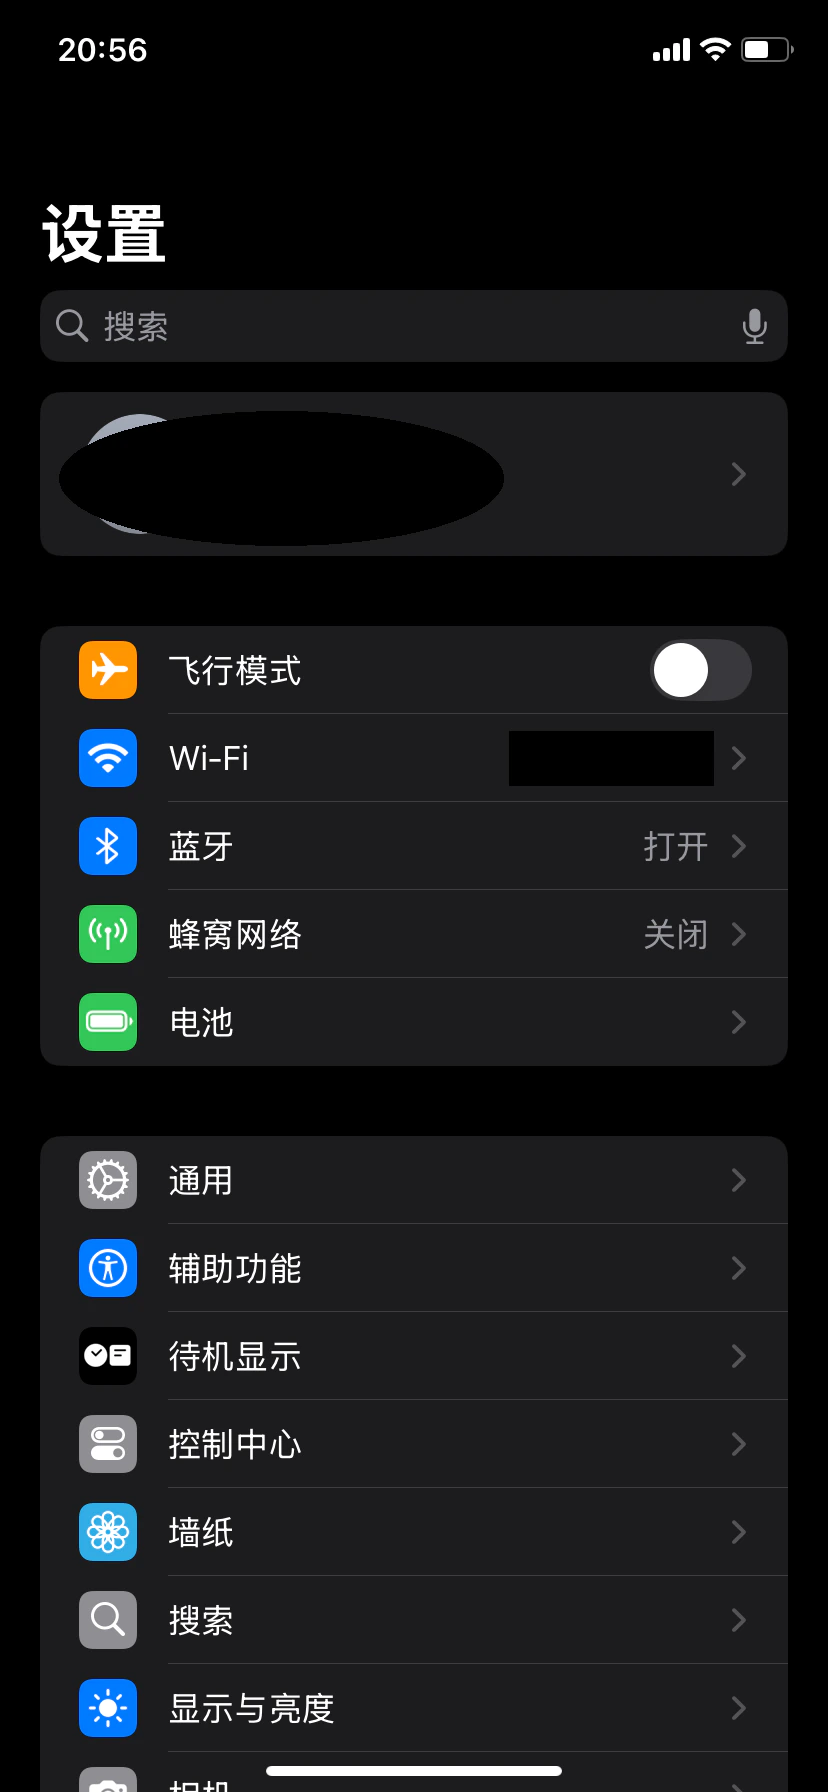
2. Open Connected Network Configuration
In the Wi-Fi list, find the currently connected network and tap the information icon (i) on the right to enter the network details page.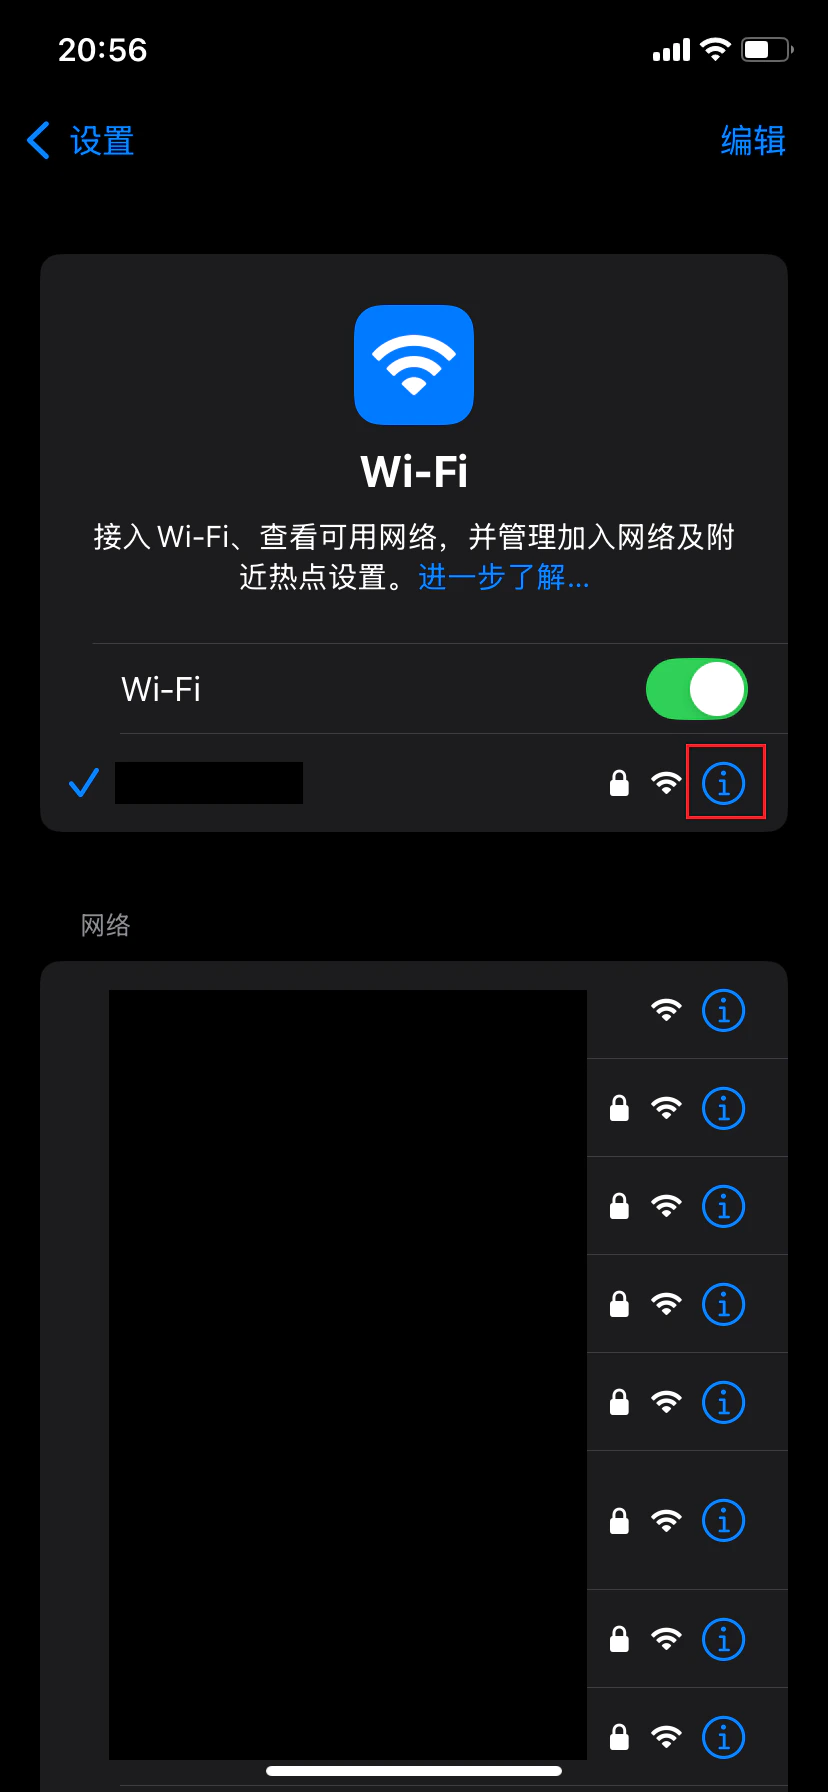
3. Open Proxy Configuration
On the network details page, scroll down and tap Configure Proxy.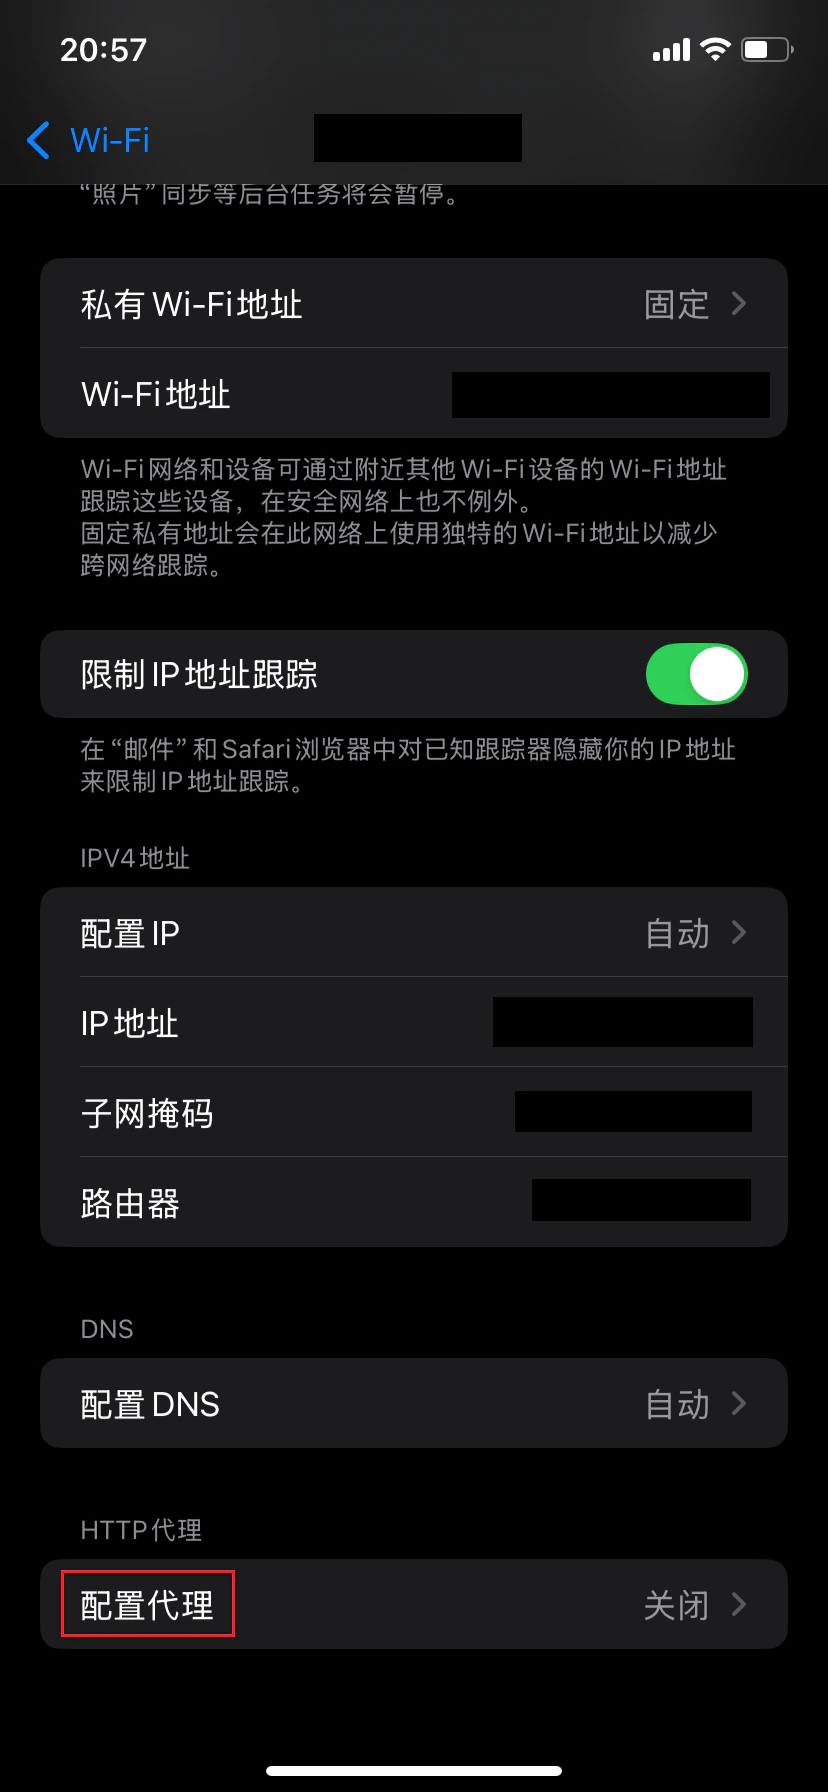
4. Select Manual Proxy Mode
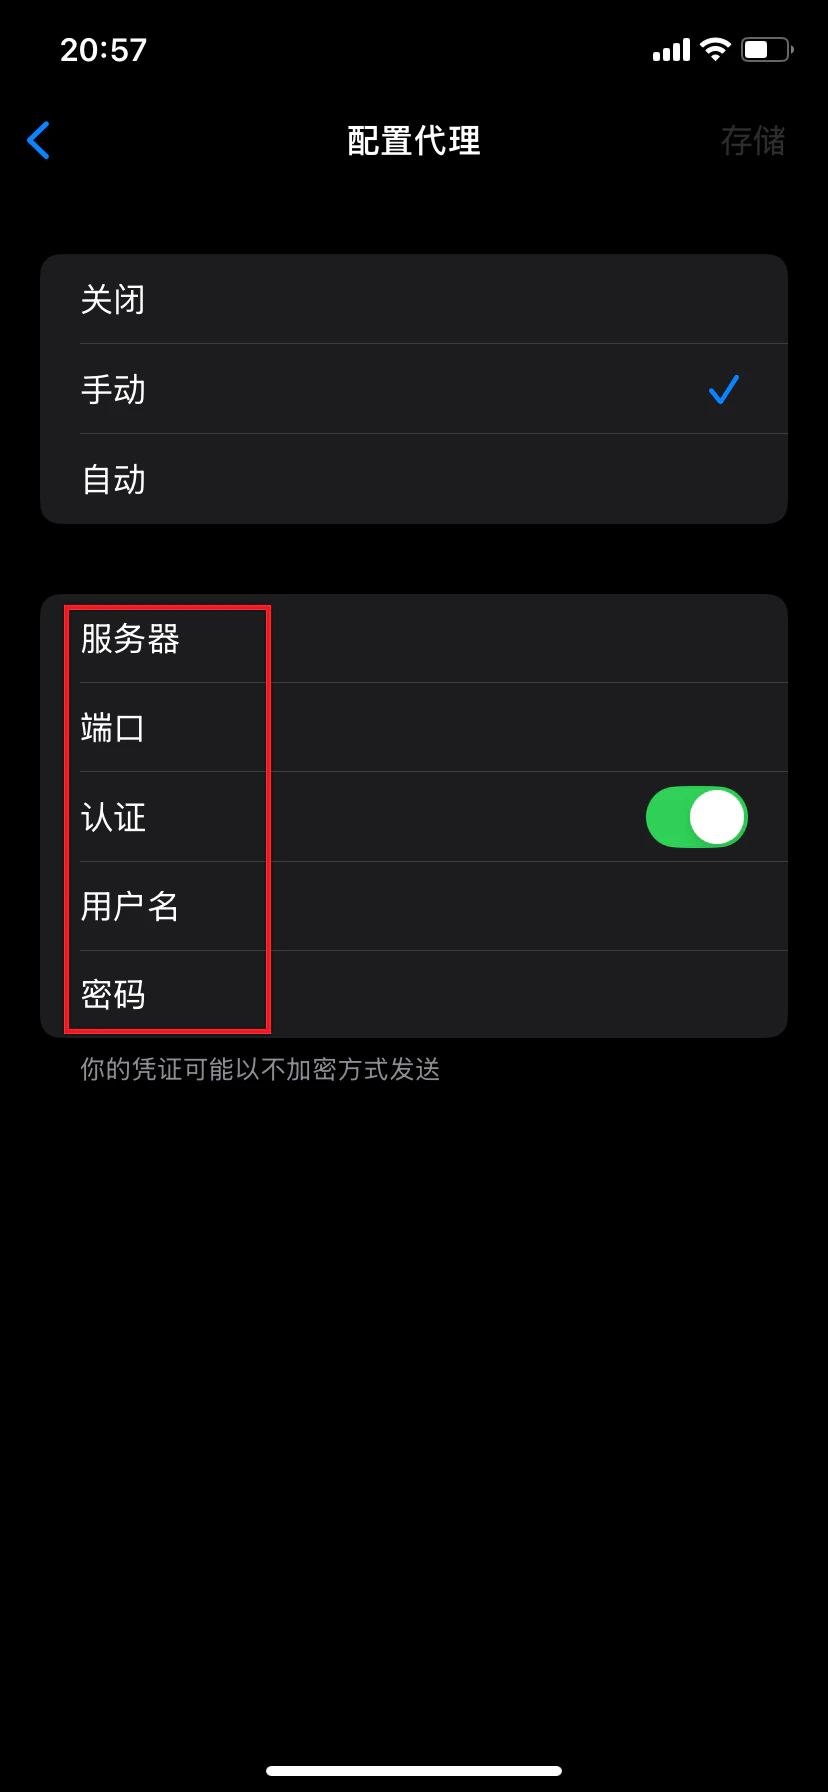
On the proxy configuration page, select Manual mode.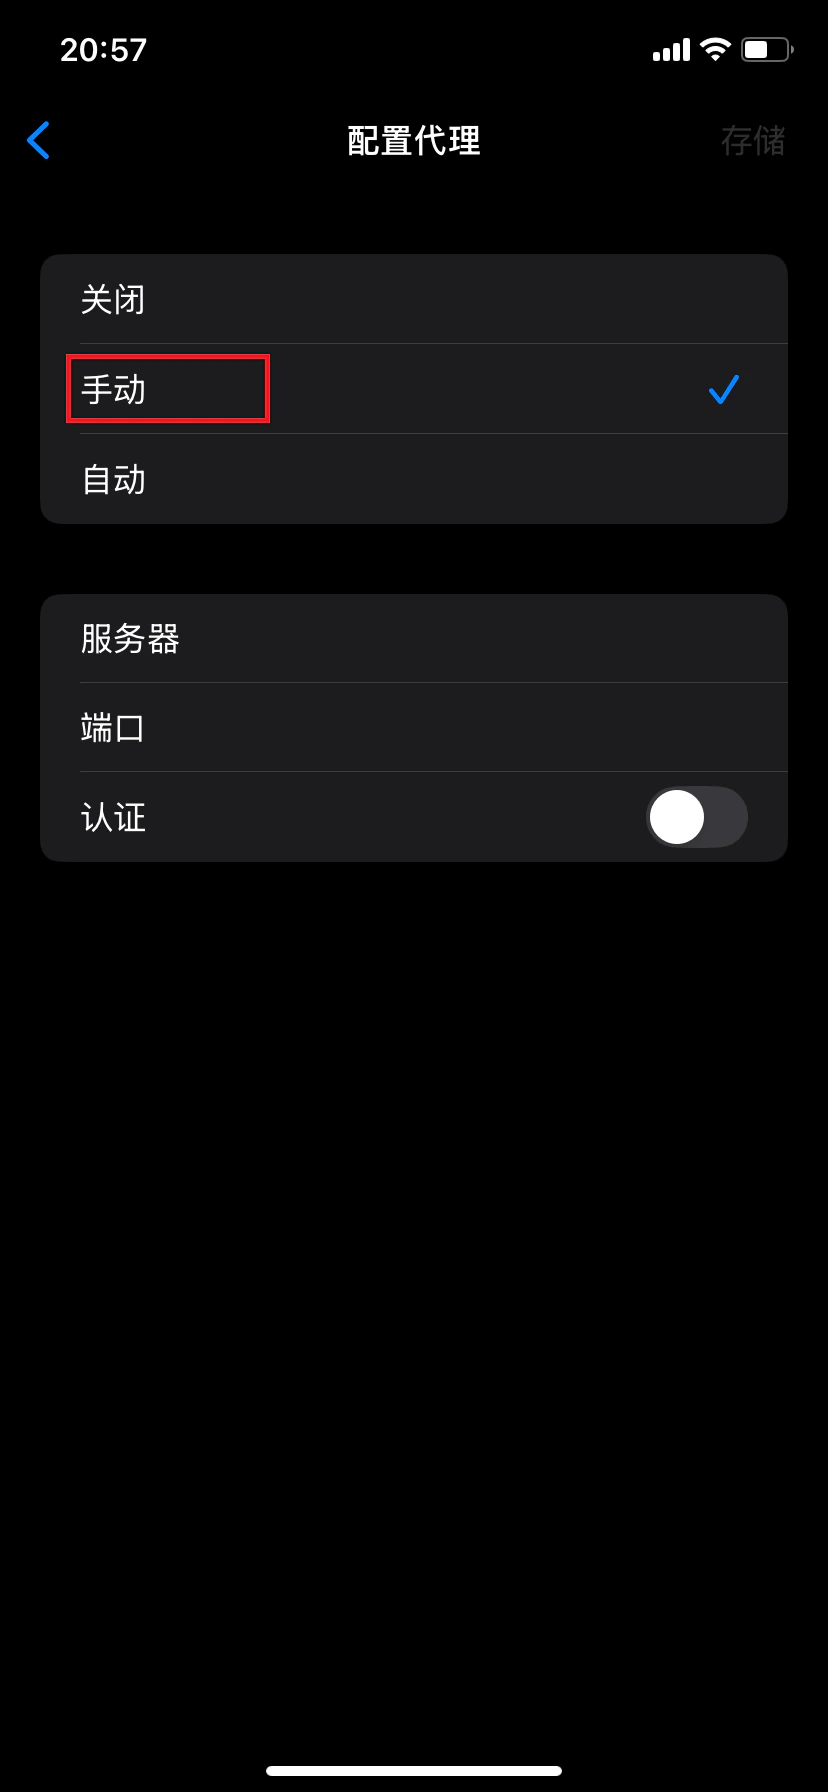
5. Enter Proxy Information and Save
- Enable the Authentication switch
- Fill in the following information:
- Server: Proxy server address
- Port: Proxy service port
- Username: Proxy username
- Password: Proxy password
- Tap Save in the top-right corner to apply the settings
6. Verify Proxy Connection
Open a browser and visit an IP detection website to confirm that the displayed IP address matches the proxy IP you configured. If they match, the proxy setup is successful.Notes
- This configuration applies at the Wi-Fi level and only takes effect for the current Wi-Fi network
- You must reconfigure the proxy after switching to a different Wi-Fi network
- Ensure that the proxy information is entered correctly and that the proxy service supports your intended use case