The usage method for Dynamic Residential IPs is the same as that for Static Residential IPs.
Step 1: Preparation
1. Download the Software Download and install the appropriate version of the Clash Verge client based on your operating system. (Demonstration system: Windows 10) 2. Prepare the Required Information- Users must configure an overseas network environment on their own
- Static Residential IP information: Obtain the following details from Ip2up:
- Server address
- Port number
- Username
- Password
Step 2: Add an Overseas Subscription
- Open Clash Verge and click Subscription in the left sidebar.
- Click Add Subscription, paste your overseas subscription link into the input box, and save it.
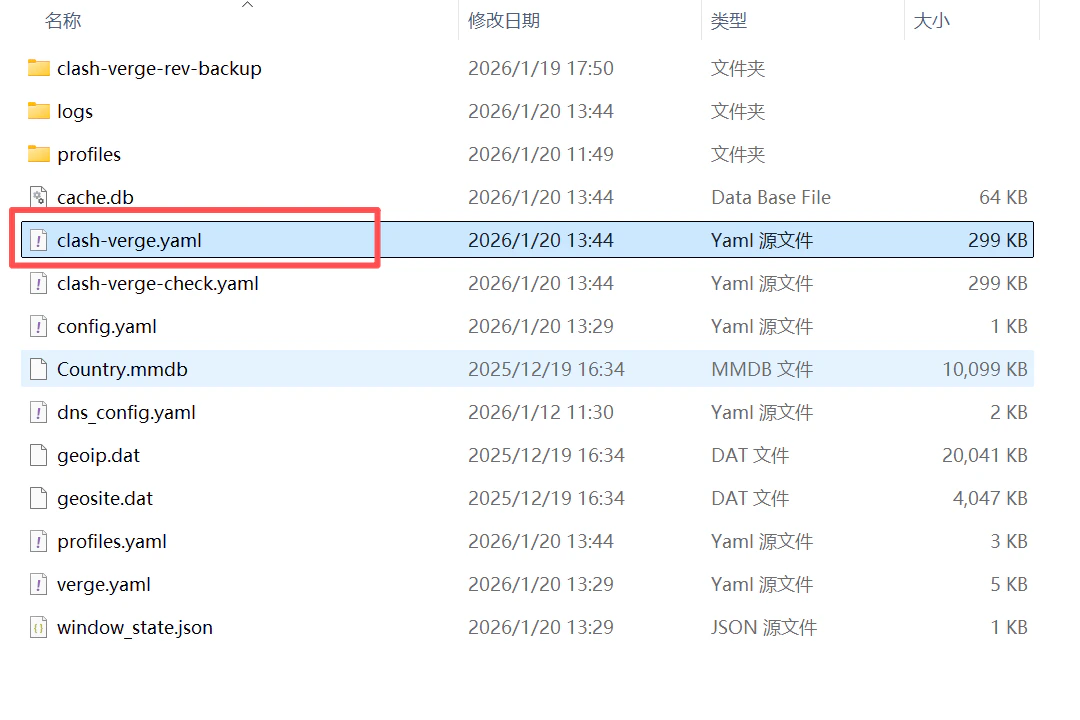
- After updating the subscription, go to Settings → Profile Management, locate the
config-verge.yamlfile in the local folder, and open it with a text editor for editing. It is recommended to make a backup copy before editing.

- name – Display name of the node
- server – Server address (IP or domain)
- port – Connection port
- type – Protocol type (e.g., trojan, vmess, shadowsocks)
- cipher – Encryption method
- password – Authentication password
Step 3: Modify the Configuration File
Add the following two types of nodes in theproxies: section of the configuration file to create a chained proxy structure:
- Entry Node:Replace with your stable overseas node that supports UDP
- Static Proxy:Replace with the Static Residential IP information obtained from Ip2up
- dialer-proxy: “Entry Node”:It indicates that the static proxy will connect through the “Entry Node” , forming a chained proxy
Step 4: Import the Configuration
1. Import the Configuration File Save the modified configuration file as config.yaml and import it using one of the following methods: Method 1: Drag and Drop Directly drag theconfig.yaml file into the Clash Verge main interface
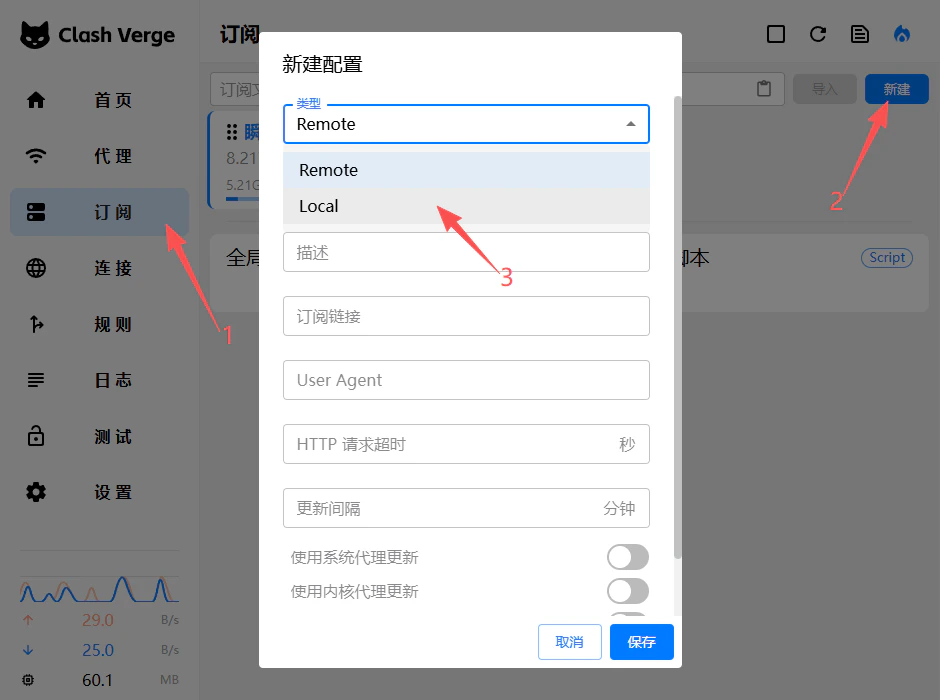
Method 2: Manual Import
- Click 「Proxy」 in the left sidebar
- Click the 「New」 button
- Select 「Local」 as the type
- Click 「Select File」, locate and choose your
config.yamlfile, the file name can be customized
Step 5: Testing and Usage
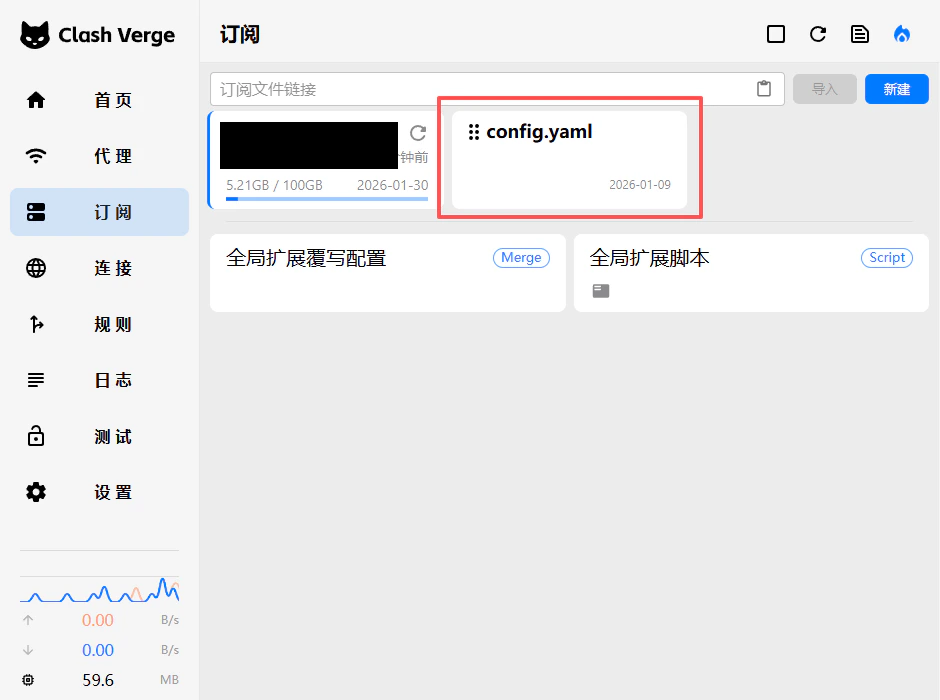
1. Enable the Configuration File- Click 「Subscription」 in the left sidebar
- Find the newly added configuration file in the list
- Click the 「Start」 button on the right
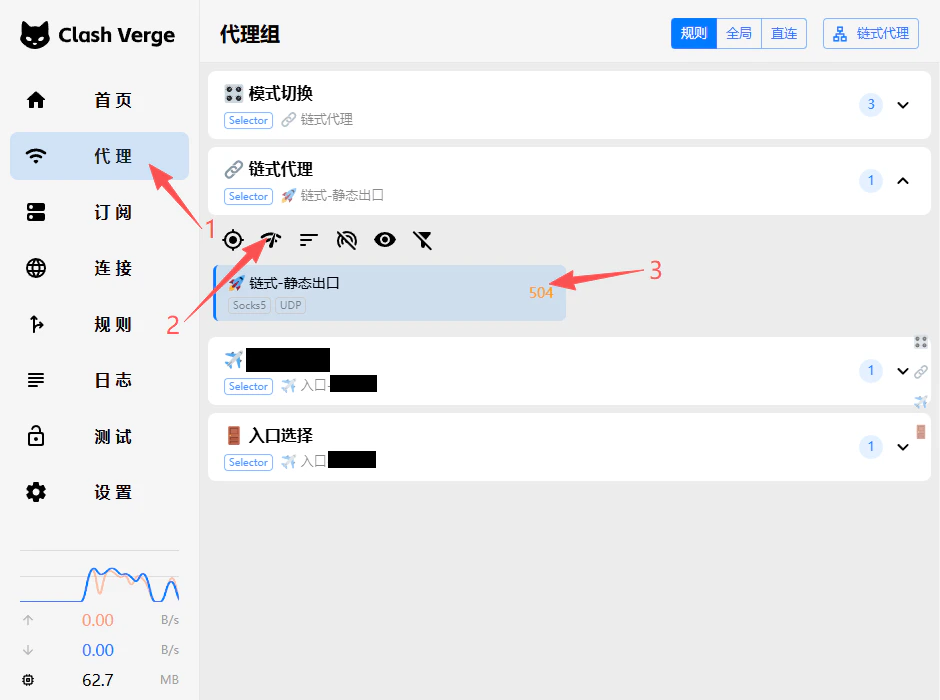
- Switch to the 「Proxy」 page
- Locate 「Chained Proxy」 in the list
- Check whether a latency value is displayed on the right (a displayed value indicates a successful connection)
- Rule Mode:Intelligent traffic routing based on predefined rules
- Global Mode:All traffic is forwarded through the proxy