The usage method for Dynamic Residential IPs is the same as that for Static Residential IPs.
Step 1:Set Global Routing Mode
Open the v2rayNG app, tap the menu in the top-left corner, and go to “Routing Settings”.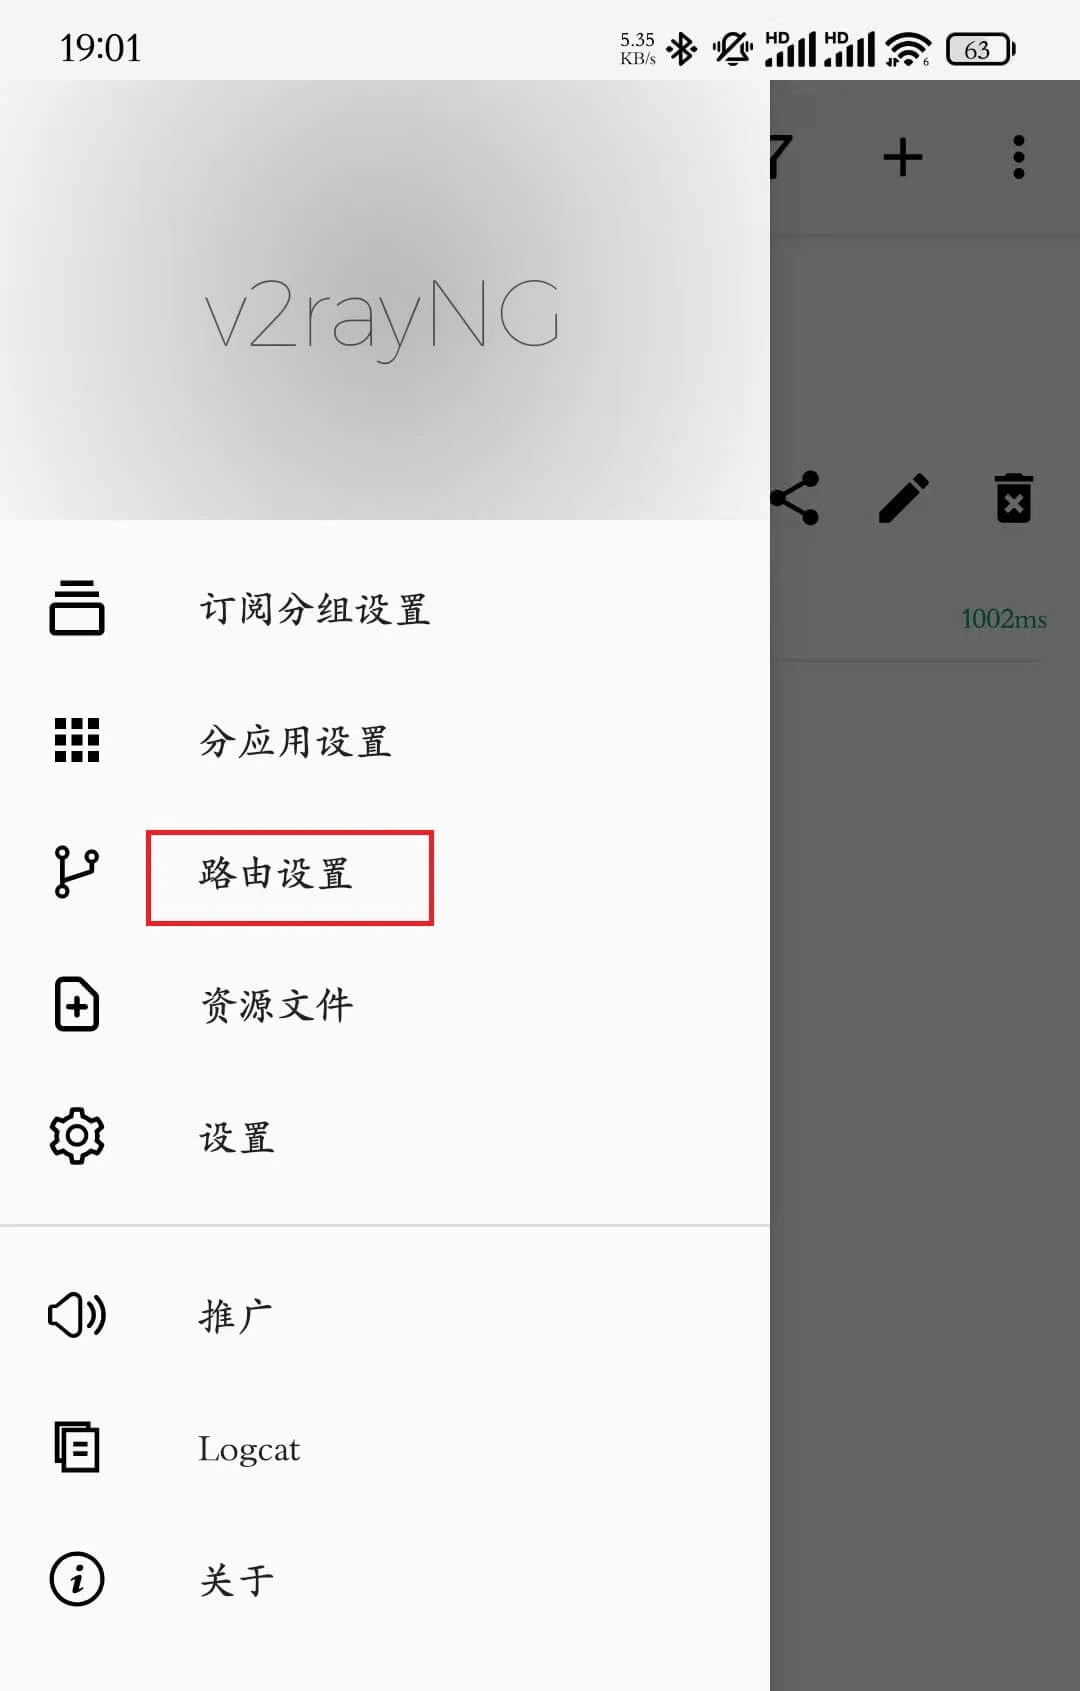
Step 2:Adjust Routing Configuration
On the “Routing Settings” page, disable the four options highlighted in the image to ensure normal proxy traffic.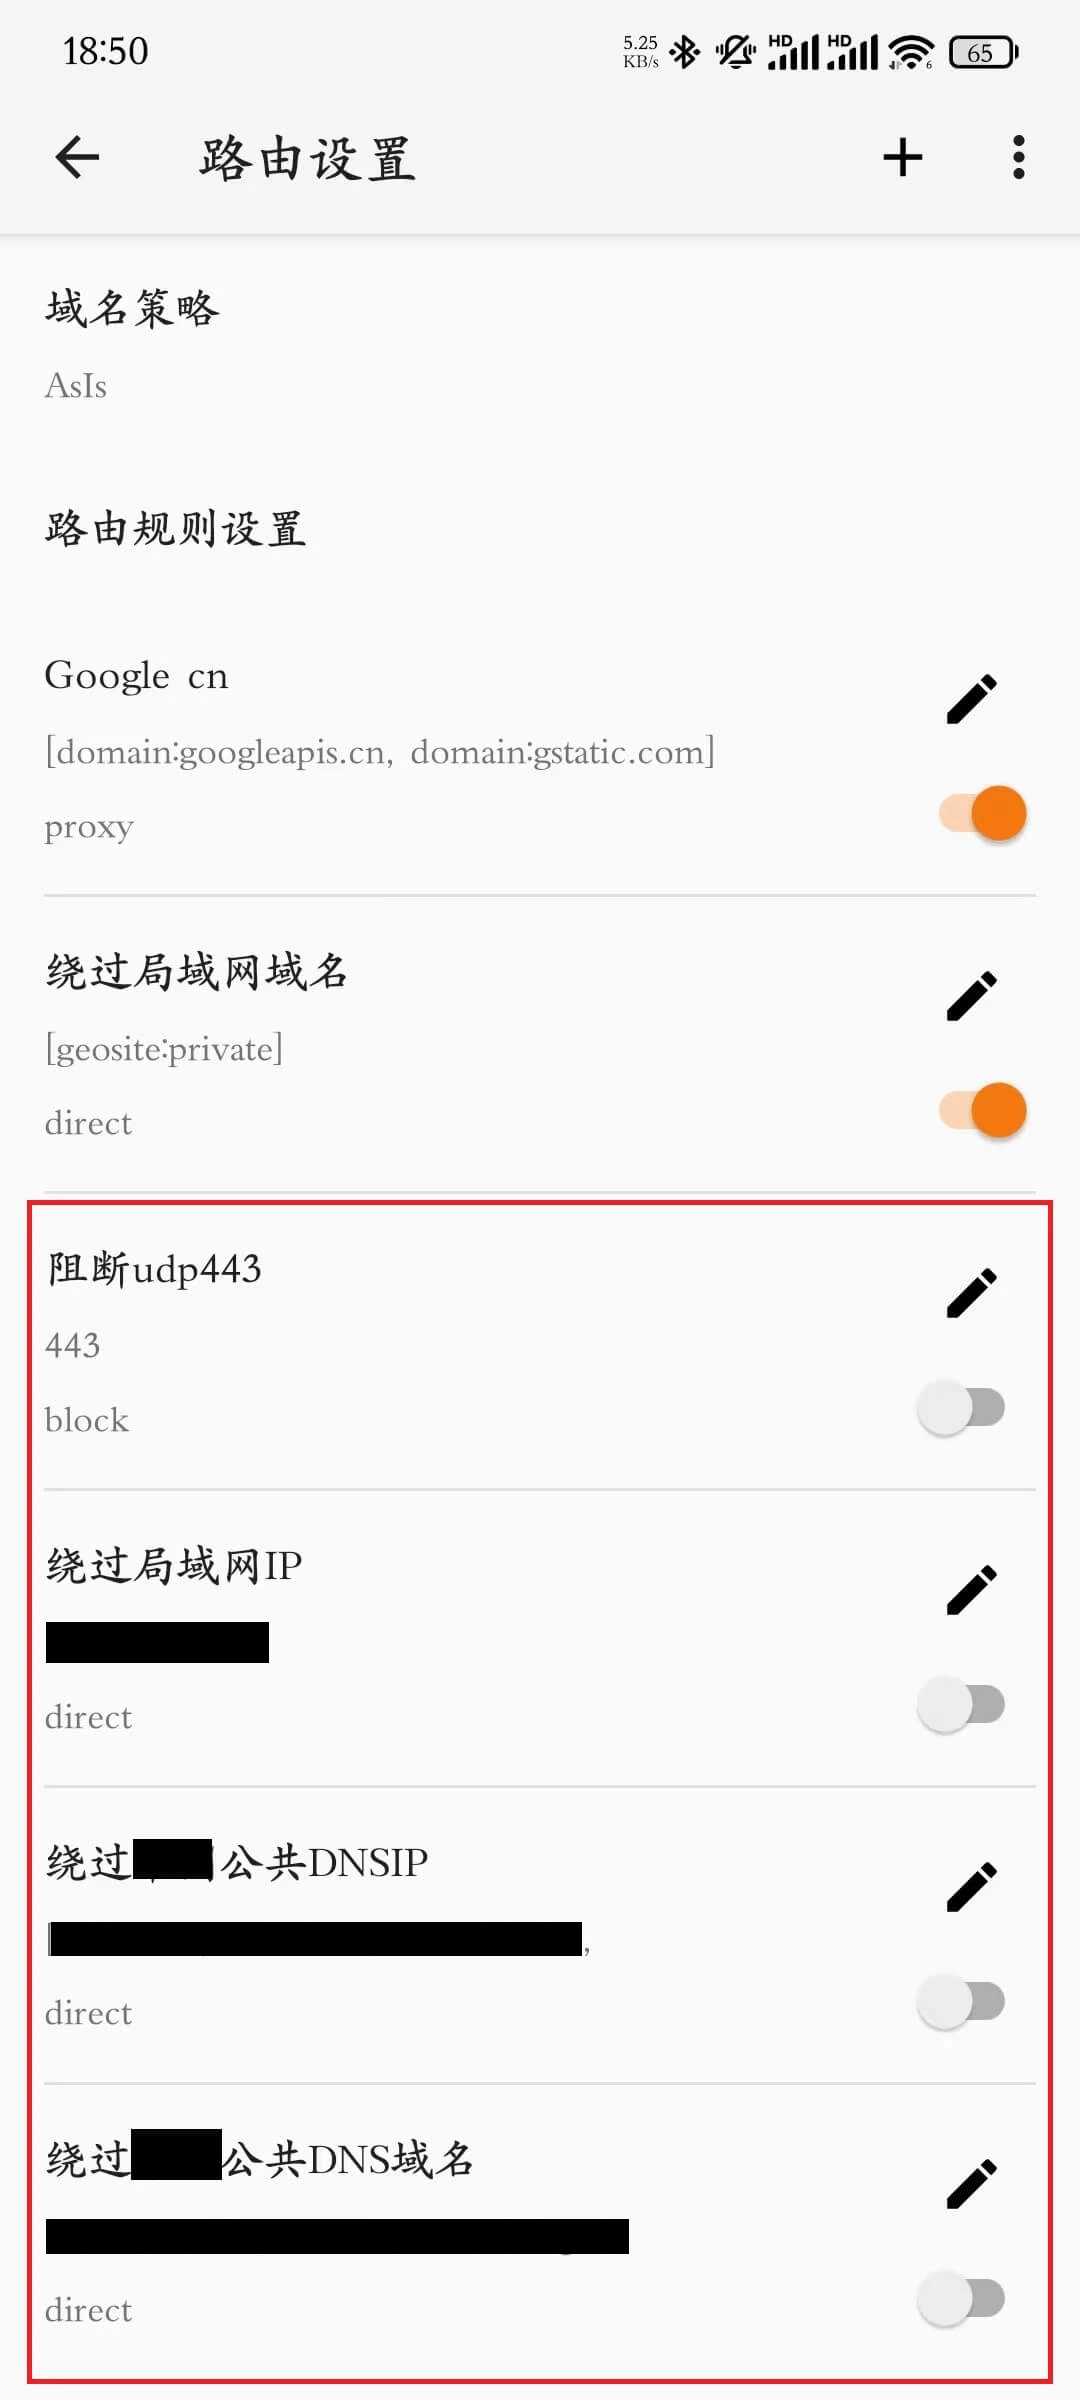
Step 3:Go to Subscription Group Settings
Tap the top-left menu and select “Subscription Group Settings”.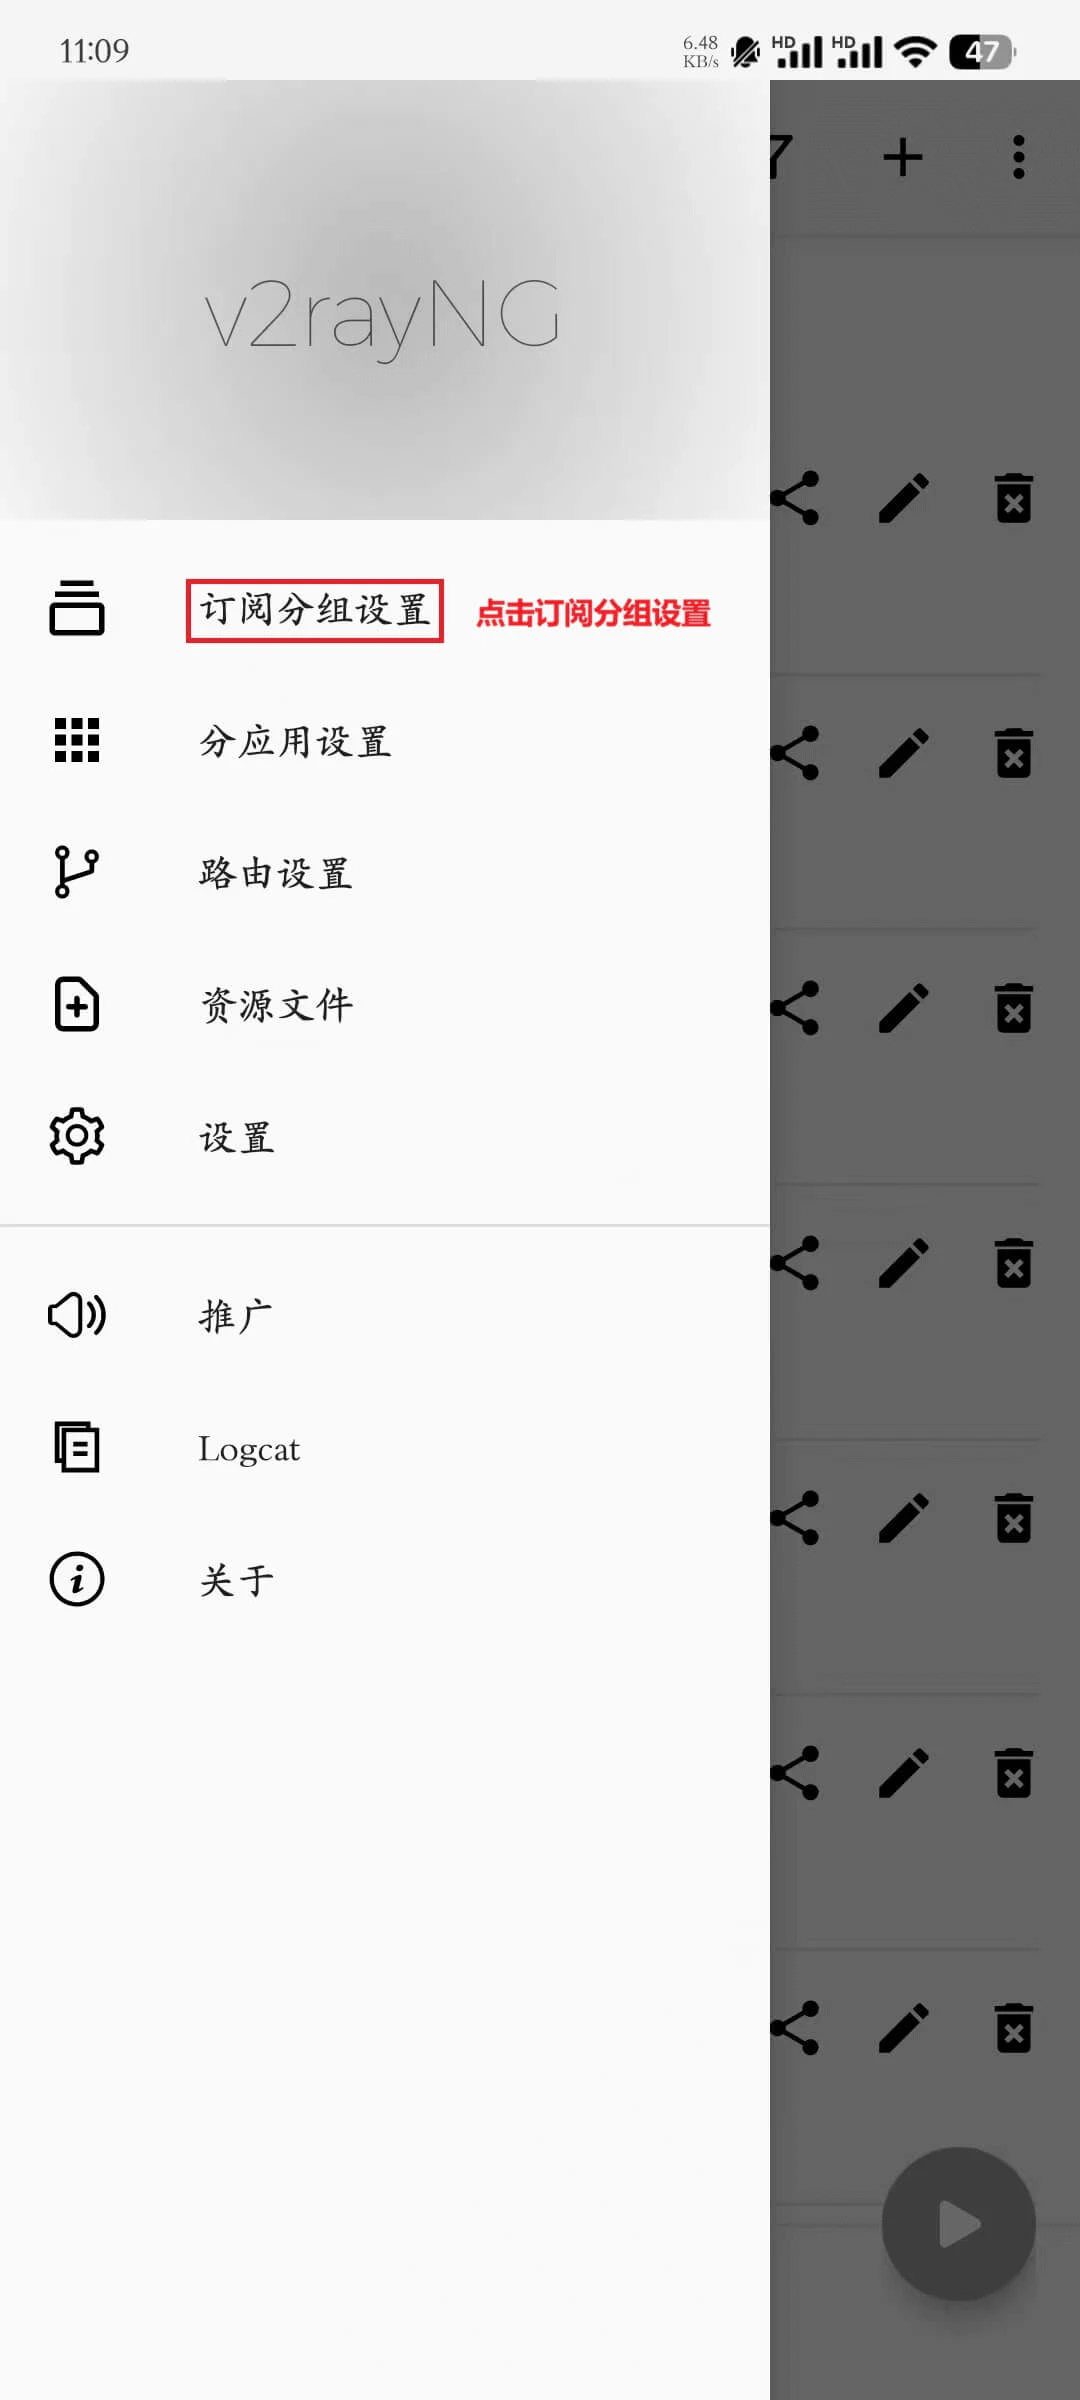
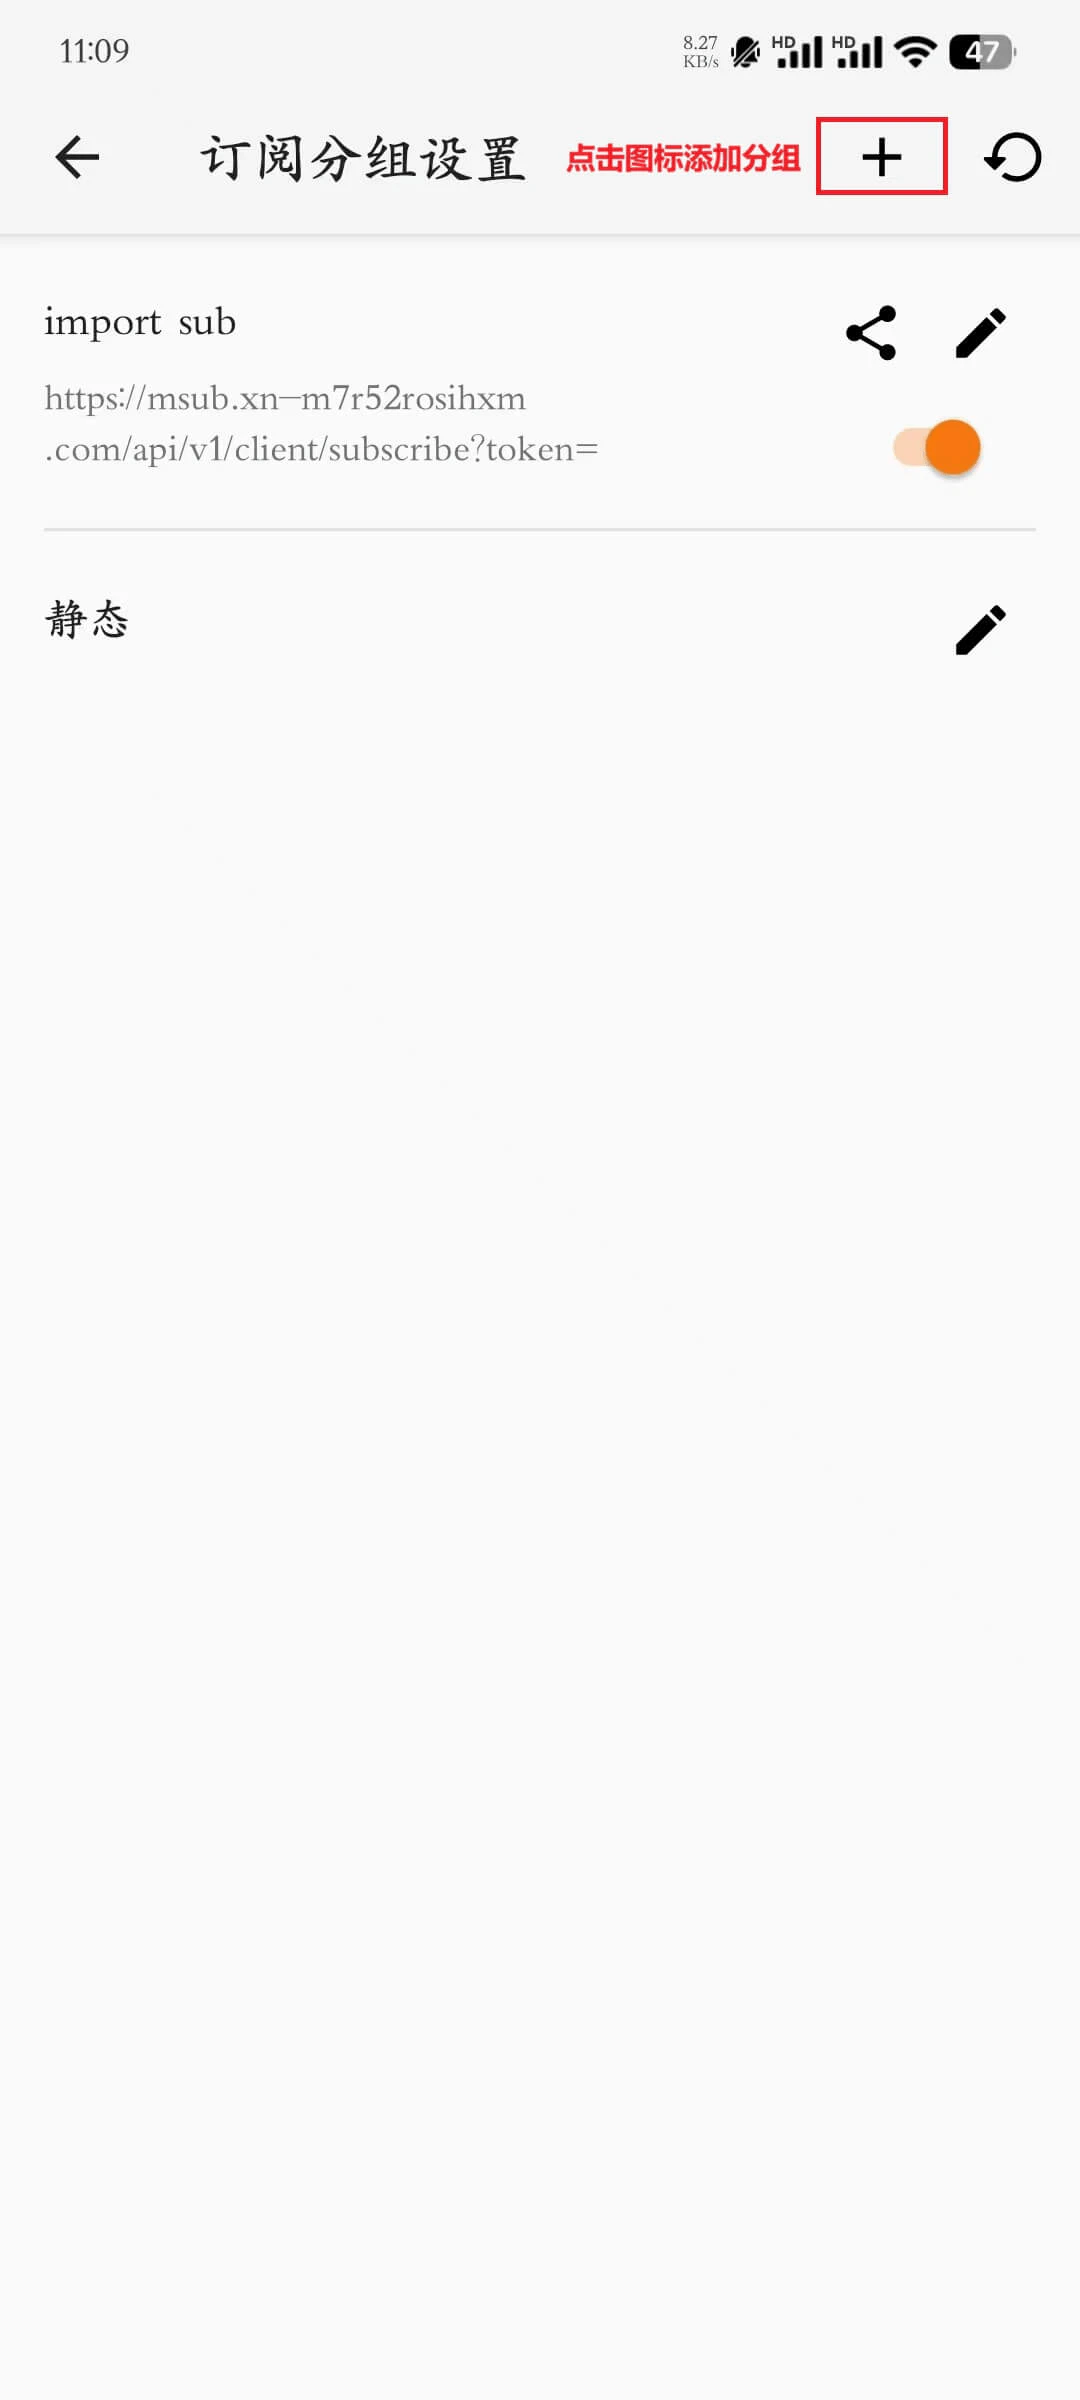
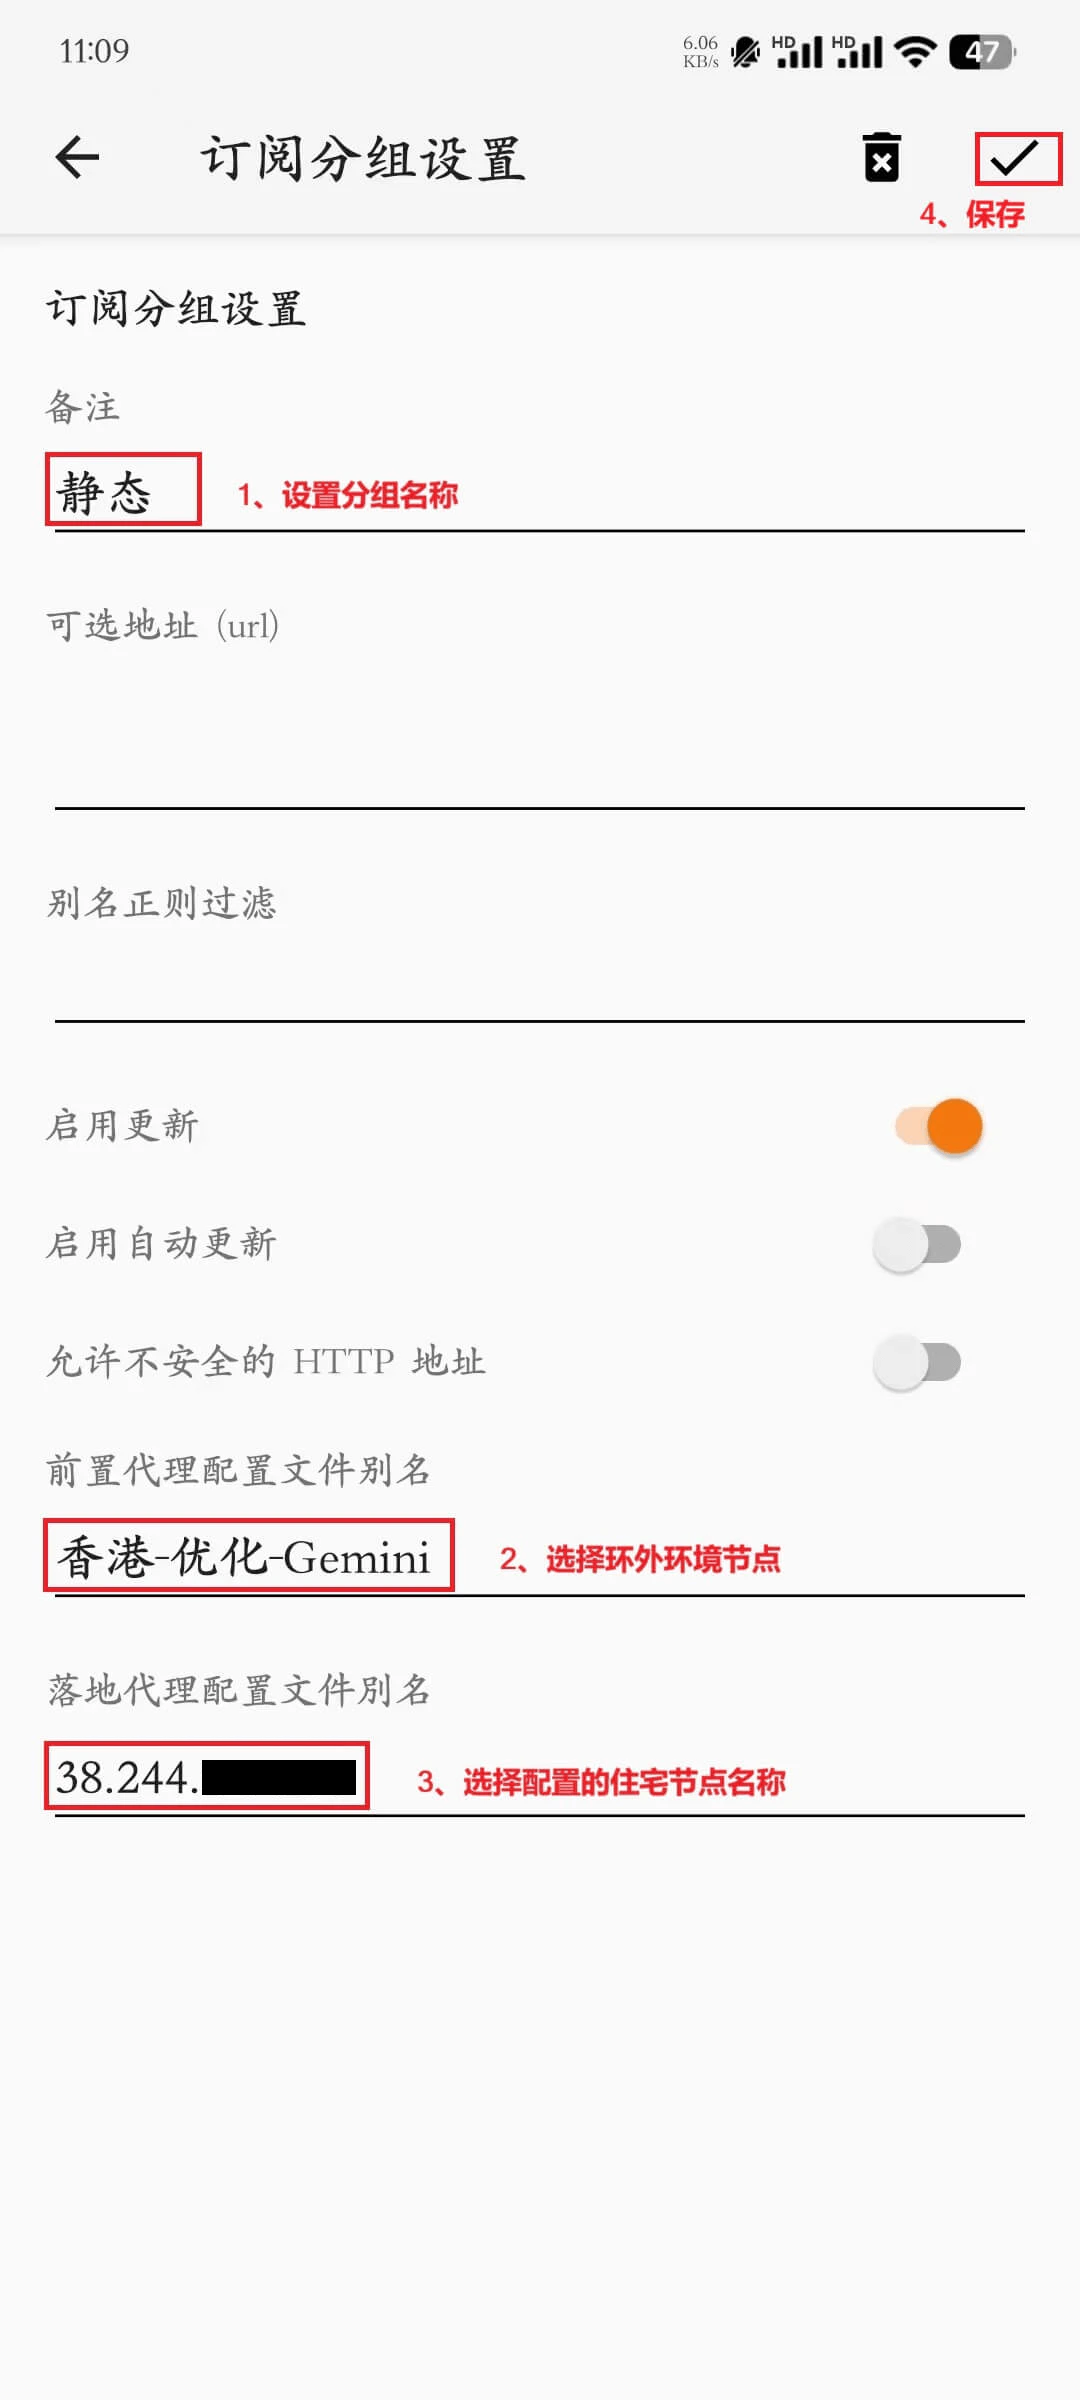
Step 4:Create a New Group
- Tap the ”+” icon in the top-right corner to add a new group.
- Fill in the required group information:
- Group Name: Custom group identifier
- Front Proxy Name: Select an overseas network node (for connecting to the overseas environment)
- Exit Proxy Name: Select an Ip2up residential node (for final access)
- Tap “Save” to finish creating the group.
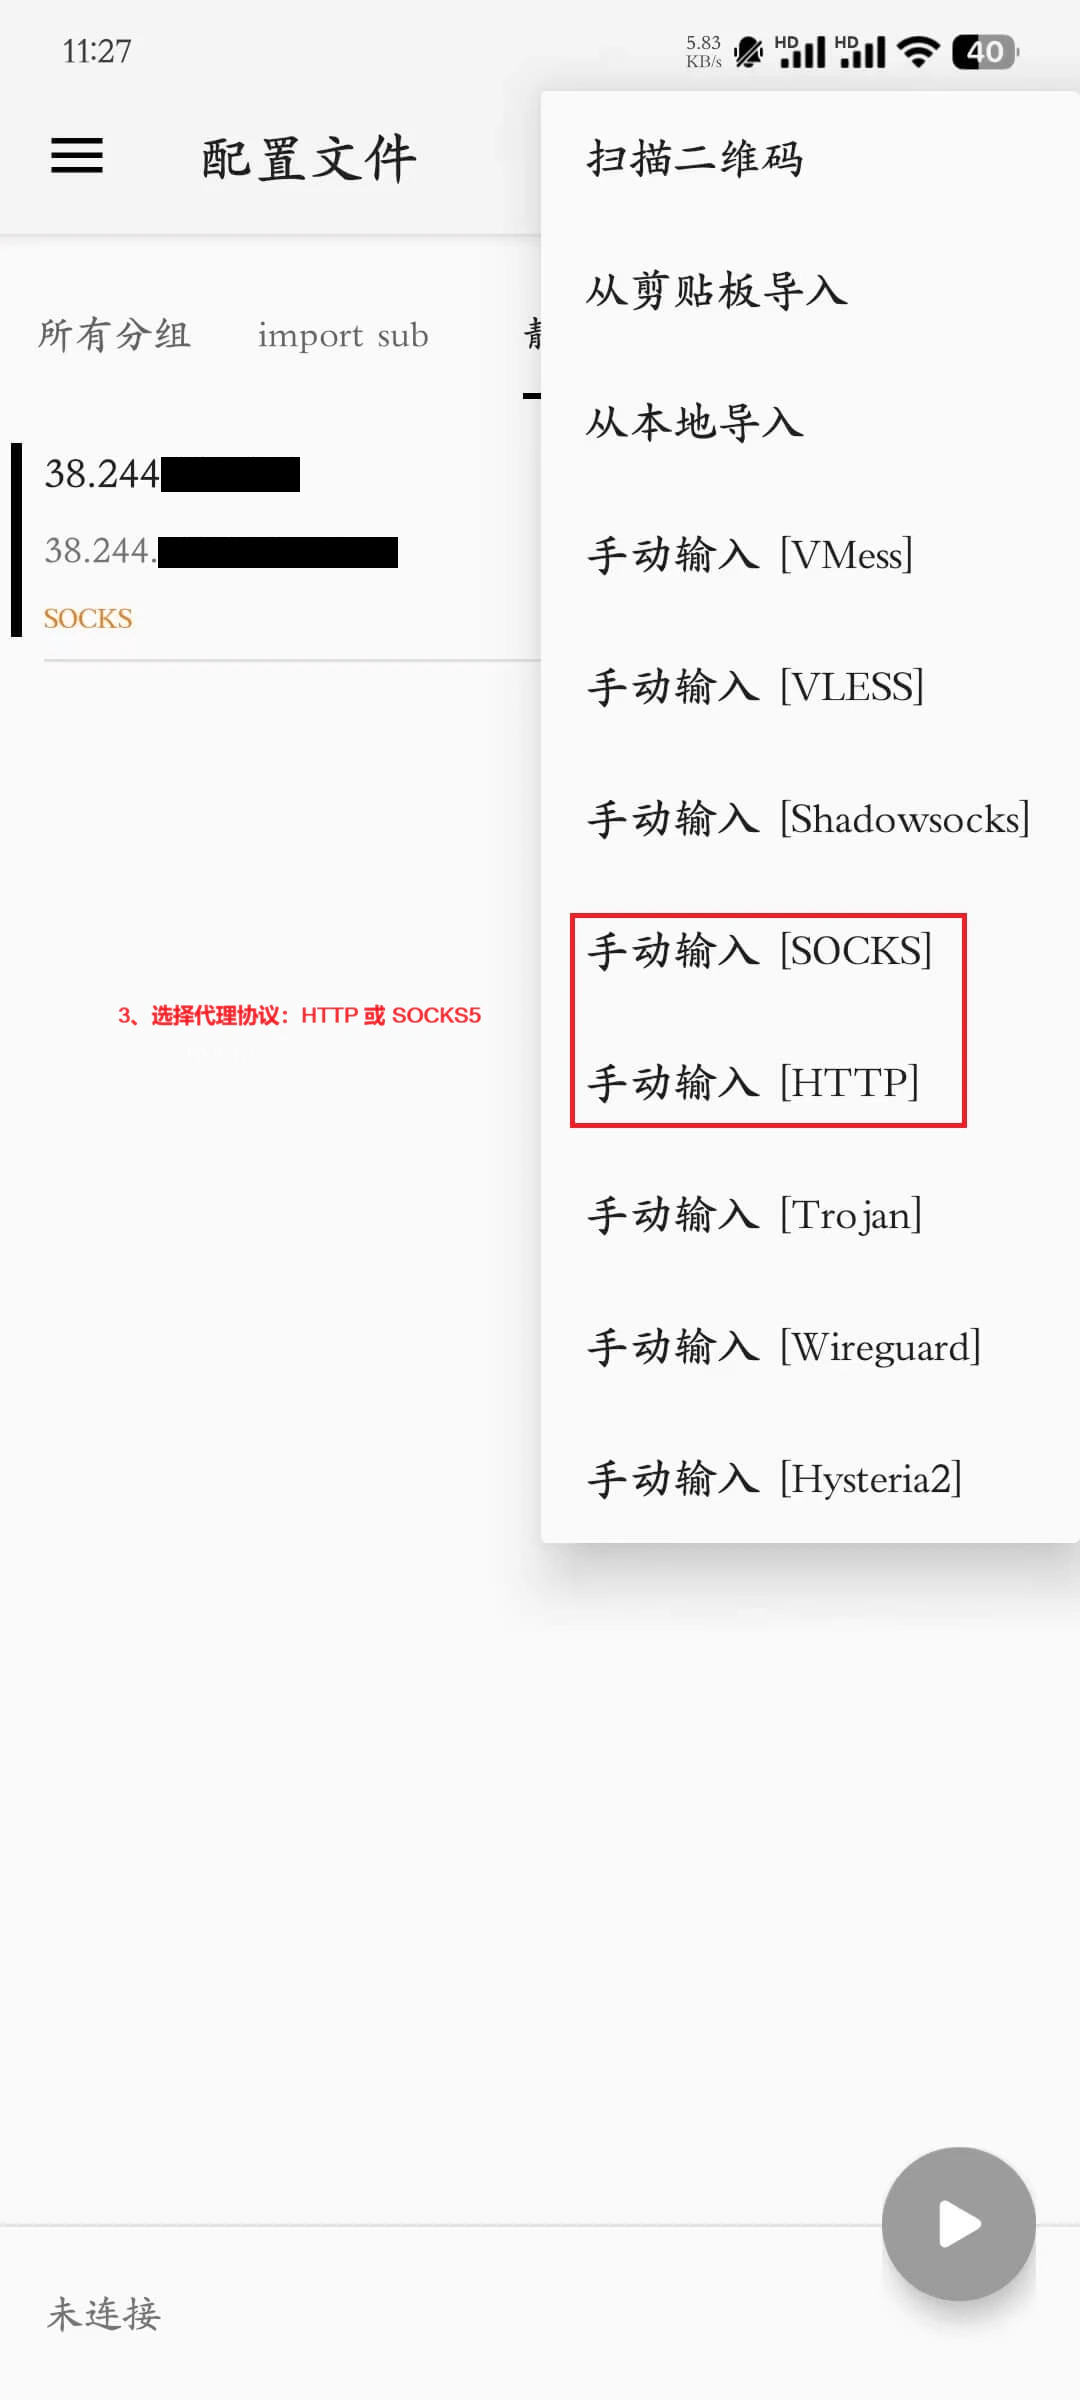
Step 5:Add Residential Nodes to the Group
- Select the group you just created.
- Tap the ”+” icon in the top-right corner to add a new configuration.
- Choose the proxy protocol: HTTP or SOCKS5.
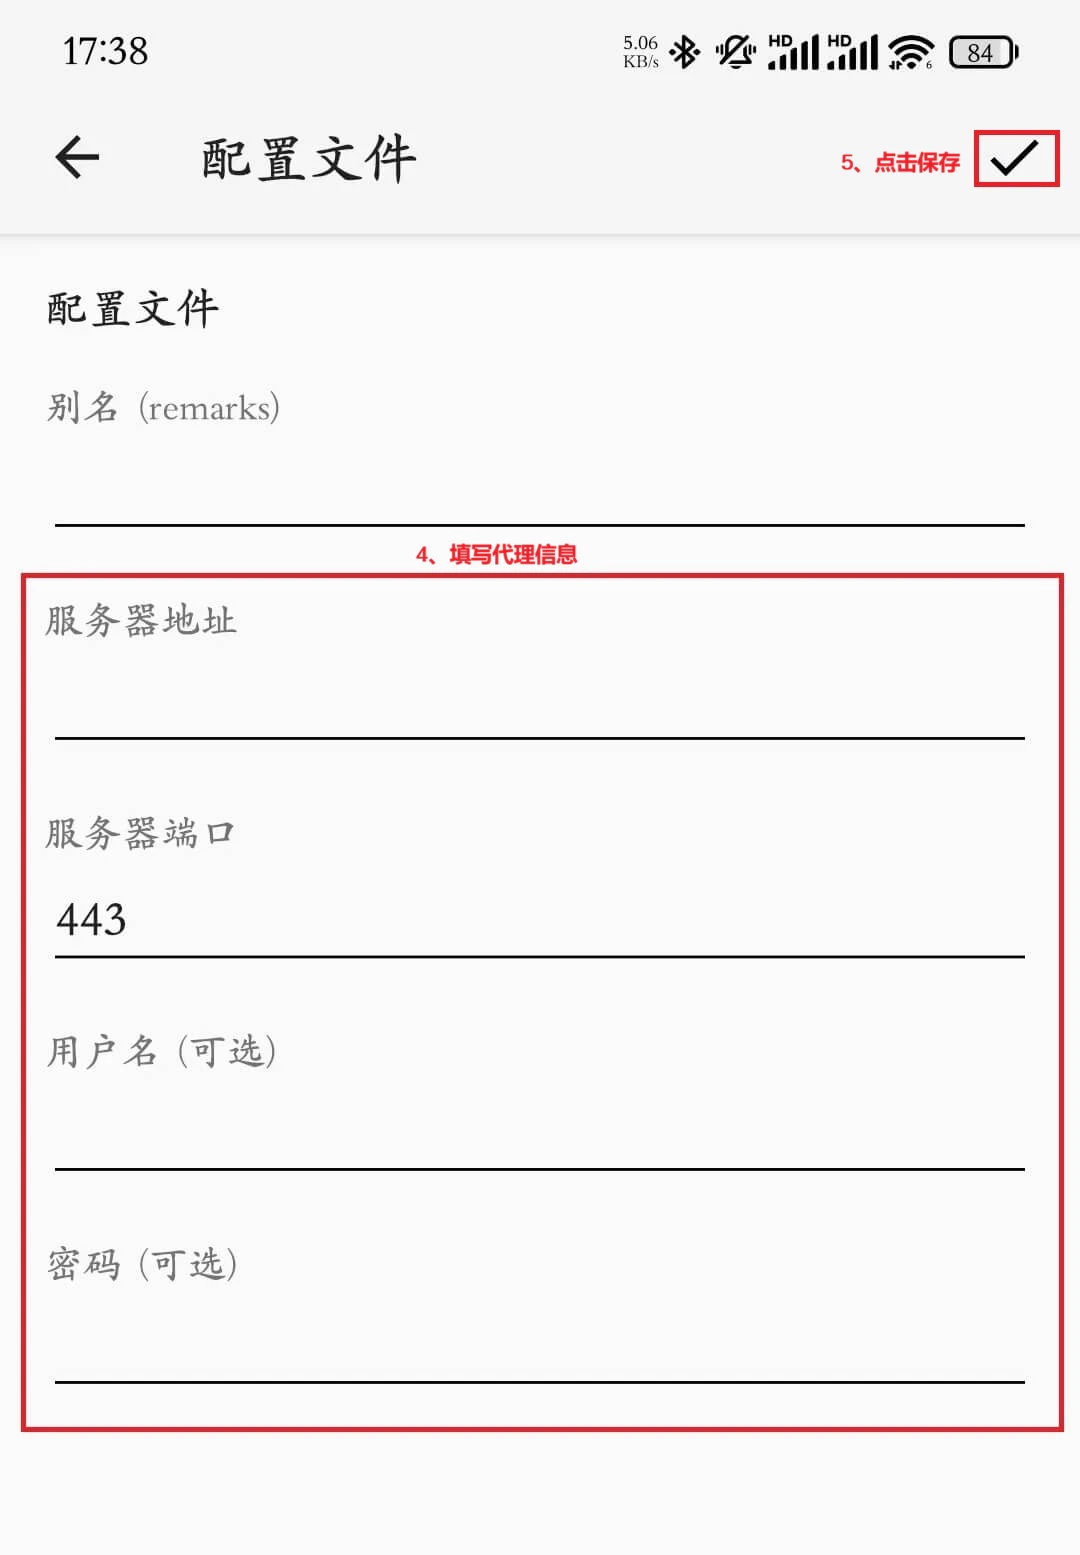
- Enter the proxy details obtained from Ip2up:
- Server Address
- Server Port
- Username
- Password
- Tap “OK” or “Save” in the top-right corner to save the configuration.

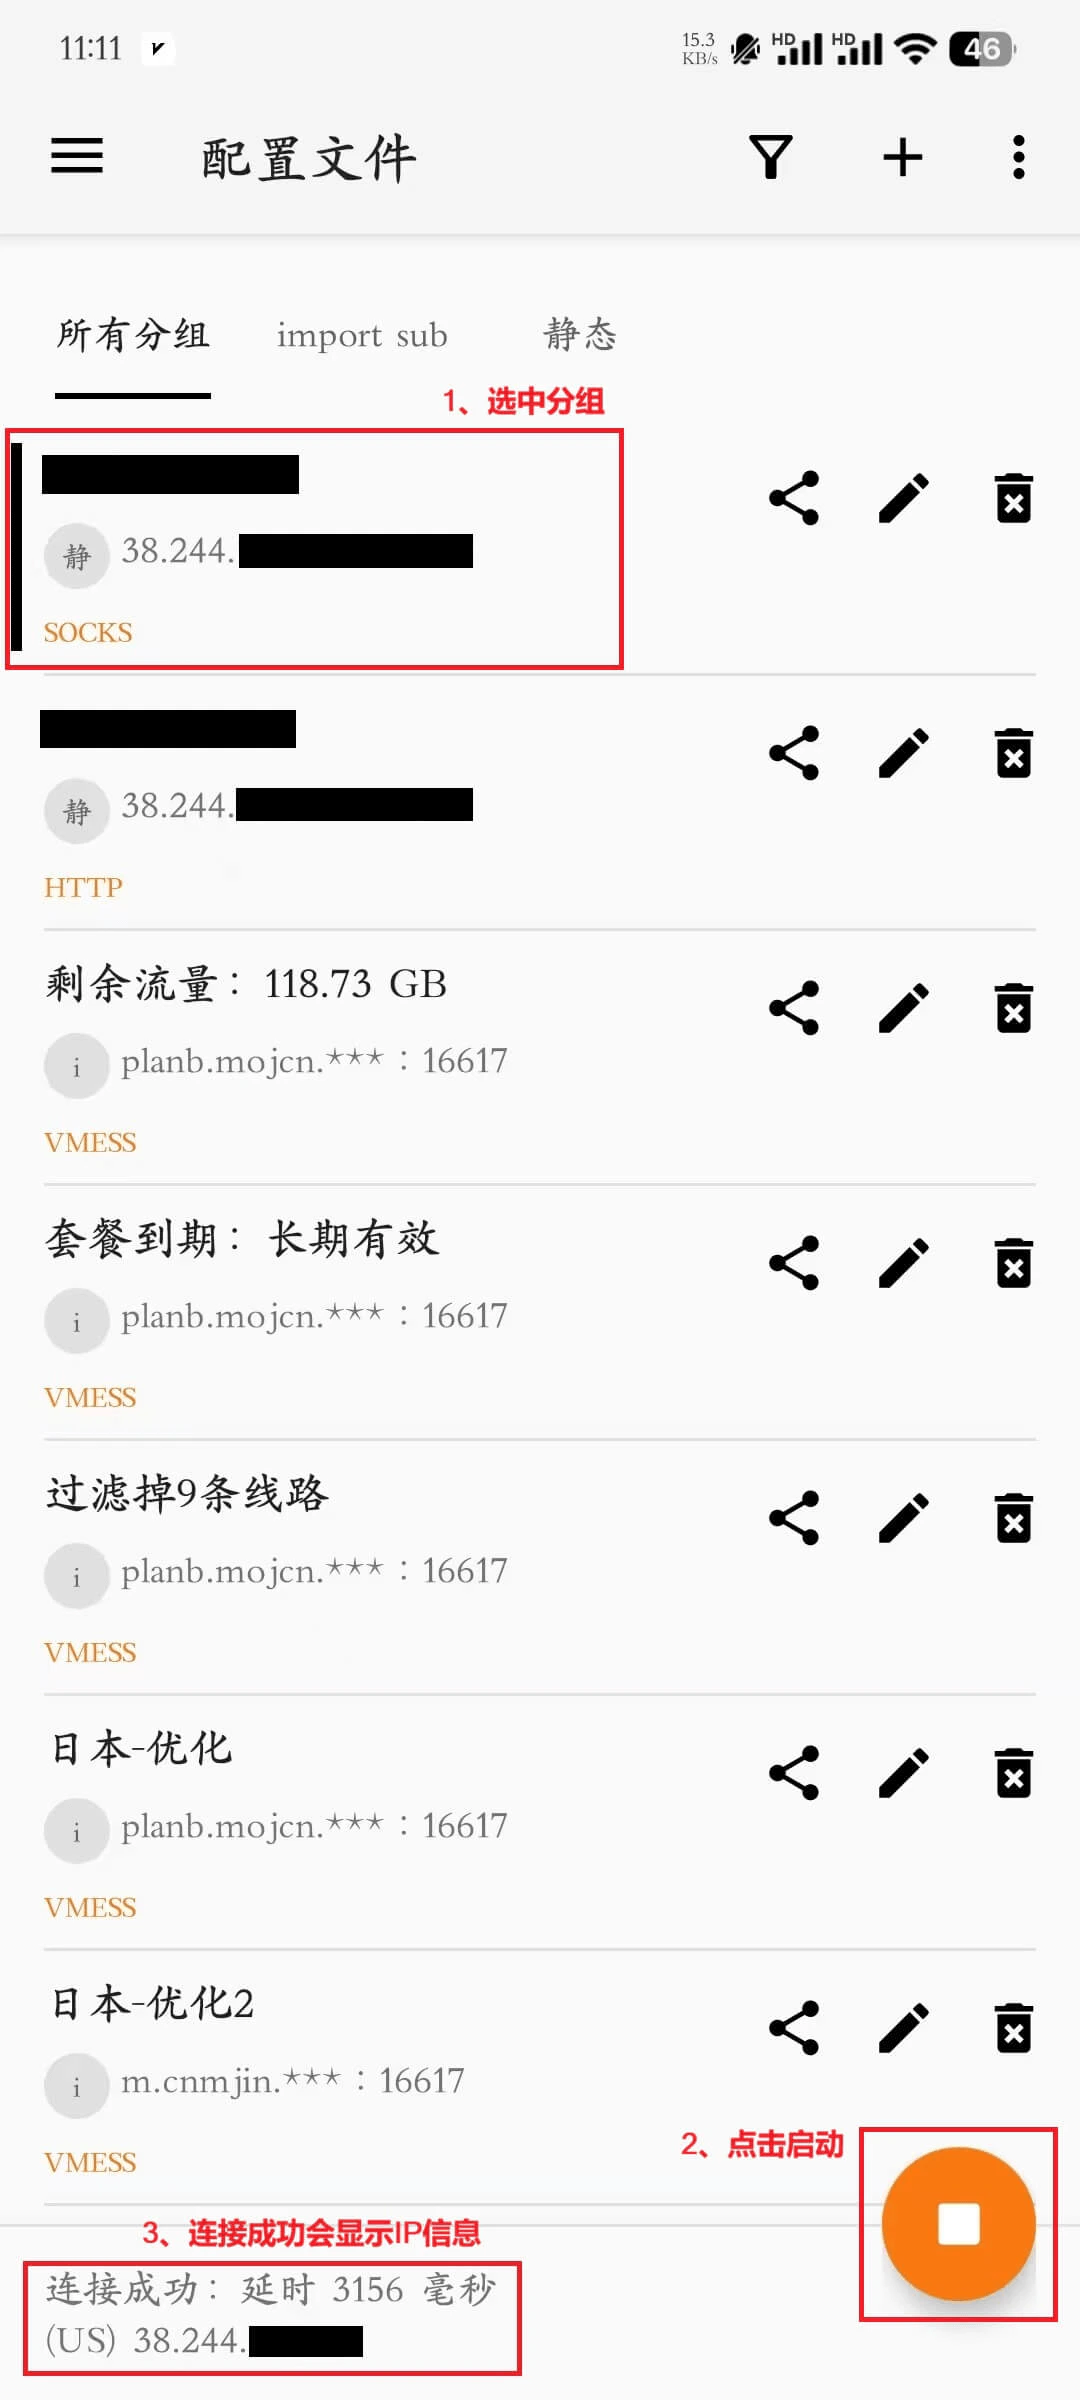
Step 6:Connect and Test the Proxy
- Return to the v2rayNG main interface.
- Find the configured group in the group list.
- Select the group (make sure it is selected).
- Tap the “Start” button at the bottom.
- The interface showing “Connected” means the proxy setup is complete.
Step 7:Verify the Proxy Connection
- After a successful connection, open your mobile browser.
- Visit an IP checking website (e.g., ipinfo.io).
- Confirm that the displayed IP address matches the proxy IP provided by Ip2up.
- If the proxy IP is shown, the configuration is successful.
Notes
- Make sure you have the correct Ip2up proxy credentials.
- The proxy service must be used in an overseas network environment.
- Test node latency before connecting and choose the best-performing node.
- Keep v2rayNG running in the background to maintain the proxy connection.