The usage method for Dynamic Residential IPs is the same as that for Static Residential IPs.
Step 1: Preparation
System & Software Requirements- Operating System: Windows (this tutorial uses Windows)
- Installed Software:
- Clash Verge (basic configuration completed)
- v2rayN (latest version)
- Server address
- Port
- Username
- Password
Step 2: v2rayN Configuration
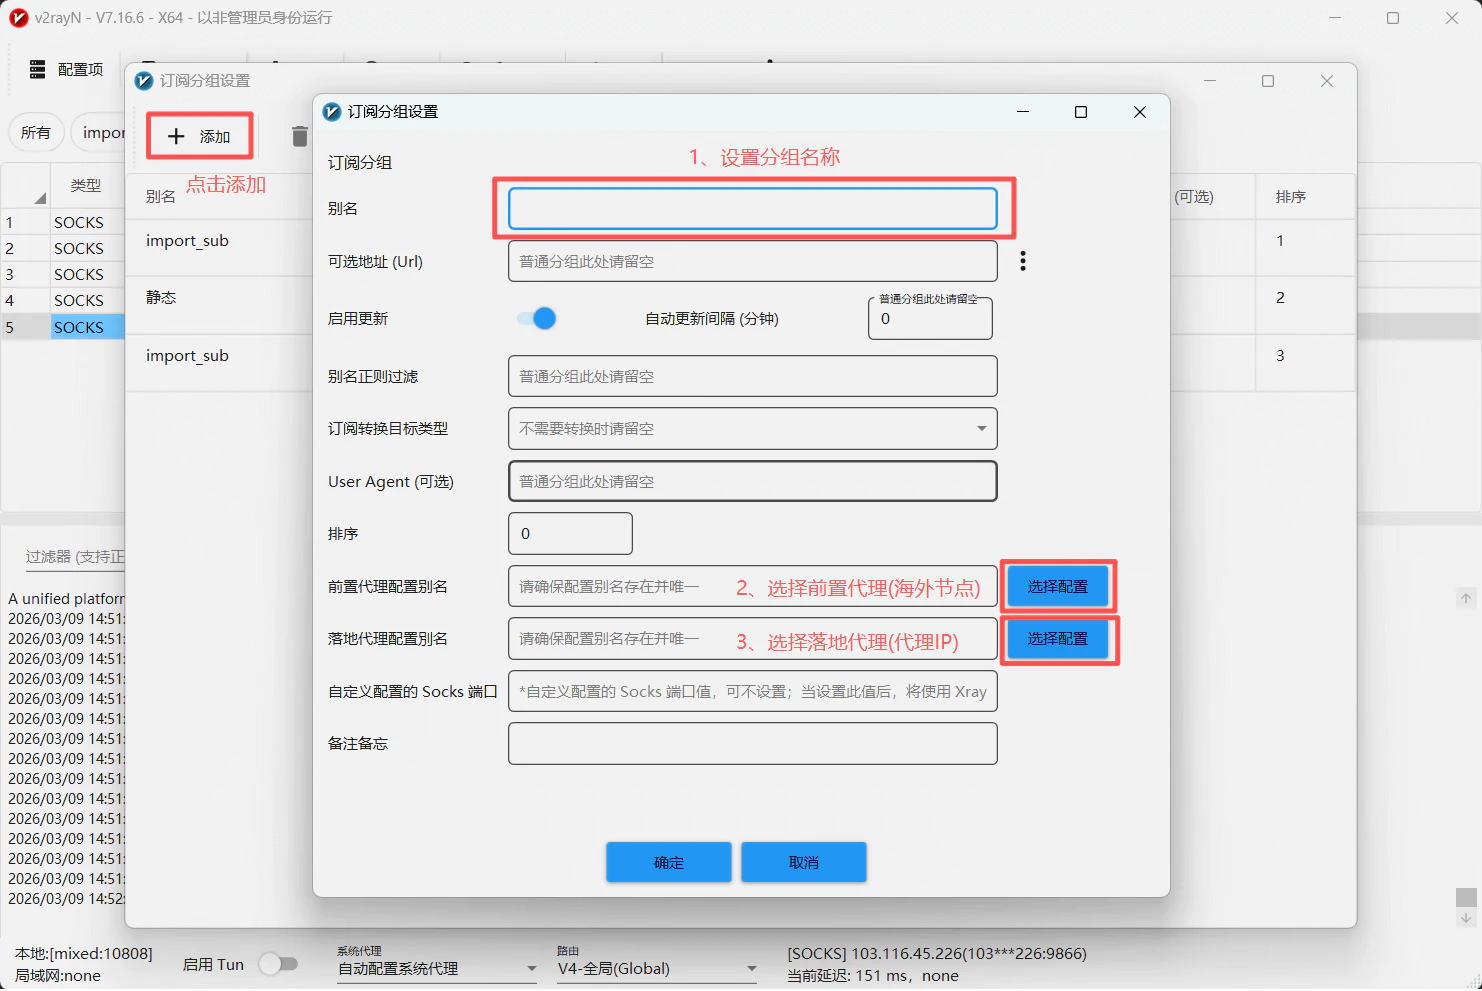
1. Add Subscription Group- Open the v2rayN application
- Go to the top menu and select Subscription Groups
- Click Add
- Fill in the group details:
- Group Name: Custom group identifier
- Upstream Proxy: Select an overseas node (for connecting to the overseas environment)
- Exit Proxy: Enter your Ip2up proxy details
- Select the newly created group
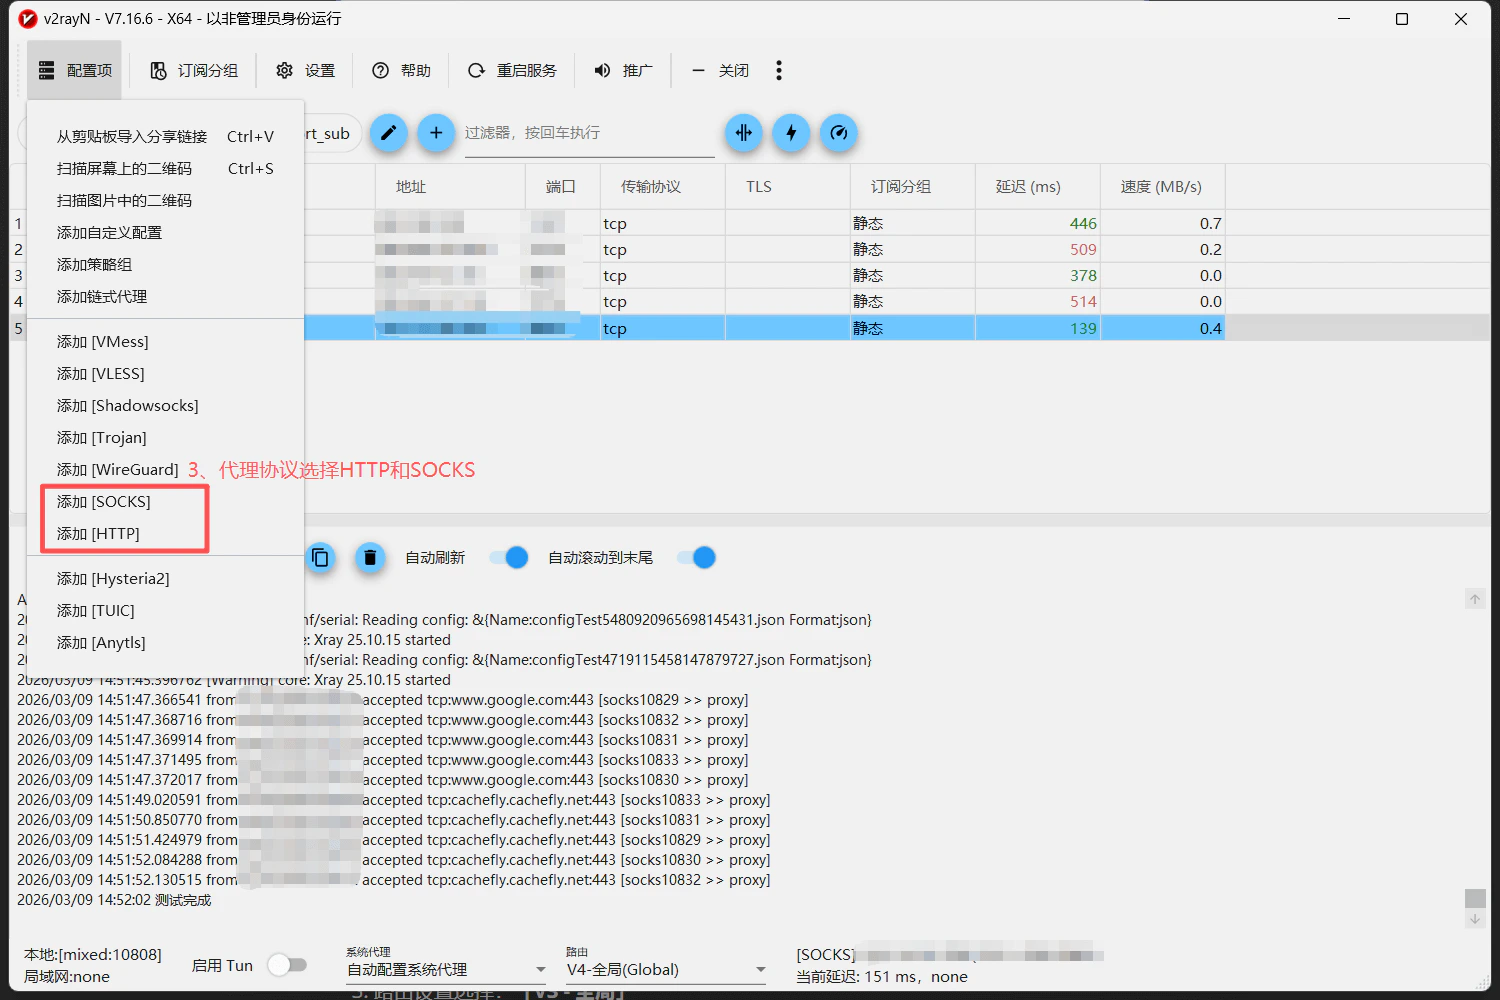
- Go to the top menu and select Profiles
- Choose the protocol: HTTP Proxy or SOCKS Proxy
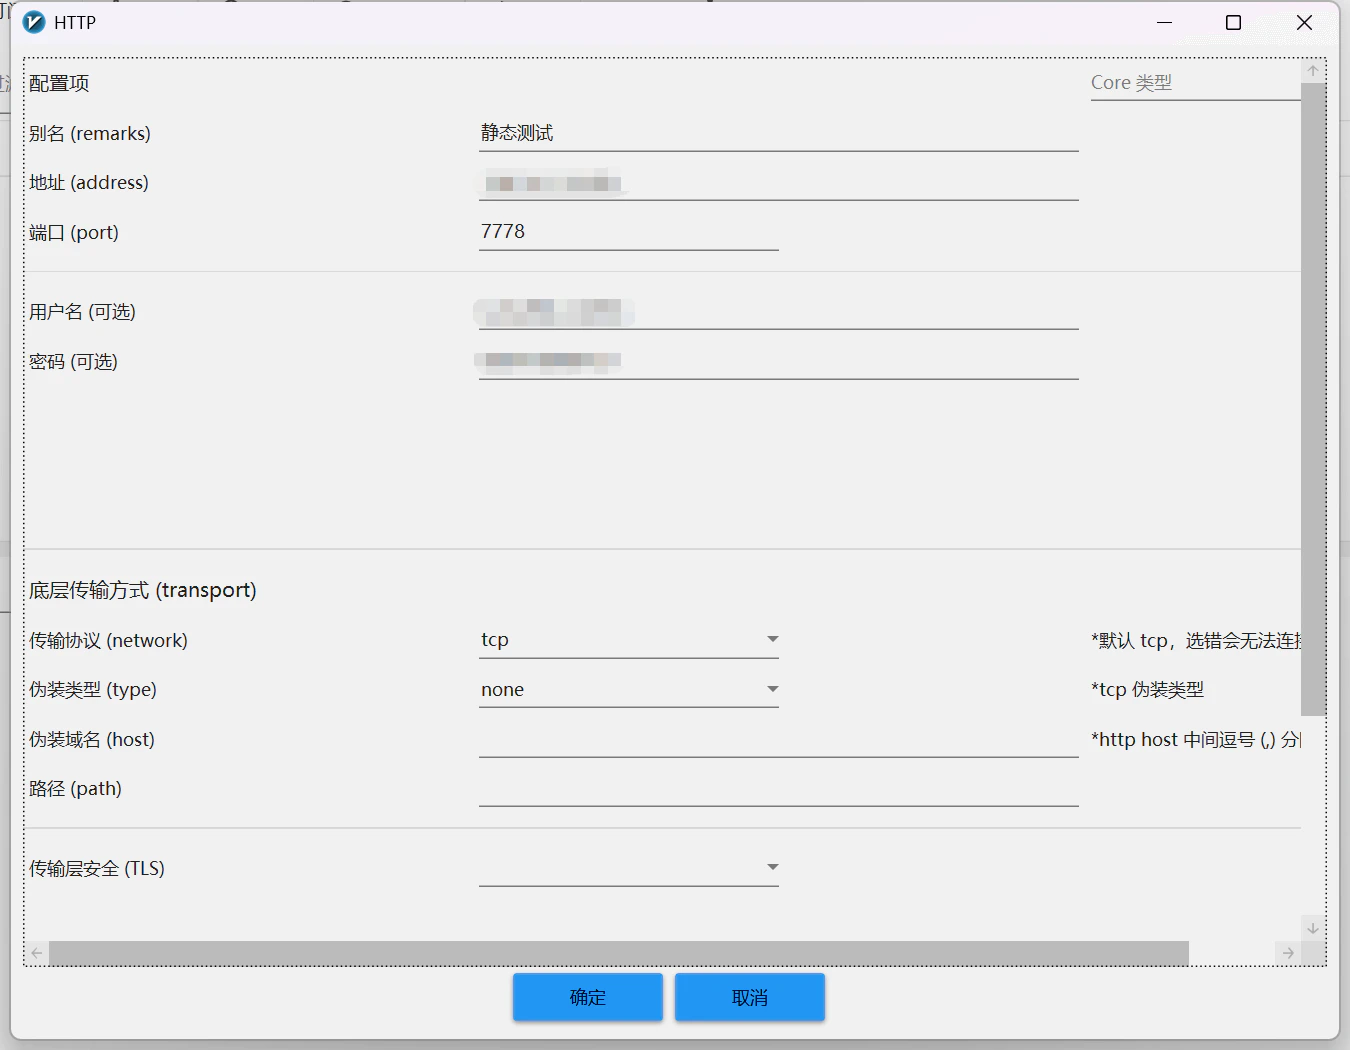
- Enter the proxy information from Ip2up:
- Address: Server address
- Port: Proxy service port
- Username: Proxy account
- Password: Proxy password
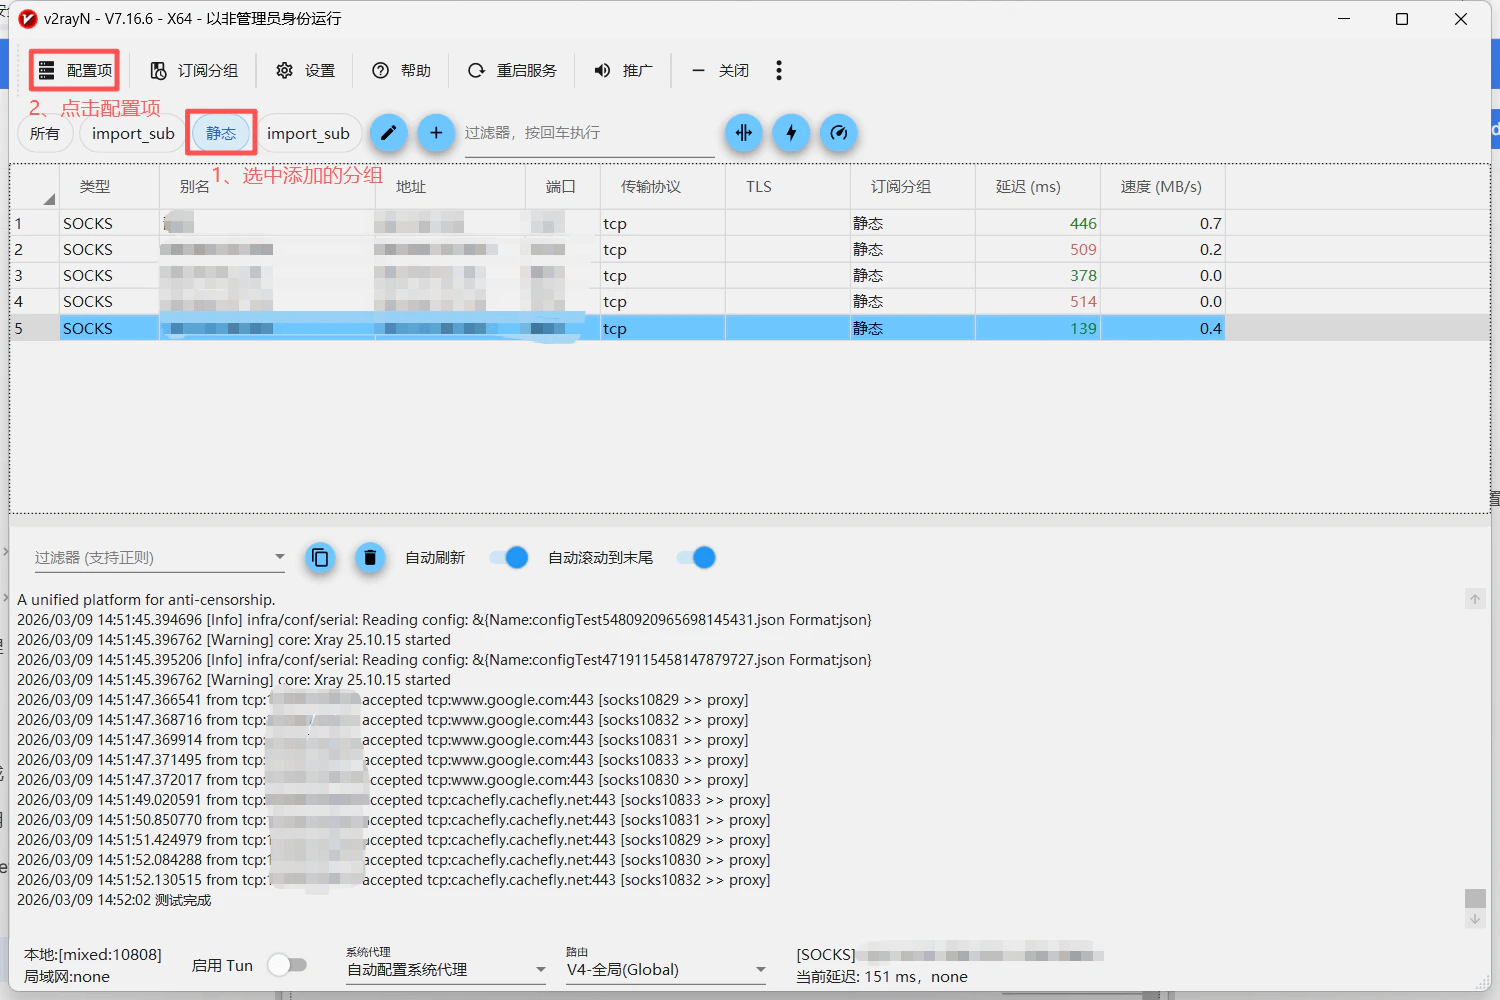
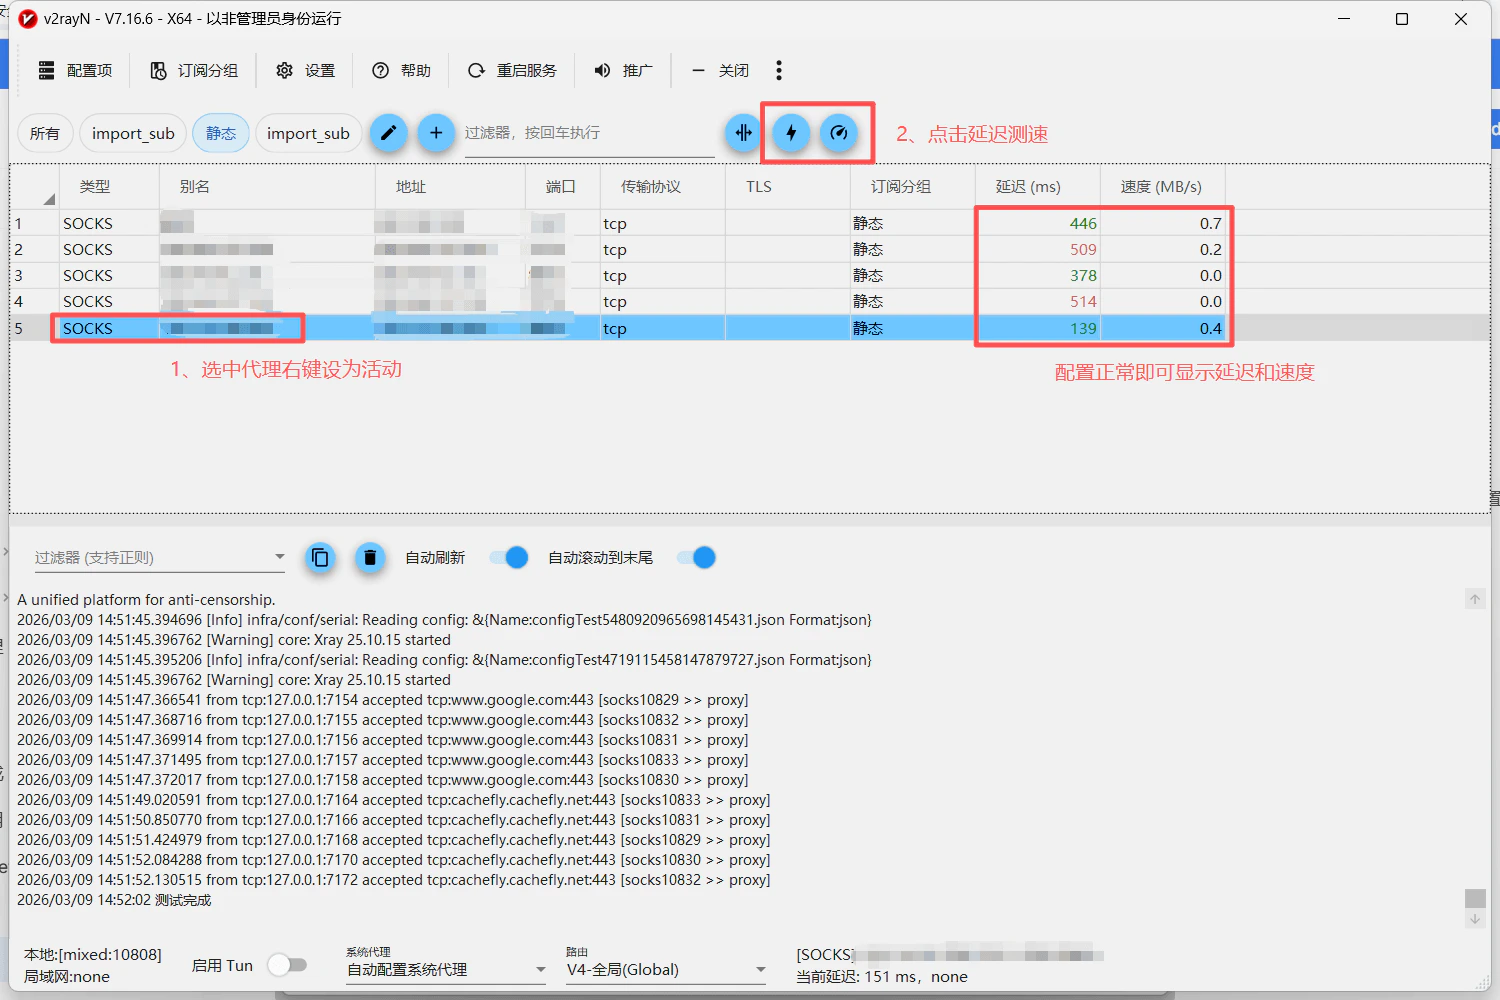
- Select the group and locate the configured proxy node
- Right‑click the node and select Set as Active Proxy
- Click Latency Test
- Normal latency and speed values indicate a successful configuration
- At the bottom of the v2rayN window, enable TUN Mode
- Set system proxy to Auto Configure System Proxy
- In routing settings, select: V4 – Global
- When enabled, the system uses v2rayN as the proxy client
- Traffic type: global traffic
- Start TUN Mode to handle traffic via the upper‑layer TUN interface
- In this setup, Clash Verge acts as the traffic handler
Step 3: Clash Verge Configuration
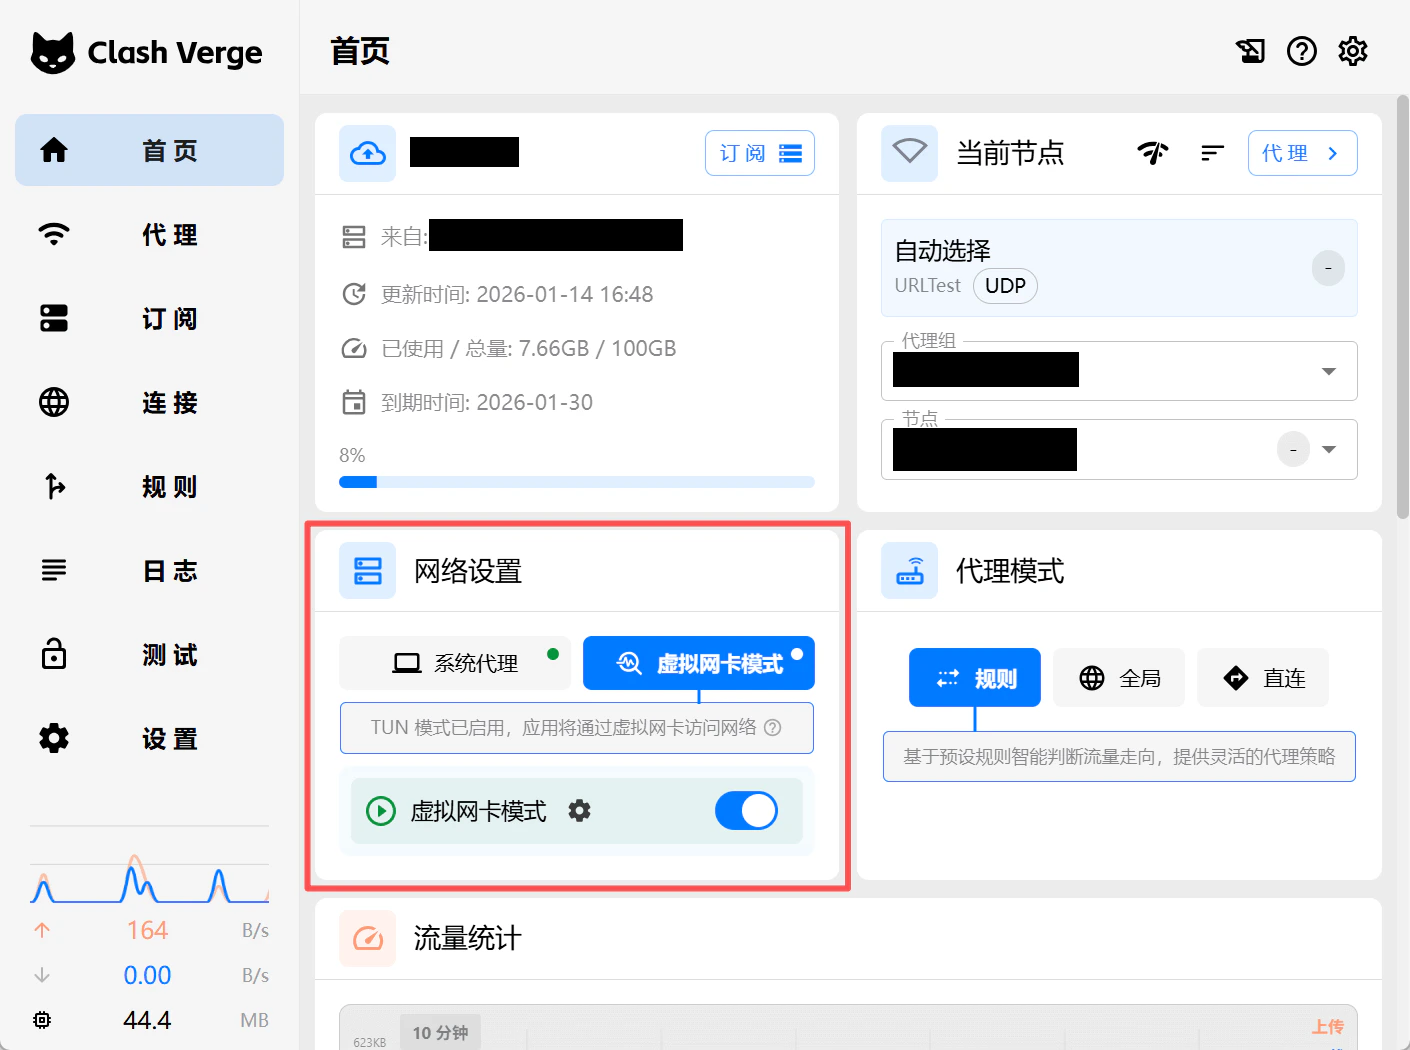
1. Enable TUN Mode- Open your installed Clash Verge client
- Go to Network Settings and turn on TUN Mode
Step 4: Configuration Validation
Checklist- v2rayN proxy information is correct
- v2rayN TUN Mode is enabled
- v2rayN system proxy is set to auto‑configure
- Clash Verge TUN Mode is enabled
- Clash Verge system proxy is disabled
- Clash Verge has selected an overseas egress node
Important Notes
- Usage Notice: Ip2up proxy IPs must be used in an overseas network environment. Please prepare the overseas environment in advance.
- Software Coordination: Ensure v2rayN and Clash Verge are configured correctly to avoid functional conflicts.
- Traffic Flow: System traffic path: App → v2rayN → Clash Verge → Overseas Node → Target Website
- Performance Impact: Chained proxies may slightly increase latency. It is recommended to choose low‑latency egress nodes.