The usage method for Dynamic Residential IPs is the same as that for Static Residential IPs.
Step 1. Add a Proxy Configuration
Open the Shadowrocket app and tap the + button in the upper-right corner to add a new configuration.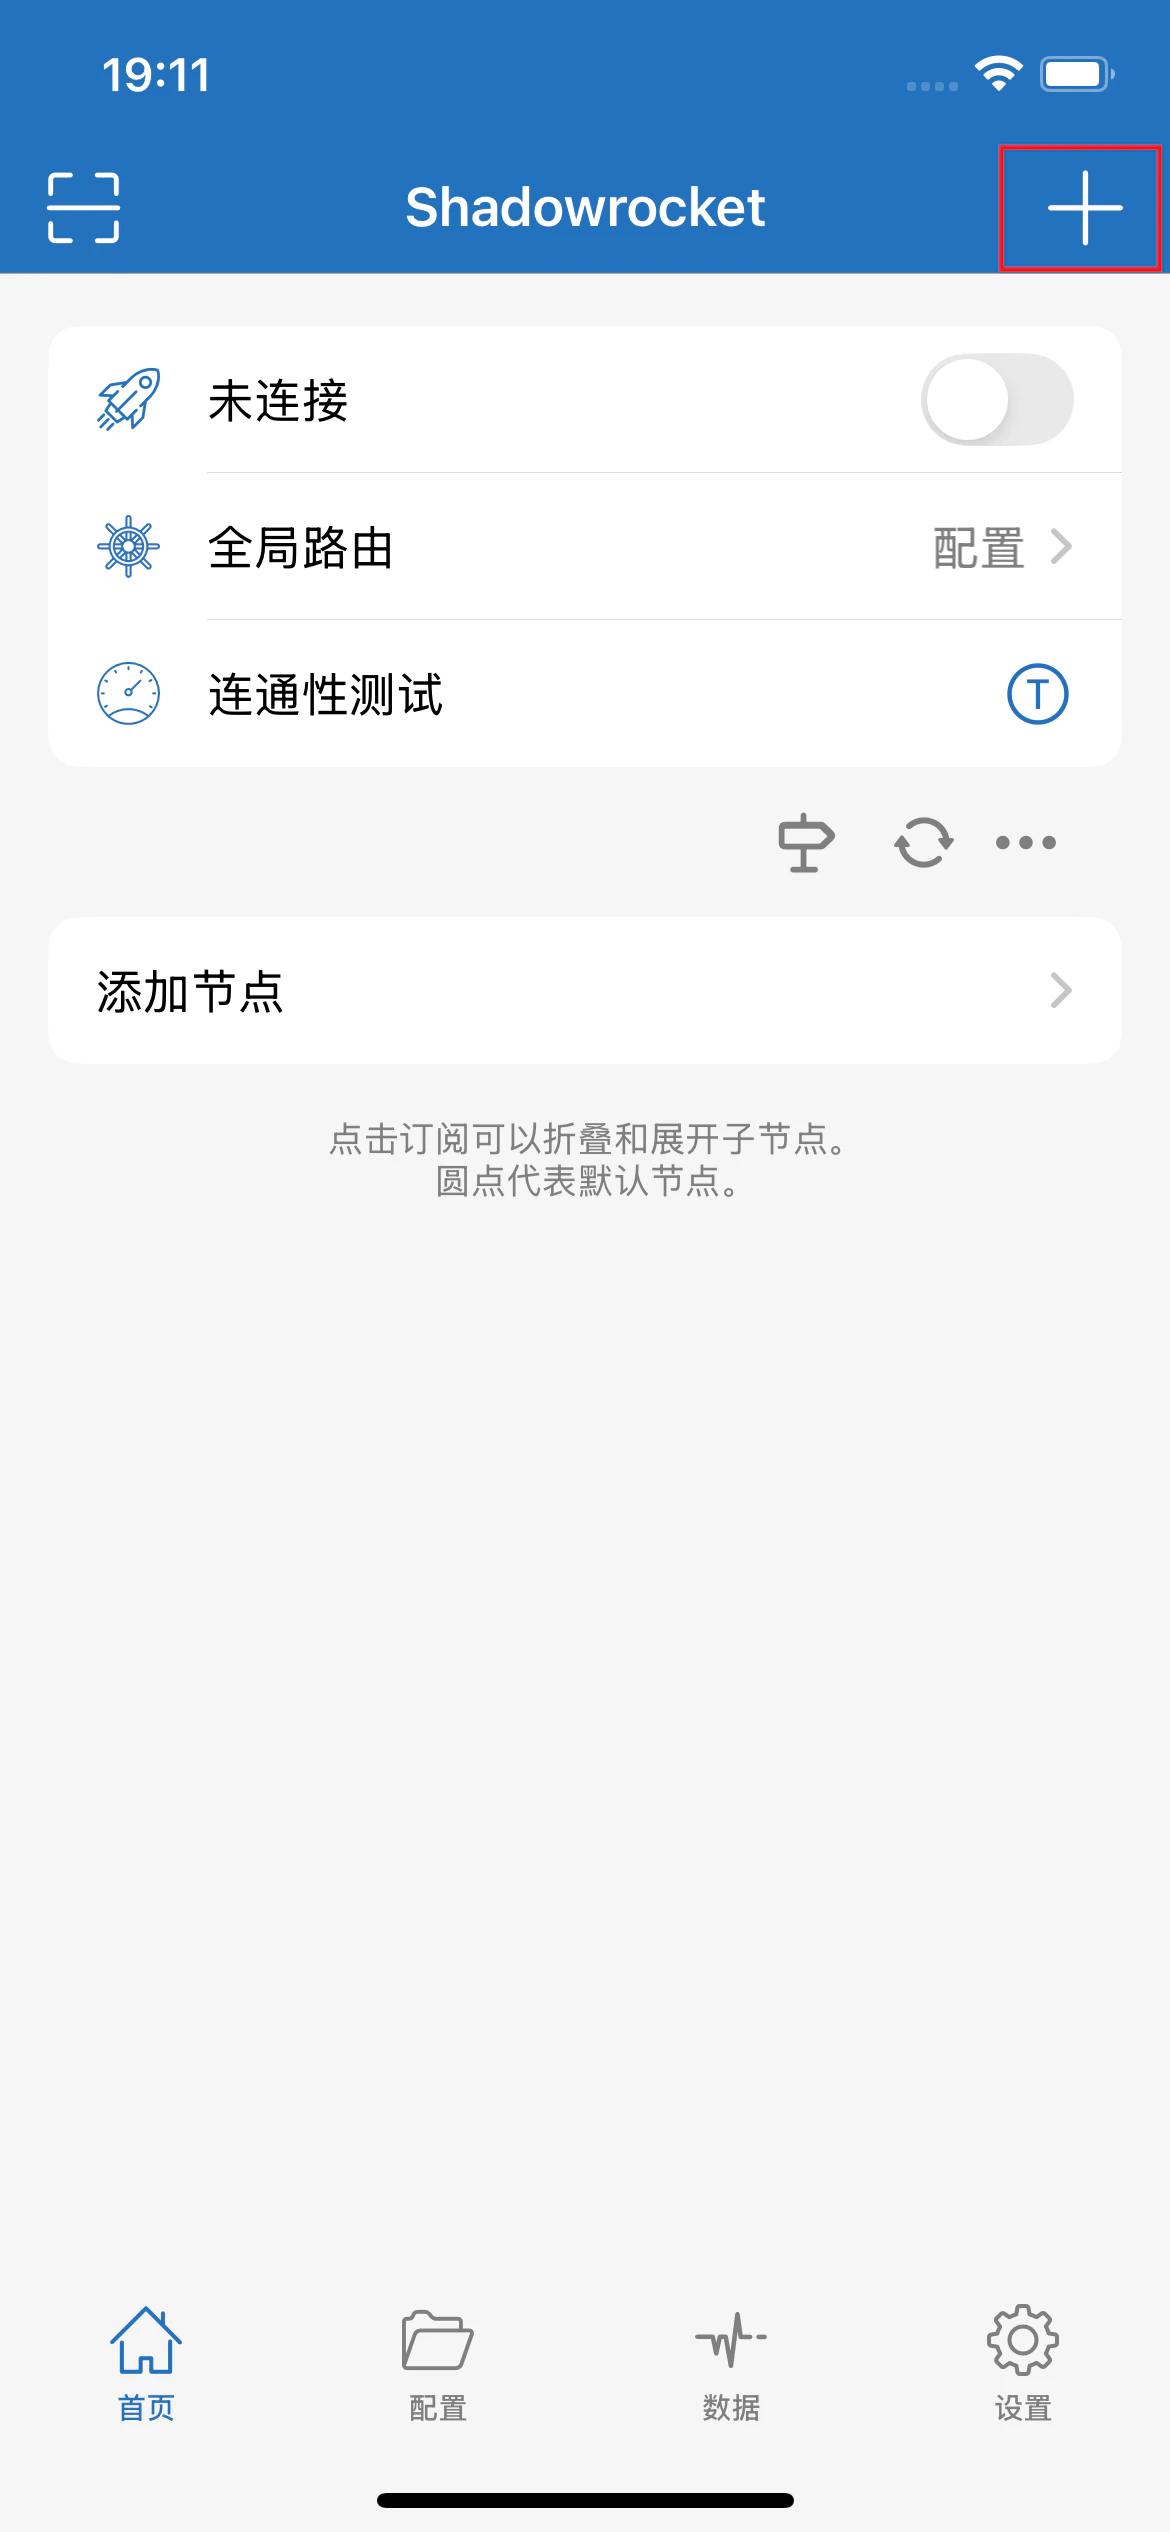
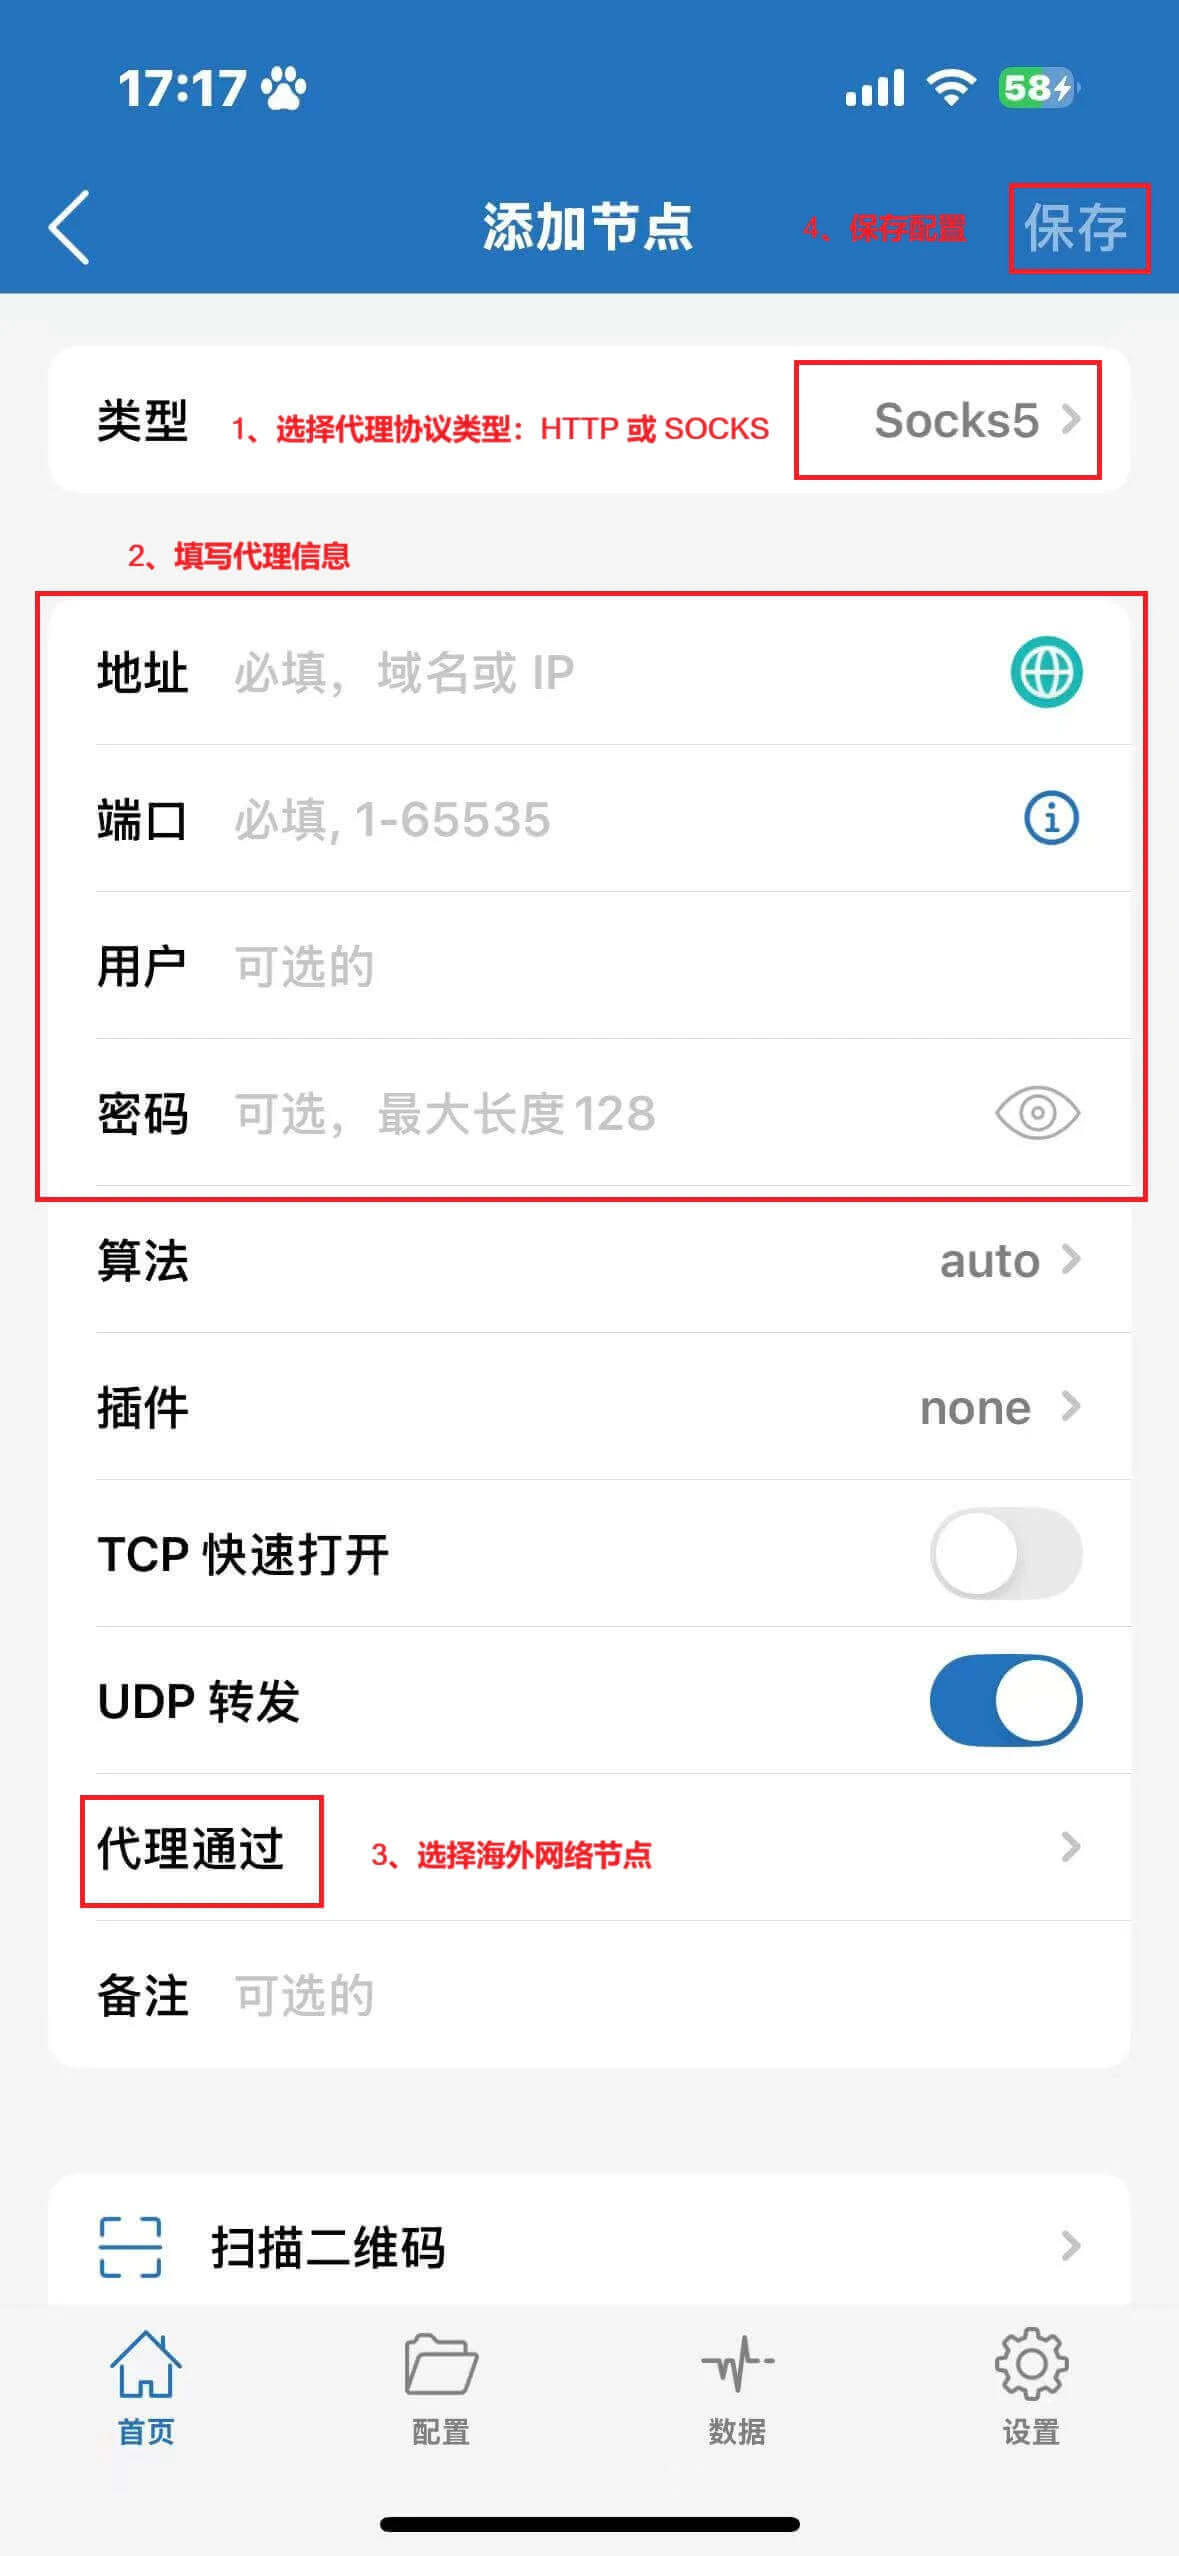
Step 2. Configure Proxy Information
- Select the proxy protocol type: HTTP or SOCKS
- Enter the proxy information obtained from Ip2up:
- Address (Server): Proxy server address
- Port: Proxy service port number
- Username: Proxy account
- Password: Proxy password
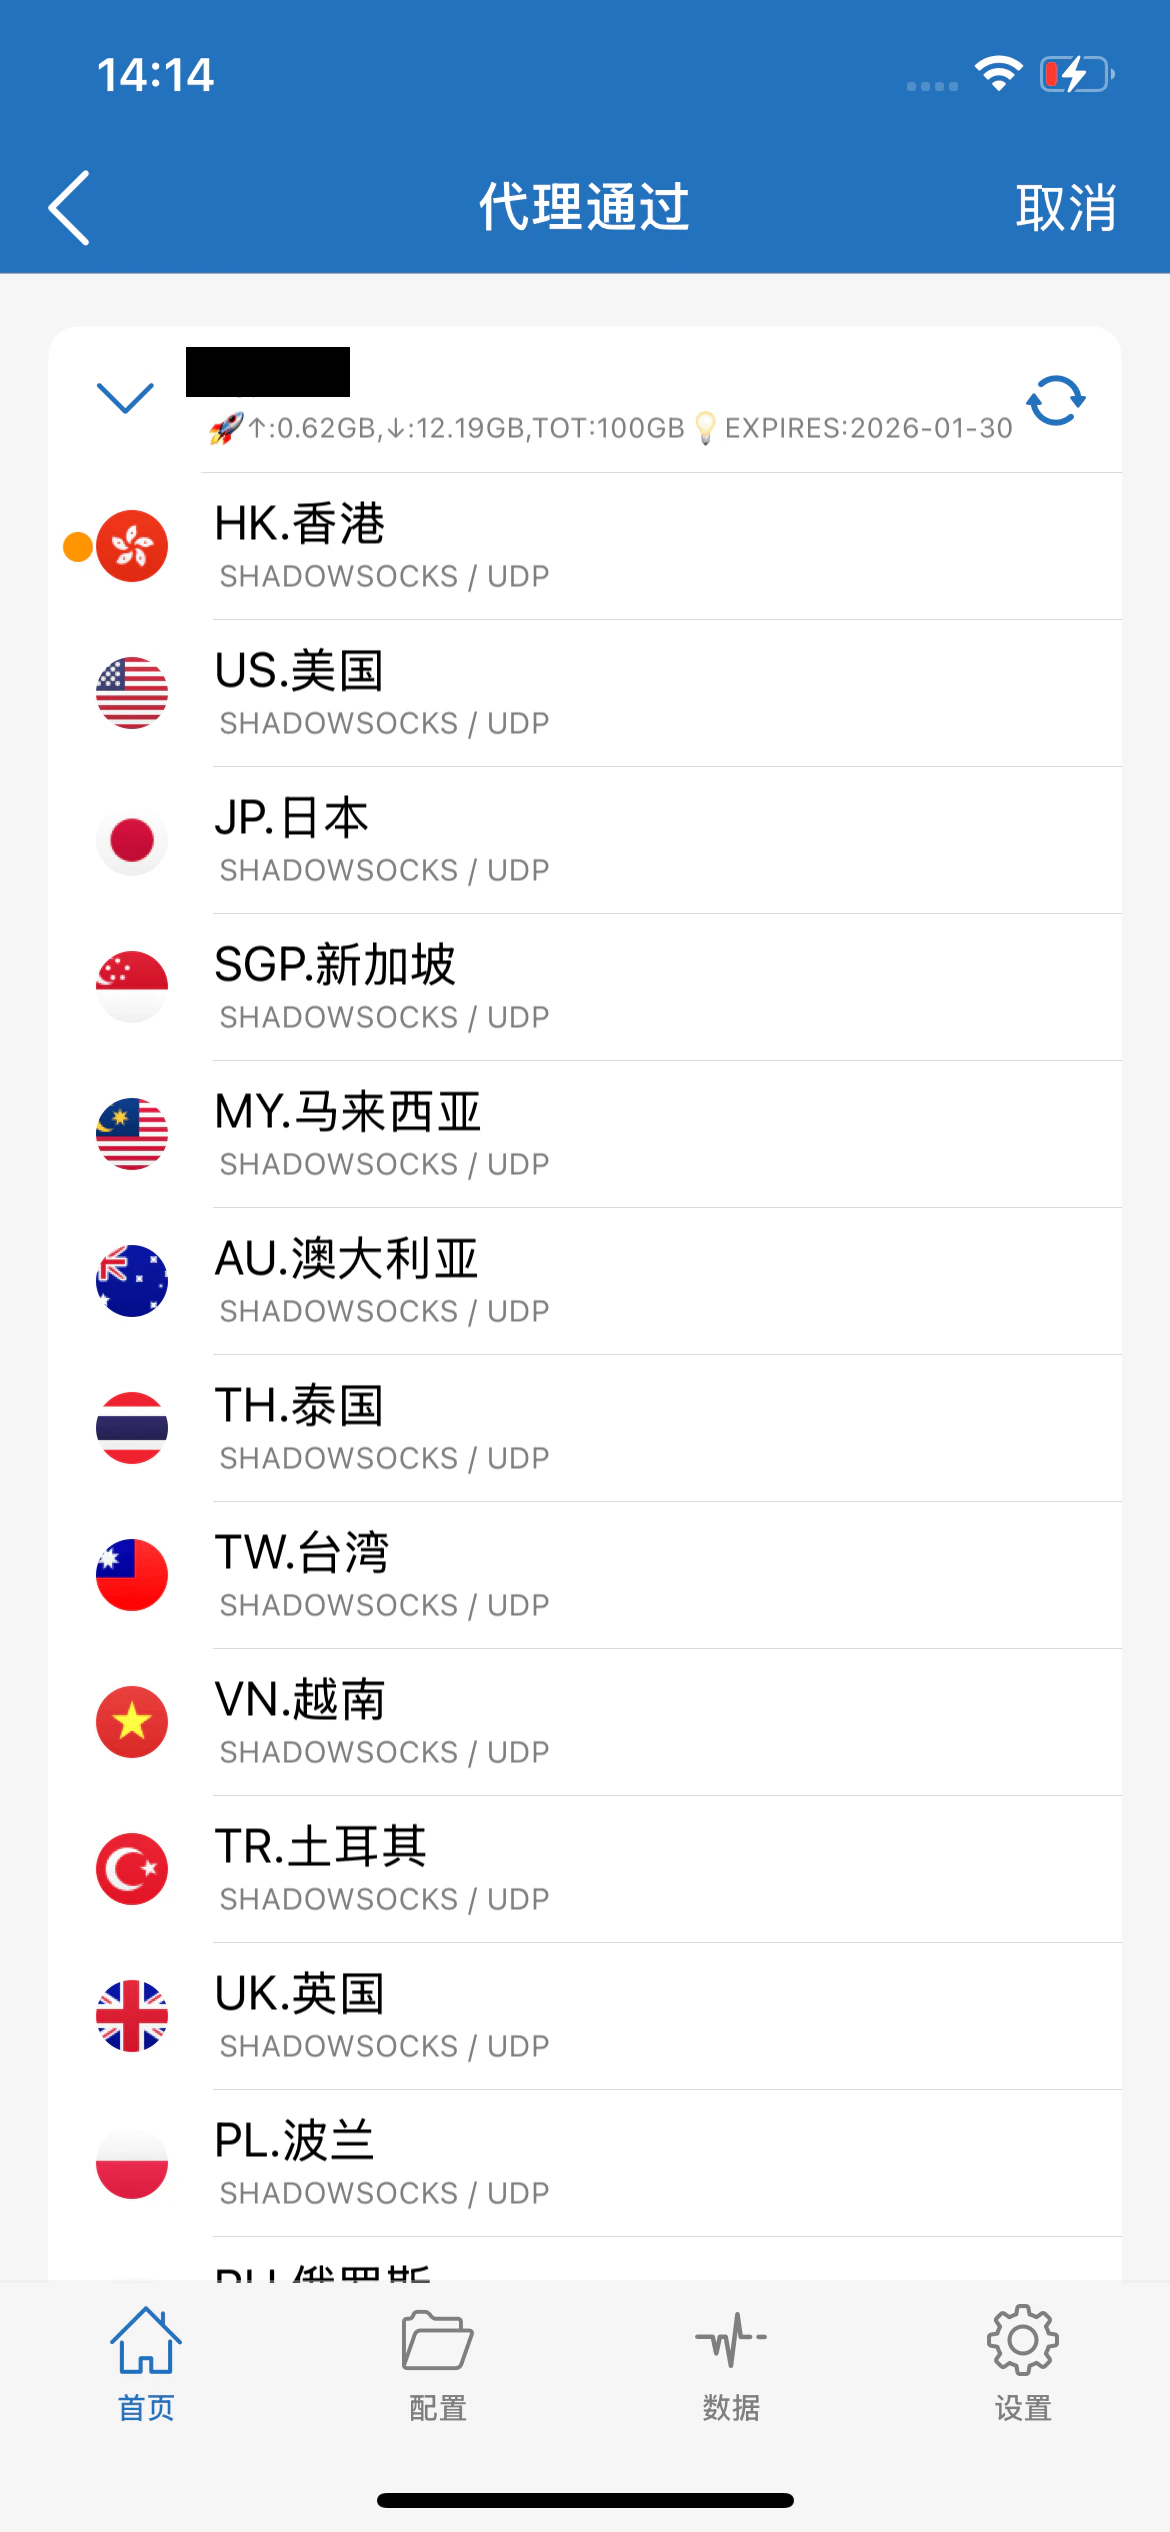
- Tap Proxy via and select an overseas network node
- Tap Done or Save in the upper-right corner to save the configuration
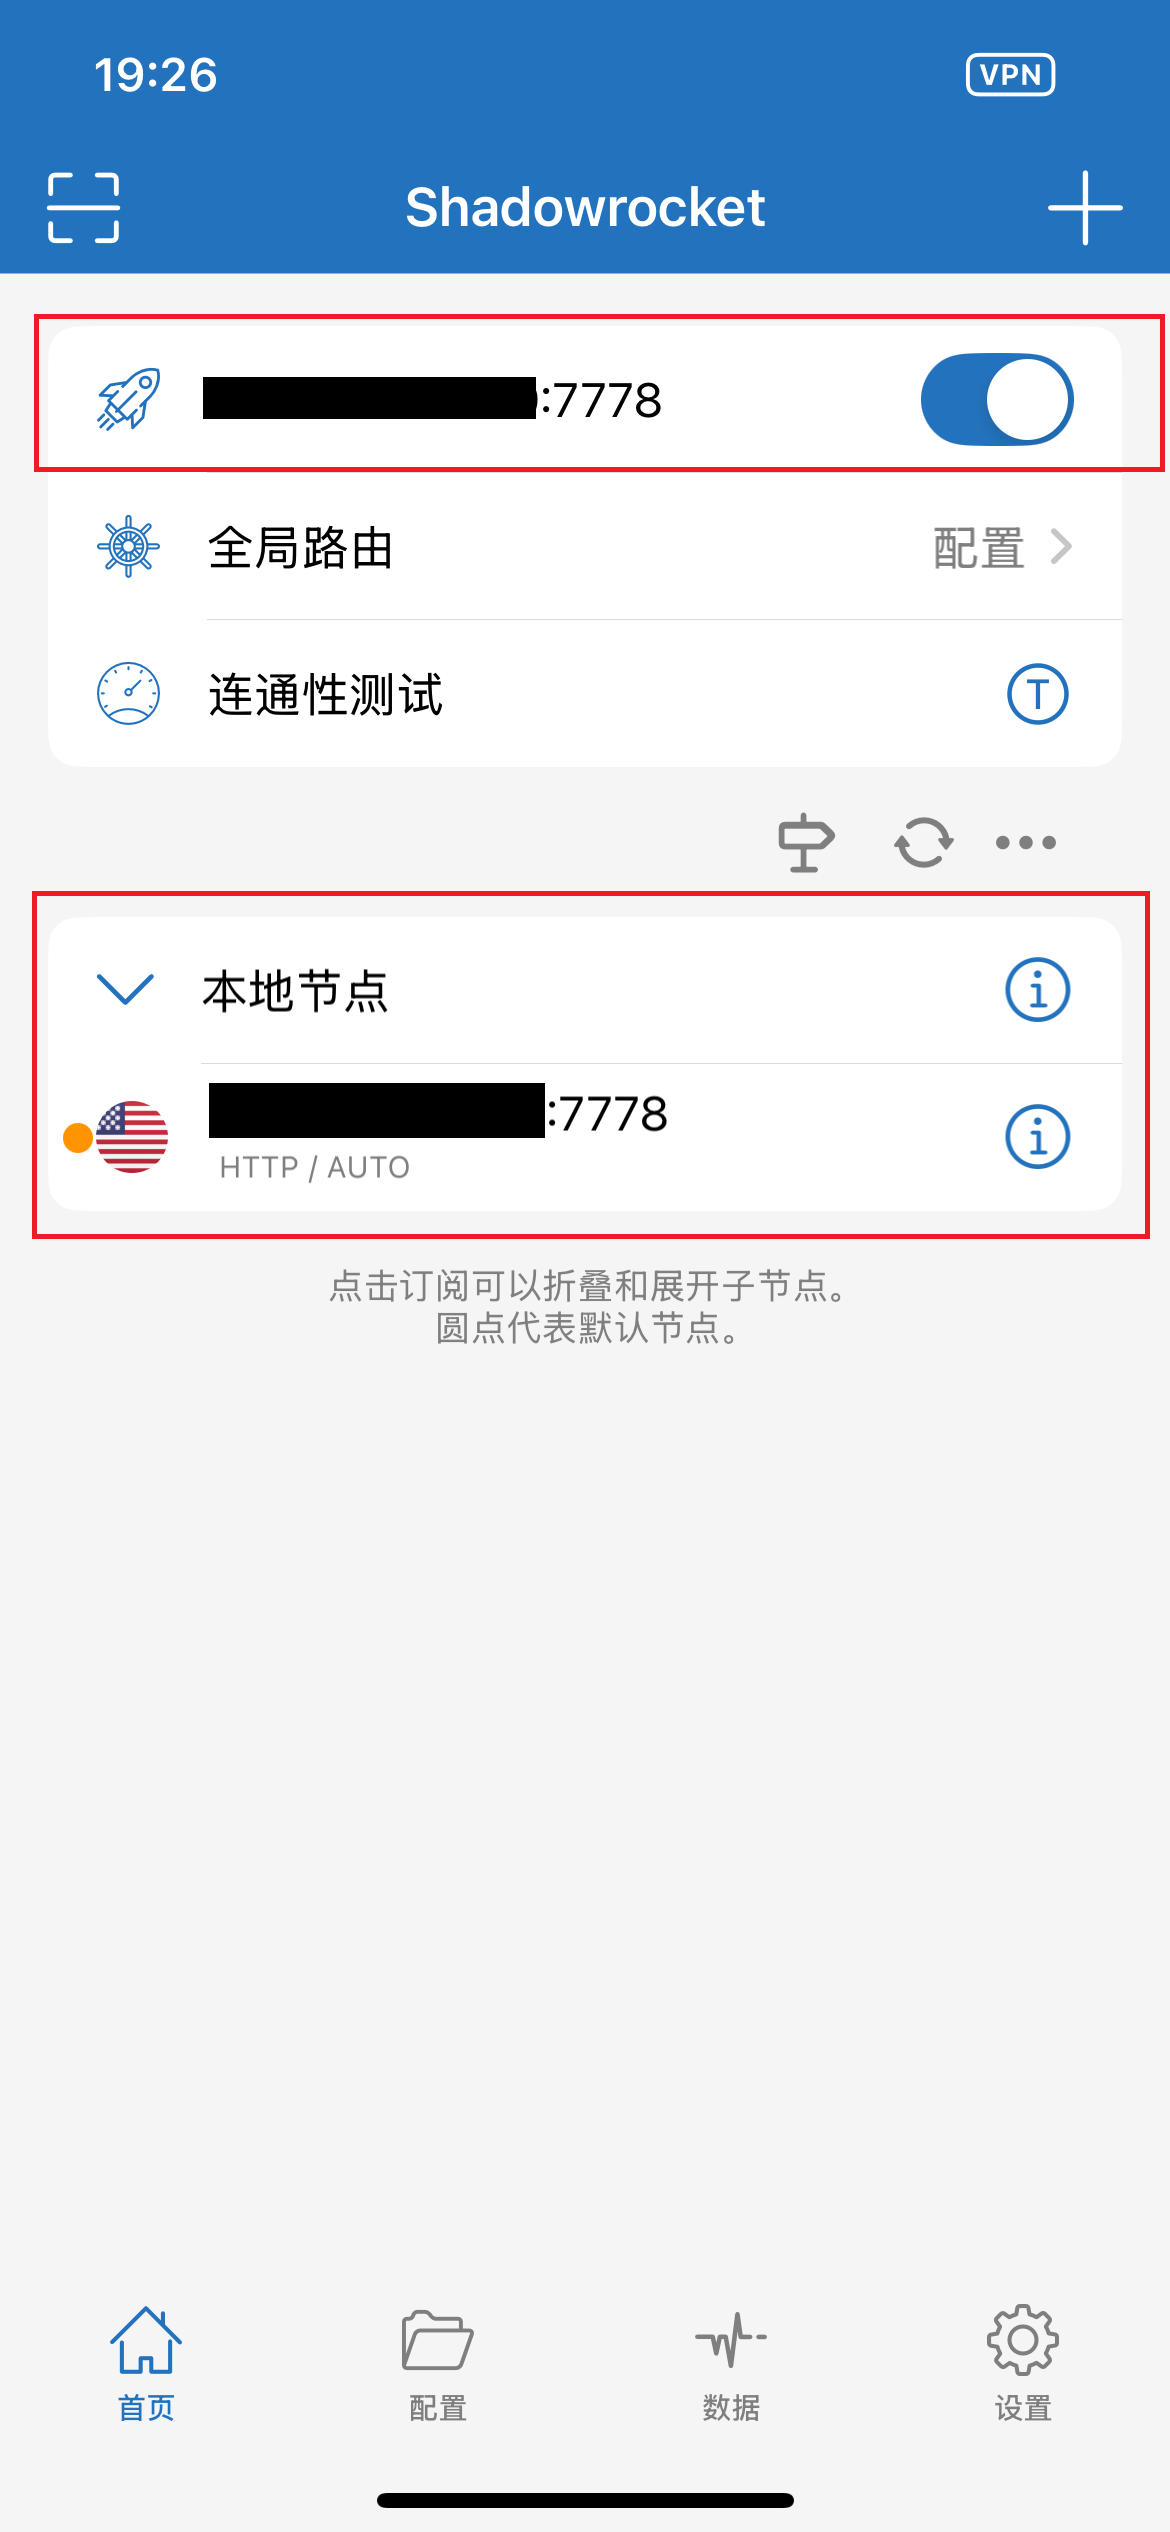
Step 3. Enable and Connect the Proxy
- Return to the Shadowrocket main interface (home page). The node list will display the proxy node you just added
- Set the global routing mode:
- Select Proxy mode
- Turn on the top switch to enable the proxy
- Permission prompt handling:
- When connecting for the first time, the system will display a VPN configuration dialog
- Tap Allow to grant permission; otherwise, the proxy function cannot be used
- Node management:
- If there are multiple nodes, tap a node to set it as the default
- Each connection will automatically use the default node
- To switch nodes, simply set another node as the default

Step 4. Verify the Proxy Connection
- Ensure that the top switch in Shadowrocket is turned on (displayed in green)
- Open Safari or another browser and visit ipinfo.io
- Confirm that the displayed IP address matches the residential proxy IP you configured
Important Notes
Connectivity Test Explanation:- Some IP addresses may display “Timeout” during connectivity tests
- This is a normal phenomenon of the Shadowrocket detection mechanism and does not affect actual usage
- The timeout prompt can be ignored; the proxy function remains fully operational
- Before switching nodes, first disconnect the current connection
- Then initiate the new node connection
- Avoid Shadowrocket cache data affecting connection stability